HTTP Modules serve very much the same role ISAPI filters served for classic ASP-as a place to insert functionality into the request processing. HTTP Modules plug into the ASP.NET processing chain to handle application-wide events in the same way that Global.asax handles application-wide events. In fact, many ASP.NET features are implemented through HTTP Modules.
Existing Modules
ASP.NET employs HTTP Modules to enable features such as output caching and session state. To get an idea of what features are implemented via HTTP Modules, take a look at the master configuration file for your machine (that is, go to the Windows directory, look in the Microsoft.NET directory, and drill down to the configuration directory for the most current release). The master Web.Config file mentions several modules in the httpModules section of the configuration, as shown in Listing 17-2. This list does not include entire strong names of the assemblies, but it gives you an idea as to what modules are already part of the ASP.NET pipeline.
Listing 17-2<httpModules> <add name="OutputCache" type="System.Web.Caching.OutputCacheModule" /> <add name="Session" type="System.Web.SessionState.SessionStateModule" /> <add name="WindowsAuthentication" type="System.Web.Security.WindowsAuthenticationModule" /> <add name="FormsAuthentication" type="System.Web.Security.FormsAuthenticationModule" /> <add name="PassportAuthentication" type="System.Web.Security.PassportAuthenticationModule" /> <add name="RoleManager" type="System.Web.Security.RoleManagerModule" /> <add name="UrlAuthorization" type="System.Web.Security.UrlAuthorizationModule" /> <add name="FileAuthorization" type="System.Web.Security.FileAuthorizationModule" /> <add name="AnonymousIdentification" type="System.Web.Security.AnonymousIdentificationModule" /> <add name="Profile" type="System.Web.Profile.ProfileModule" /> <add name="ErrorHandlerModule" type="System.Web.Mobile.ErrorHandlerModule " /> </httpModules>
The <httpModules> section mentions the name of a module, followed by a fully specified type that implements the feature. The following features are handled by modules:
-
Output Caching
-
Session State
-
Windows Authentication
-
Forms Authentication
-
Passport Authentication
-
Role Manager
-
URL Authorization
-
File Authorization
-
Anonymous Identification
-
Profile
Tutorial 2 ("ASP.NET Application Fundamentals") includes a short summary of the ASP.NET pipeline. The Modules fit into the processing chain and take effect prior to being processed by the HttpApplication object. While the features themselves may require extensive code to implement (for example, imagine all the work that went into the session state manager), the basic formula for hooking a module into your application is pretty straightforward. Creating a module involves four steps:
-
Writing a class implementing IHttpModule
-
Writing handlers for the events you want handled
-
Subscribing to the events
-
Mentioning the module in Web.Config
Implementing a Module
Here's an example illustrating how HTTP Modules work. The earlier example in this tutorial demonstrated how to time requests by handling events within Global.asax. The example showed time stamping the beginning of a request, storing the time stamp in the current HttpContext, and examining the time stamp as the request finished.
The following example performs the same functionality. However, the example uses an HTTP Module to handle the events.
A Timing Module
-
To implement a timing module, open the Web site solution file for this tutorial-Use-Application. To work, the module needs to exist in an assembly. It's easiest to write a completely separate assembly for the module. Add a project to the solution by selecting File | Add | New Project from the main menu. Make the project a Class Library and name the project TimingModule.
-
Visual Studio will add a class to the library named Class1. (The name of the file generated by Visual Studio is Class1.cs and the name of the class generated by Visual Studio is Class1). Change the name of the file to Timer.cs and the name of the class to Timer.
-
The module as generated by Visual Studio doesn't understand the ASP.NET types. Add a reference to System.Web to make the ASP.NET types available.
-
Add handlers for the beginning and ending of the request. You may borrow the code from Global.asax if you want to. The signatures for the event's handlers are such that the methods need to return void and accept two arguments: an object and EventArgs.
using System; using System.Data; using System.Configuration; using System.Web; /// <summary> /// Summary description for Timer /// </summary> public class Timer { public Timer() { } public void OnBeginRequest(object o, EventArgs ea) { HttpApplication httpApp = (HttpApplication)o; DateTime dateTimeBeginRequest = DateTime.Now; HttpContext ctx; ctx = HttpContext.Current; ctx.Items["dateTimeBeginRequest"] = dateTimeBeginRequest; } public void OnEndRequest(object o, EventArgs ea) { HttpApplication httpApp = (HttpApplication)o; DateTime dateTimeEndRequest = DateTime.Now; HttpContext ctx; ctx = HttpContext.Current; DateTime dateTimeBeginRequest = (DateTime)ctx.Items["dateTimeBeginRequest"]; TimeSpan duration = dateTimeEndRequest - dateTimeBeginRequest; ctx.Response.Write("<b> This request took " + duration.ToString() + "</b></br>"); } } -
Add IHttpModule to the class's inheritance list. Add implementations for the methods Init and Dispose. The job performed by Init is to subscribe to events. The job performed by Dispose is to release any resources used by the module (Dispose doesn't need to do anything in this example).
using System; using System.Data; using System.Configuration; using System.Web; /// <summary> /// Summary description for Timer /// </summary> public class Timer : IHttpModule { public Timer() { } public void Init(HttpApplication httpApp) { httpApp.BeginRequest += new EventHandler(this.OnBeginRequest); httpApp.EndRequest += new EventHandler(this.OnEndRequest); } public void Dispose() { } // … } -
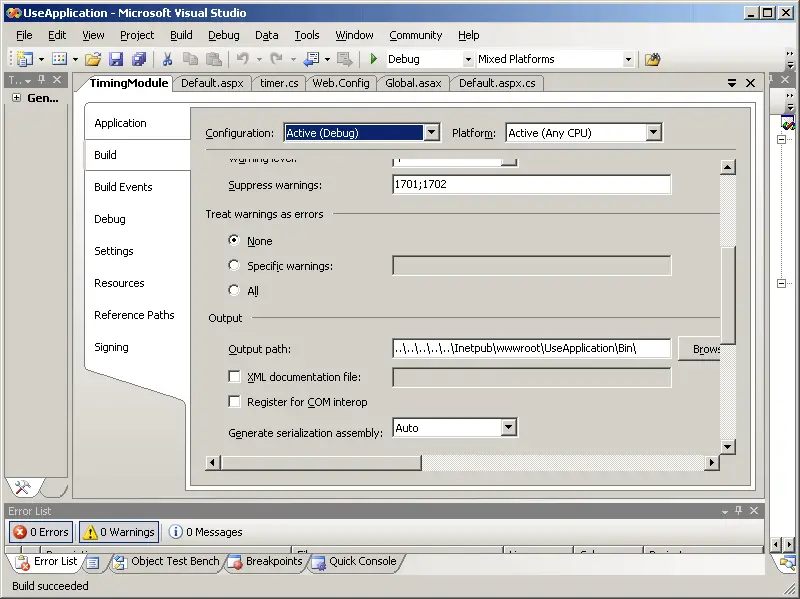
By default, the output produced by the compiler is directed to a separate binary and debug directory (that is, it doesn't go in a place where the Web site can use it). To make the assembly available to the Web site, you need to redirect the output of the compiler so it goes in the Web site's bin directory. To add a \Bin folder to the Web site project, right-click on the Web site project in Project Explorer and select Add Folder. Select Bin folder. Then right-click on the Timer project again and select Properties. On the property page, redirect the compiler output to the bin directory for the Web site. You can do this in the Build properties for the TimerModule project. If you created this as an IIS Web site, the bin directory will be directly under the project's IIS virtual directory. The following graphic shows the Visual Studio dialog for changing the target path.
-
Finally, mention the TimerModule in the Web.Config file. It needs to appear within the <httpModules> section, nested within the <system.web > section, like so:
<configuration>
 <system.web>
     <httpModules>
      <add name="TimingModule"
           type="Timer, TimingModule" />
     </httpModules>
</system.web>
</configuration>
As long as the TimerModule assembly is available to your application (that is, it's in the \bin subdirectory of your virtual directory), it will be linked into the processing chain.
See Active Modules
We saw above that many ASP.NET features are implemented through modules. While you can see the modules listed within the master configuration file, you can also see the list of available modules at runtime. They're available through the current application instance. The following exercise illustrates how to do this.
Listing the Modules
-
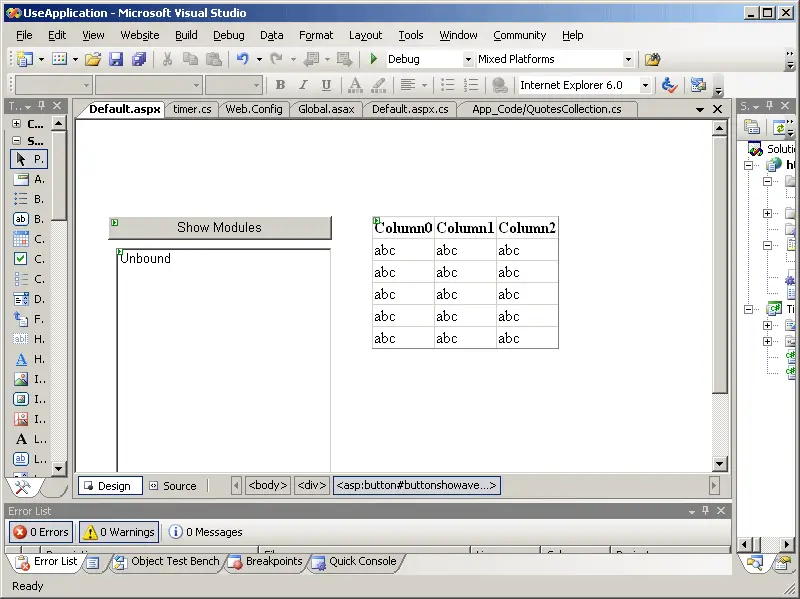
Add a button to the Default.aspx page of the UseApplication solution. This button will list the attached modules, so give it a Text property of Show Modules. Also add a list box to the page that will show the modules.
-
Double-click on the button to add a handler within the page.
-
Handle the button event by grabbing the list of modules from the application instance. The list comes back as a collection that you can apply to the list box's DataSource property. Calling DataBind on the ListBox will put the names of all the modules in the ListBox.
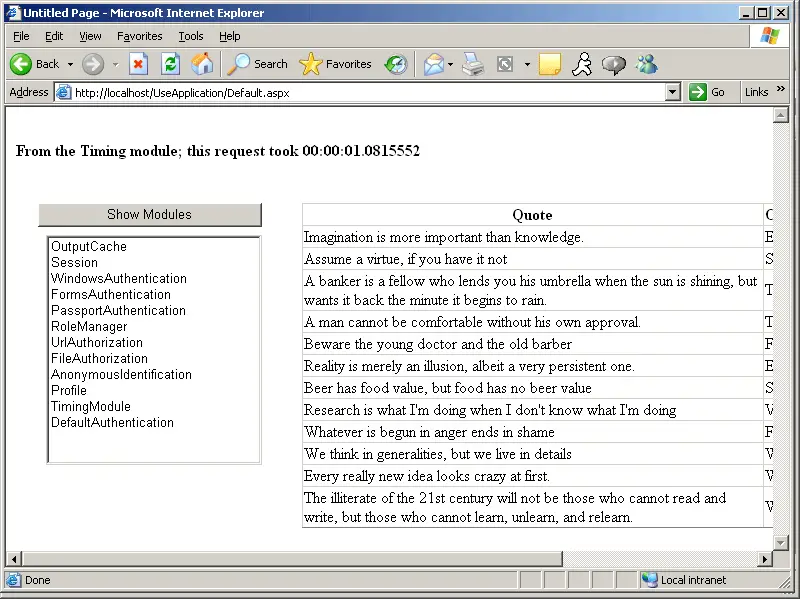
protected void ButtonShowmodules_Click(object sender, EventArgs e)
{

    HttpApplication httpApp = HttpContext.Current.ApplicationInstance;
    HttpModuleCollection httpModuleColl = httpApp.Modules;

    Response.Write("<br>");
    String[] rgstrModuleNames;
    rgstrModuleNames = httpModuleColl.AllKeys;

    this.ListBox1.DataSource = rgstrModul eNames;
    this.ListBox1.DataBind();
   }
Running the page and clicking the Show Module button will fill the list box with a list of modules plugged into the application (check out the TimingModule entry in the list).