Another challenging request I get on occasion is to make a light-colored object dark or a dark object light. This is one of the most challenging requests for most people, and one of the toughest things you may be asked to do. I've made the following example tough, as I will use two cars, one white and one black, and make the white one black and the black one white.
A white car has very little information to work with, and much of it must be created. A black or dark object has too much information and must be creatively lightened considerably to look like a realistic light car.
Changing a black object to white
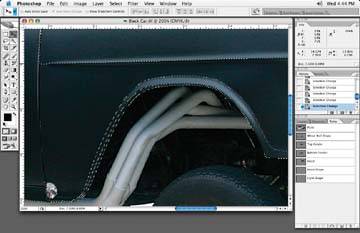
The first step in changing the color of the car in Figure 3-52 is to mask off the color to be changed. You can make a mask of each element of the image with the Pen tool, as shown in Figure 3-53. For instance, in this case, we are changing the color of a car, so make separate masks for the hood, doors, fenders, etc. One trick for changing a black car to white is to leave a small space between the various components, as in Figure 3-53, so that these lines will be dark enough to be apparent when the corrections are done, just like spaces in the real thing!
Figure 3-52. The original black car

Figure 3-53. Create paths for all of the car's paint, including doors, hood, and all shapes within the paint
Using the path selection you just created, make a copy of the black paint of the car and paste it to a new layer (Figure 3-54). Take care when making the selection, as you don't want the outer edge selection to be too soft. I usually select a .2.
Figure 3-54. Paste the black paint selection into a new layer

Then make a copy of this black car, and change the black car copy to a grayscale image using Image » Mode » Grayscale. Don't merge the layers!
Figure 3-55. Create a grayscale image so the color is neutral
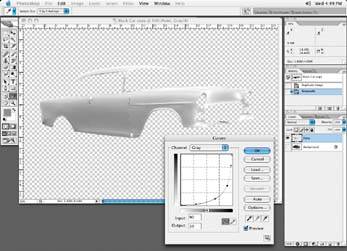
Now apply a "crazy curve" to the grayscale image to lighten the color, but try to maintain shape in the body of the car. The dialog box in Figure 3-55 shows the settings for this project.
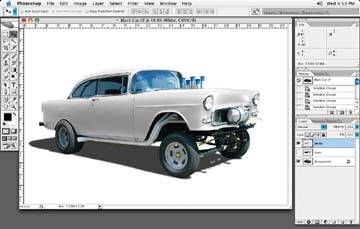
Now make a selection of the new white paint panels of the grayscale image. A simple Command+click on the layer will do the trick.) Once the selection is made, copy the new white paint color and paste it into the original full color image, as shown in Figure 3-56Remember to make the same selection on the full color image first so that the paint will paste in the same position.
Figure 3-56. Paste the new white paint color onto the full color image
For added realism, add extra shape and shadow. First, create another layer and call it Shape, and set its attributes to multiply. You can use this layer to add additional shape and shadowing. Use the paint selection and, with a black-only color with a low opacity (20% airbrush), brush around areas you feel need some shadowing (Figure 3-57). Use your original un-retouched image for a guide as to where the shadows should be. Depending on the image, you may be able to use a slight curve adjustment to enhance the white car paint you pasted from the grayscale image and work some detail into it. It isn't always that feasible, though.
Figure 3-57. Brush extra shape onto a multiplied shape layer
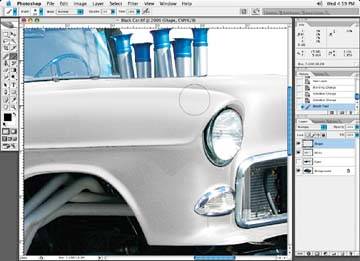
Figure 3-58 shows how my Shape layer looks when I have completed my shadow and shape brushing.