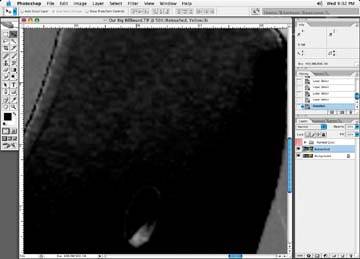
If areas of the image look blotchy this is usually because the color is breaking off hard, like the image in Figure 7-37. You could use my favorite Clone brush tool to soften the area, but you may want to try and color correct with the Curves adjustment first. It may save some time.
Figure 7-37. An image where the color is breaking off and looking rough
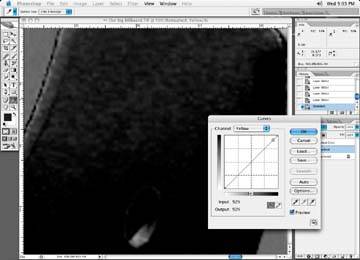
Call up your Curves adjustment tool. With the Eyedropper tool, take readings of the dark and the light side of the color break. If you have your Curves adjustment tool on one of channels and you click on the image area with the Eyedropper, you will get little indicators on the Curves tool as to where that color sits on the color curve of the tool. Once you determine the light and dark areas of your breakup area of your image, put a marker point at these two points, as shown Figure 7-38. Marker points are created by clicking with your cursor on the individual channel curve lines at the various points on the curve line where you wish to mark, create, or lock a point.
Figure 7-38. Read and mark the curve adjustment with your light and dark rough image area
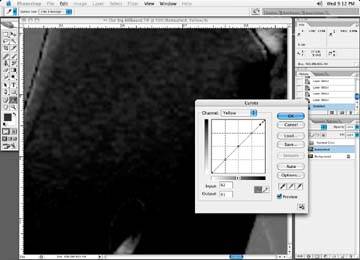
I will also add other marker points outside of these two point so when I make a change to the curve, the outer ends of the points don't swing out as depicted in Figure 7-39.
Figure 7-39. The curves tool with additional marker points outside of the dark and light marker points
Do the same thing for any or all of the channels affected. Next, adjust points on the curve until the level of roughness disappears. Add extra points if you find you are not targeting the right area, as I've done in Figure 7-40. Repeat this process for each channel, if other channels are affected.
Figure 7-40. The final result of our curve efforts
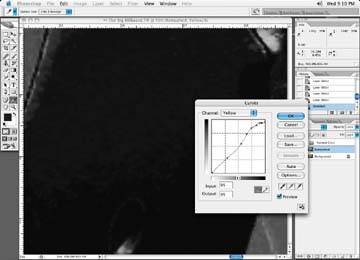
What you are trying to do is create a smooth transition between the hard dark area and the lighter area by adjusting points that may fall in between the original light and dark areas that form the rough area.
Once you are happy with the changes, accept the change. If you had made a selection of the area, that's great. Or, you can take a History snapshot of the change, undo the change, and paint the correction into the affected areas, as described in Tutorial 3. Repeat this process on all affected areas.