Before: Serious model face

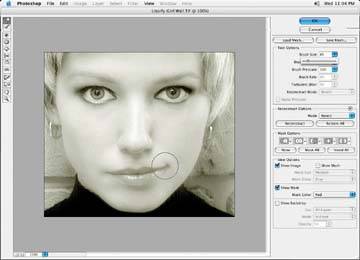
Here, we'll use the Liquify tool to improve her mood. Choose Filter » Liquify. In the Tool options, choose a large brush (a small brush will make it difficult to keep the lines smooth and fluid). Too small a brush will cause small ripples in your change.
Use the Forward Warp tool in the upper-left corner to turn up the corners of her mouth. Do not just pull on the edges of areas where the lines are, as this will cause the area you are distorting to become blurry. Try starting the distortion a little farther away from the actual area, working out toward the edges. If you use the Liquify command in this way you will not stretch the image as much and it won't appear distorted.
Remember that when changing the shape of any portion of the image, think of the other effects this may have on the rest of the image. Smiling changes the shape of your cheeks, eyes, and so on. Make subtle adjustments to these areas with the Liquify tool as well, as shown in the final image. Don't be afraid to use your imagination.
Use the Liquify brush to manipulate the shape of the mouth