Use the Fuzziness slider to squeeze the last bit of selection out of the image; I've adjusted it to +117

My selection displayed
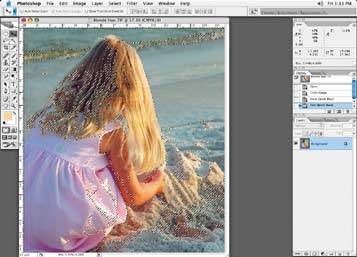
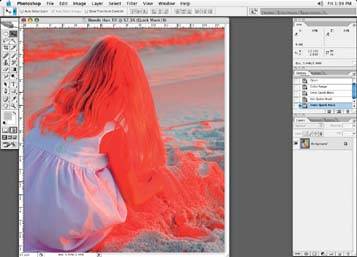
With the selection made, I will switch to the Quick Mask mode and have a look at my selection in the form of a color. Seeing my selection in the form a solid color helps me see what my selection will look like. To me, the little marching ants don't really tell me what I am going to get; I could have little holes all over the place, and it's tough to see with a selection made. The Quick Mask mode allows me to see the selection I have made very clearly. And, as you can see in Figure 6-21, it needs some work.
Seeing the selection as a color really helps
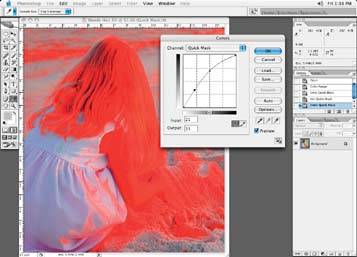
One way to manipulate the mask or selection you have made is to do a correction to it just like you would the image itself. If your mask looks weak in some area (one good reason to use a solid opacity in the Mask mode), instead of painting or reselecting, open the Curve adjustment tool and adjust the curve so that it fills in the mask. Or you can adjust the curve to expand on what you have done to fill in any areas that need work. In this case, I'll adjust my curve to fill in and improve my mask.
Note: The Quick Mask mode can be used a couple of different ways. You can use it to check a selection you have made as a visual aid, or you can go in and manipulate the mask in the Mask mode.
Using the curve adjustment to fill in the mask and add to it (this can help you fill in little holes or rough edges of your selection)
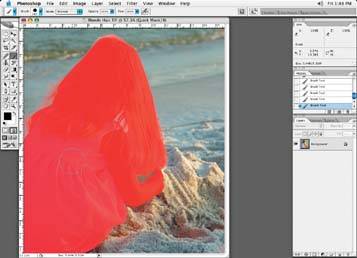
Paint in areas that need to be added to the selection
Another option is to use the Brush tool from the toolbar to paint in any areas you wish to add to your selection. The great thing about using the Brush tool is that you can set all the usual Brush attributes to the Brush tool in the Quick Mask mode as you would for normal brush work in the Standard working mode. Fill in any spots or edges on the mask that need to be filled in.
Use the Brush tool to paint in mask
Use the brush as you would on any color image. The opacity, size, and softness adjustments can be adjusted. Use the X key to switch from brushing mode to erasing mode. Just make sure that the Color Picker on your toolbar is displaying a black and a white square. If your Color Picker is displaying a light shade of color, say a 50% black or any other light color, when you paint with the paint brush, you will not get 100% coverage with your brush. You will get a brush density set by the Color Picker color density.