Adjusting the width of a column.

The resized column.

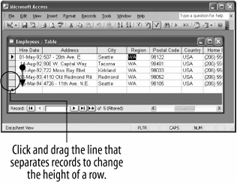
Adjusting the height of a row.

The resized row.

Access is usually pretty smart about how wide to make the columns of a table or query so hopefully you won't have to do much resizing. Sometimes, however, you will discover that some of the columns or rows are not large enough to display the information they contain. This lesson explains how to change the width of a column and the height of a row.
-
If it isn't already open, find and open the Employees table.
Most of the columns in this table are wide enough to display all their information. The Title column, however, needs to be slightly wider.
-
Carefully position the pointer over the right edge of the Title field until it changes to a .

Once the pointer is positioned over the column line and appears as a
 , you can adjust the column width to make it narrower or wider.
 -
Click and hold the mouse button and drag the line to the right about a half-inch, as shown in figure, then release the mouse button.
Access resizes the width of the Title column, as shown in figure.
You can also have Access automatically adjust the width of a field or column so that it can hold the widest entry. This neat feature is called AutoFit. To use AutoFit, simply double-click the right edge of the column or field you wish to adjust.
-
Scroll to the right until the Address field is displayed. Double-click the right edge of the Address field name to automatically adjust its width.
AutoFit automatically adjusts the width of the Address field so that it is wide enough to display its longest entry.
Unless you are working with a table that contains several memo fields with lots of text, you will probably want to stick with the default row height. The procedure for adjusting the height of a row is almost the same as adjusting the width of a column simply click and drag the bottom of any record's row heading.
-
Move the pointer to the record selection area and carefully position the pointer between any two records, until it changes to a
 .
.Once the pointer appears as a
 you can adjust the row height to make it smaller or wider.
 -
Click and hold the mouse button and drag the line down until the row height doubles, as shown in figure, then release the mouse button.
The height of all the rows in the table is doubled, as shown in figure.
Splendid! In just one lesson you've learned how to adjust the width of columns and the height of rows in a datasheet.
TO ADJUST THE WIDTH OF A COLUMN:
-
DRAG THE COLUMN HEADER'S RIGHT BORDER TO THE LEFT OR RIGHT.
OR...
-
RIGHT-CLICK THE COLUMN HEADER(S), SELECT COLUMN WIDTH FROM THE SHORTCUT MENU, AND ENTER THE COLUMN WIDTH.
OR...
-
SELECT THE COLUMN HEADER(S), SELECT FORMAT » COLUMN WIDTH FROM THE MENU, AND ENTER THE COLUMN WIDTH.
TO ADJUST THE HEIGHT OF A ROW:
-
DRAG THE ROW HEADER'S BOTTOM BORDER UP OR DOWN.
OR...
-
RIGHT-CLICK THE ROW HEADER(S), SELECT ROW HEIGHT FROM THE SHORTCUT MENU, AND ENTER THE ROW HEIGHT.
OR...
-
SELECT THE ROW HEADER(S), SELECT FORMAT » ROW HEIGHT FROM THE SHORTCUT MENU AND ENTER THE ROW HEIGHT.
TO AUTOMATICALLY ADJUST THE WIDTH OF A COLUMN OR ROW:
-
DOUBLE-CLICK THE RIGHT BORDER OF THE COLUMN OR BOTTOM BORDER OF A ROW.