FrontPage now offers a quick, automated solution. A photo gallery is page of pictures and text with a professional-looking layout that FrontPage creates for you. The gallery page features thumbnail photos, which your visitors can click to see the full-size image, and includes space for you to name and discuss each picture.
Creating a Photo Gallery
You can place a photo gallery within an existing page, or on its own page. Here's what you need to do:
-
Create a new gallery.
Select Insert » Picture » New Photo Gallery.
-
Add pictures.
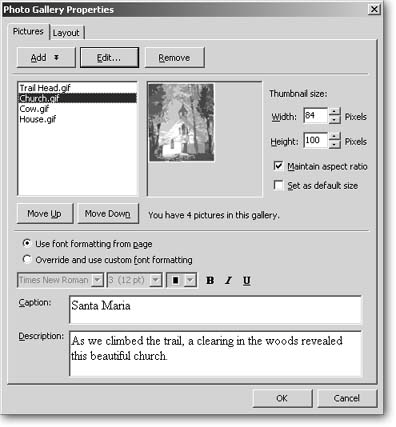
The Photo Gallery Properties dialog box displays (see Figure 4-10). Click Add to bring new images into your gallery. Browse and select the pictures that you wish to include. Enter a caption and description for each picture.
-
Select a Layout.
Click the Layout tab to preview your layout options and select the one you prefer. If you find later on that you don't like it, you can come back and change it.
After you click OK, your gallery displays in FrontPage. You can continue to add pictures and edit the layout at any time. Right-click the Photo Gallery and select Photo Gallery properties to make changes.

Figure 4-10. Add and order your Photo Gallery images within the Photo Gallery Properties dialog box. Order pictures as you want them to appear using the Move Up and Move Down options.
Using the Photo Gallery template
FrontPage offers an already populated gallery for you. Select File » New and within the Task pane, click "More page templates" and select Photo Gallery.
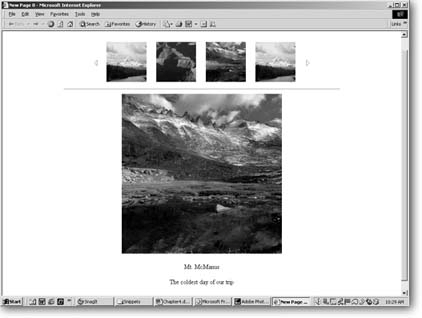
The program creates a photo gallery that already contains a handful of pictures, as illustrated in Figure 4-11. This might be a nice way to preview what the gallery looks like, but otherwise, having to replace these photos with your own makes extra work for you. You might as well create a blank photo gallery following the instructions above.
Editing Pictures Within a Photo Gallery
You can't edit Photo Gallery pictures by using the Pictures toolbar. The gallery feature comes with its own, more limited editing feature. If you click Edit within the Photo Gallery dialog box, a special Edit Picture dialog box appears. Use it to rotate, crop, or change the size of a picture. Previous and Next options, at the bottom, allow you to access all your photos without leaving the dialog box, which you may find handy. If you need to edit a picture more extensively, use an image-editing program. Again, you may want to keep backup copies of your images in a folder outside your Web site for safekeeping. This way if FrontPage's editor mangles a picture, you can import a fresh copy.

Figure 4-11. FrontPage's Slide Show format as it appears in a browser.
Getting Photos to Open in a New Window
The Photo Gallery (with the exception of the Slide Show layout) has one trait that's not really viewer friendly. When a visitor clicks a thumbnail, the large version of the photo opens in the same browser window. This forces the viewer to hit the back button to return to the page of thumbnails. If you want a full-size picture to open in a new instance of the browser, don't waste your time looking for that setting in the Photo Gallery Properties dialog box. Like other Web page features that FrontPage provides ready-made for you, the Photo Gallery isn't very flexible.
Fortunately, there's a workaround. To change the target of your thumbnail links, do the following: look in your site's folder list and locate the photogallery folder. Open the folder and then open the folder that contains your Photo Gallery. (This folder's name begins with the word "photo" followed by a series of numbers. FrontPage creates one of these folders for each gallery in your site. If you have more than one, compare them by checking the folders' image file contents.)
Open the real.htm file, and you'll see your gallery appear in the document window. Right-click a picture and select Hyperlink Properties. Set a different target for the hyperlink (Section 3.3.1). Repeat for each picture you want to open in a new window. While you have real.htm open, you can also turn any caption text into a hyperlink, if you want. When you're done, save the real.htm file.