Do not force connectors into place-if they don't fit easily, they are probably in the wrong place.
Expansion cards often require some force or side-to-side movement to fit into place, but do not force them.
When removing cables, remember the pin 1 locations. Check notations on the circuit boards, and look for the red wire on the ribbon cables.
Connect the cables to the drives before installing them in the bays.
Test the system before replacing the cover.
Lesson Summary
The following points summarize the main elements of this lesson:
By following a systematic plan, you can simplify the process of disassembling and reassembling a computer.
Establishing and maintaining good documentation and having the right hardware and software tools are the keys to a successful upgrade.
Following safety procedures will ensure that no damage is done to you or the computer.
Lesson 2: Upgrading a Computer
In today's world of constant change, the most frequently performed task by a computer professional is to upgrade old systems to the latest technologies. This ability to expand and upgrade a computer can prolong the life and utility of a system. However, sometimes even the simple addition of a new piece of software can lead to hardware conflicts and the subsequent need for an upgrade, as a computer owner tries to squeeze one more year out of "old faithful." This lesson discusses many aspects of computer hardware upgrades.
After this lesson, you will be able to:Estimated lesson time: 30 minutes
- Describe the principles behind upgrading a computer.
- Define the limits of and expectations for upgrading a system.
As discussed in Lesson 1, before you begin to upgrade any computer, you need to document the system. You should create and maintain files that document all computers for which you are responsible. Figure 14.1 provides a sample configuration sheet. Use it as a model to create your own.
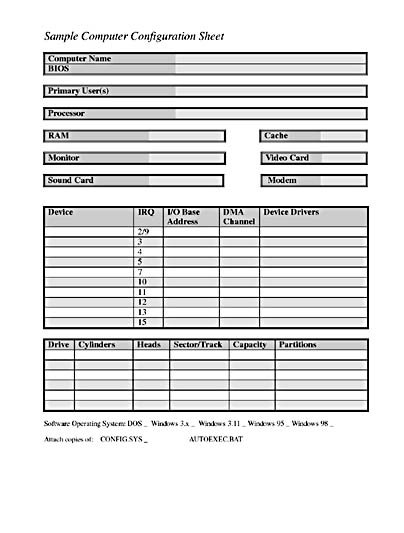
Figure 14.1 Sample configuration sheet