Referencing Another Worksheet
To refer to a cell in a different worksheet, precede the cell reference with the worksheet name followed by an exclamation sign !. For example, =Sheet2!A1 returns the value in cell A1 of Sheet2.
Example: Reference another worksheet using A1 reference style:
=Sheet2!A1
Example: Reference another worksheet using R1C1 reference style:
=Sheet2!R1C1
You must enclose the worksheet name with single quotes if the worksheet name contains space:
='Sheet 2'!A1
Referencing Another Workbook
To create an external cell reference that refers to a cell in a different workbook, precede the cell reference with the workbook name surrounded by square brackets, the sheet name, and an exclamation sign !. For example, =[Book1.xlsx]Sheet1!B2 returns the value in cell B2 of Sheet1 in Book1.xlsx.
=[workbook1.xlsx]Sheet1!A1
You need to enclose the workbook name (including brackets) and worksheet name in single quotation marks If the workbook name or sheet name in the reference includes one or more spaces, for example:
='[brain bell.xlsx]Sheet1'!A1
Example: Referencing a workbook located in a different folder:
Above examples will not work if the referenced workbook is closed or in a different folder. You must include the full path to the workbook reference if the referenced workbook is closed or in a different location:
='D:\New Folder\[brain bell.xlsx]Sheet1'!A1
Using External Reference with Named Ranges
You can define named ranges to refer to specific cells or ranges of cells. One advantage of using a named range is that you don’t need to specify the sheet name when you refer to it in a formula. This can save time and avoid errors when working with multiple sheets in a workbook.
To reference a named range from another worksheet or workbook, you use the same syntax as above, but replace the cell address with the range name and omit the sheet name and brackets [ ] :
Example: Referencing a named range on another worksheet
=SUM(MyRange)
Example: Referencing a named range on another workbook
=SUM(Book4.xlsx!MyRange)
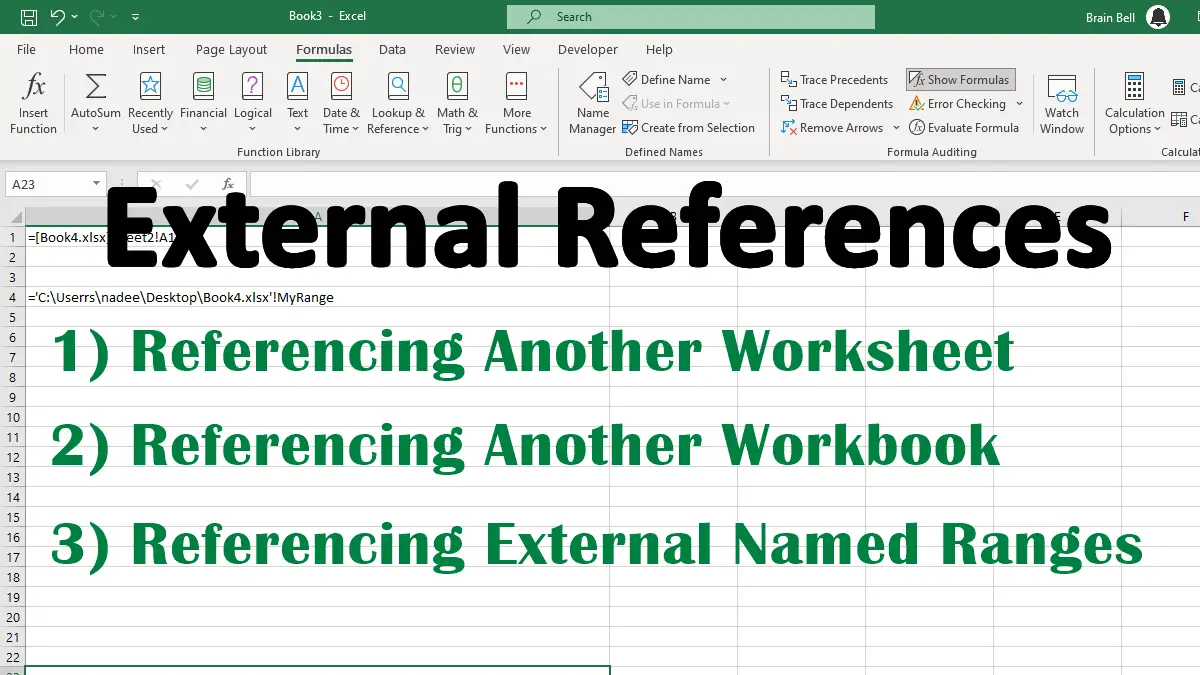
Example: Referencing a named range on another workbook and on a different folder:
=SUM('C:\Users\BrainBell\Desktop\Book4.xlsx'!MyRange)
CREATING A NAMED RANGE:
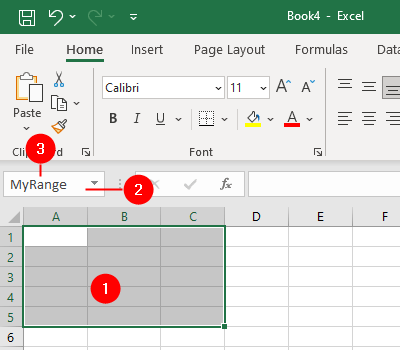
- Select the desired cells.
- Click on the “Name Box” (located next to the formula bar).
- Enter a name for the range.
You need to be careful when naming ranges, because each name must be unique in the workbook. You cannot use the same name for different ranges in different worksheets.