- Convert a Workbook into XML Format (XML Spreadsheet 2003)
- Export Mapped Worksheet Data as an XML File
- Understanding XML Maps
- Creating an XML Schema/Map
Convert Entire Workbook to XML as “XML Spreadsheet 2003”
XML Spreadsheet 2003 (*.xml) is a type of XML file that can store spreadsheet data. It is compatible with older Excel versions, as well as other applications that can read and write XML data.
XML Spreadsheet 2003 files have the extension .xml and use a schema defined by Microsoft. The schema specifies the structure and elements of the XML document, such as worksheets, rows, cells, formulas, styles, and formatting. To save a workbook as an XML Spreadsheet 2003 file, follow these steps:
- Go to
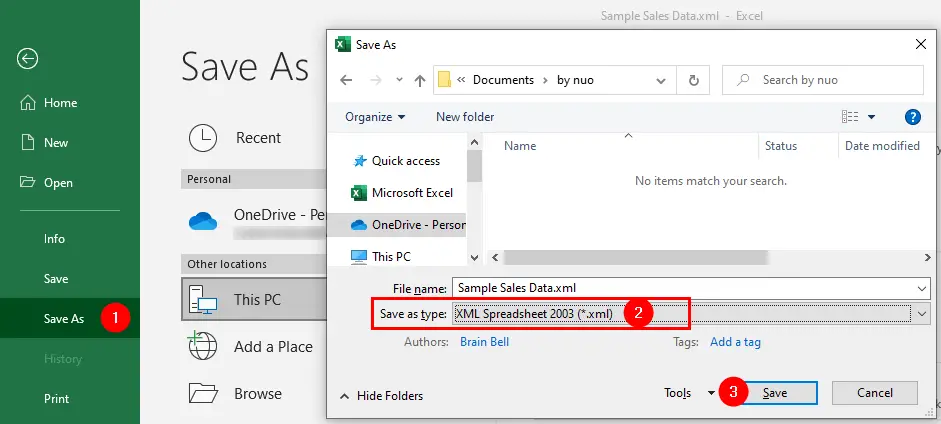
File > Save Asand clickBrowseto open theSave Asdialog box. - Choose
XML Spreadsheet 2003 (*.xml)from theSave as typedropdown menu. - Give your file a name and click
Save.
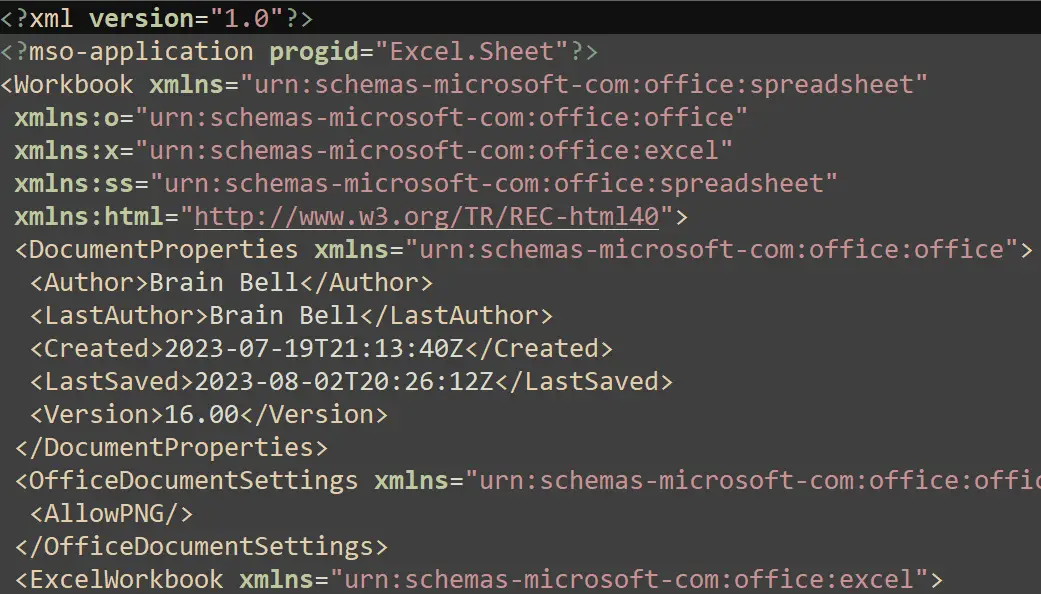
Open the XML file in a text editor or browser. You will see the XML code that represents your data and formatting. You can edit the XML code if you want to make any changes or remove any unnecessary elements.
Using XML Maps to Export XML Data
In this section, we’ll discuss how to export your worksheet data as an XML Data file. The first method is:
- Click
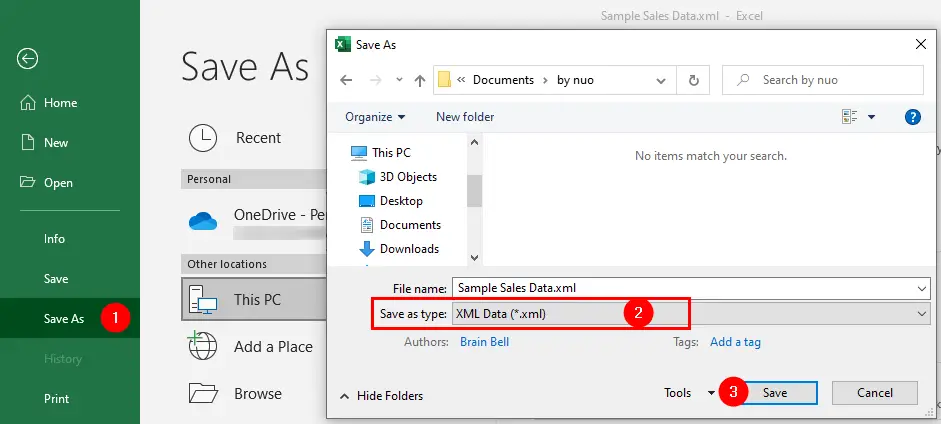
File > Save As > Browse - From
Save Asdialog box select theXML Data (*.xml)in theSave as type. - Click
Save.
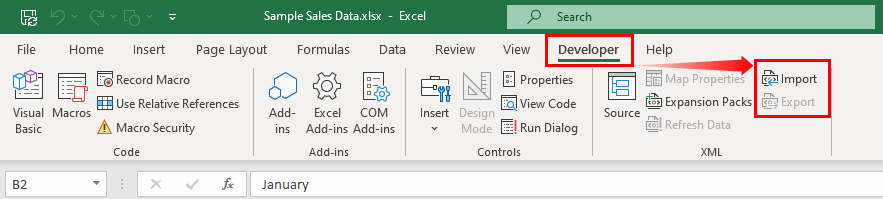
The second method is, click Developer > Export (If the Developer tab is not visible, follow this link to Show the Developer tab).
Noticed the Export button is disabled, to export your worksheet data as an XML file, Excel requires at least one XML map (XML schema .xsd file) attached to the workbook.
XML Maps
XML schemas in Excel are called XML maps. You can associate single or multiple schemas with a workbook and then map the schema elements to cells on the worksheet.
In this section, we’ll add an XML map to the workbook, see following steps:
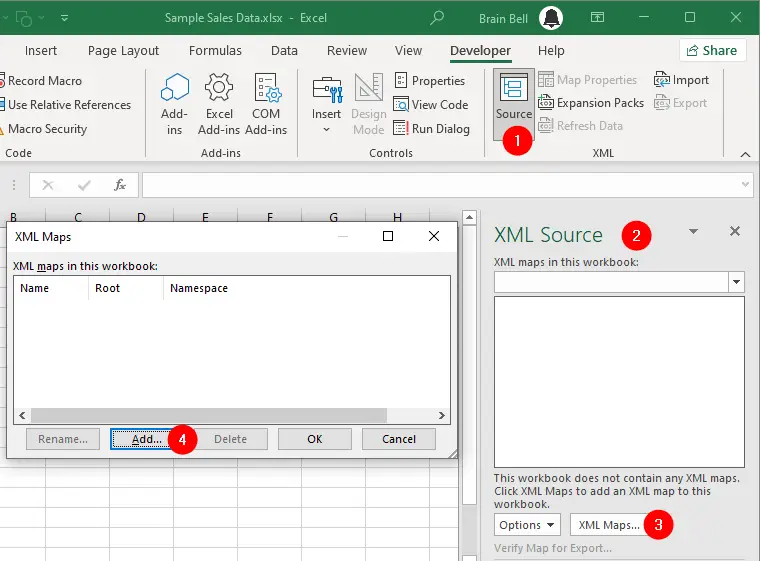
- Open the
XML Sourcetask pane by clicking theDeveloper > Source. - Excel will display the
XML Sourcetask pane. This task pane is used for displaying XML maps found in the XML data or schema documents to map XML elements to cells or ranges on a worksheet. - In the
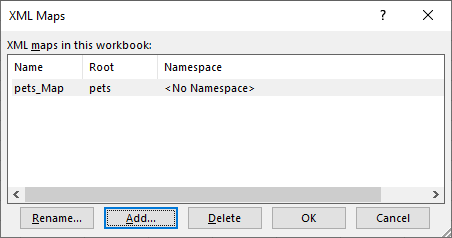
XML Sourcetask pane, click theXML Mapsbutton to open theXML Mapsdialog box. The XML Maps dialog box is used to add, delete, or rename an XML map associated with the workbook. - Click the
Addbutton, it will open the “Select XML Source” dialog box, select an XML schema (.xsdextension) file and clickOpen. See the following figure:
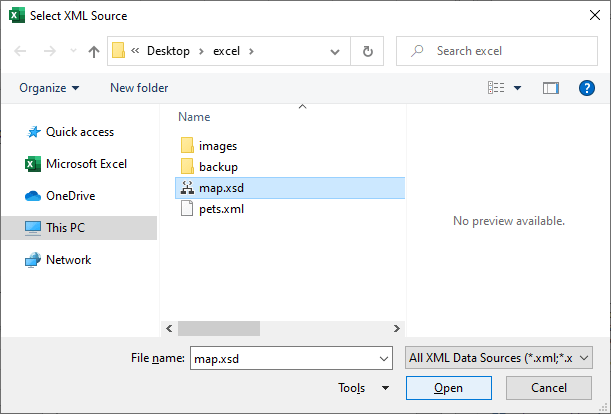
Note: If you don’t have an XML schema (.xsd extension) file but you have an XML data file (e.g. pets.xml), you can use that XML file to create an XML map. When you select an XML file instead of the schema (.xsd) file, Excel shows you a message box as shown below::
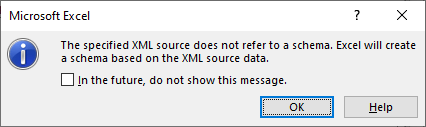
Excel will create a schema based on the XML source data itself. This may not match your expectations or requirements for the XML data. Therefore, we recommend that you specify a schema for your XML source or edit the generated schema accordingly.
If the XML schema file have more than one root node, the
Multiple Rootsdialog box appears and you must select a root node which you wan to use. Themap.xsdfile has a single root node so theMultiple Rootsdialog box will not appear.
Excel displays the XML map name (root element name is small letters) in the XML Maps dialog box as shown in the following figure, click OK to return to the Excel window:
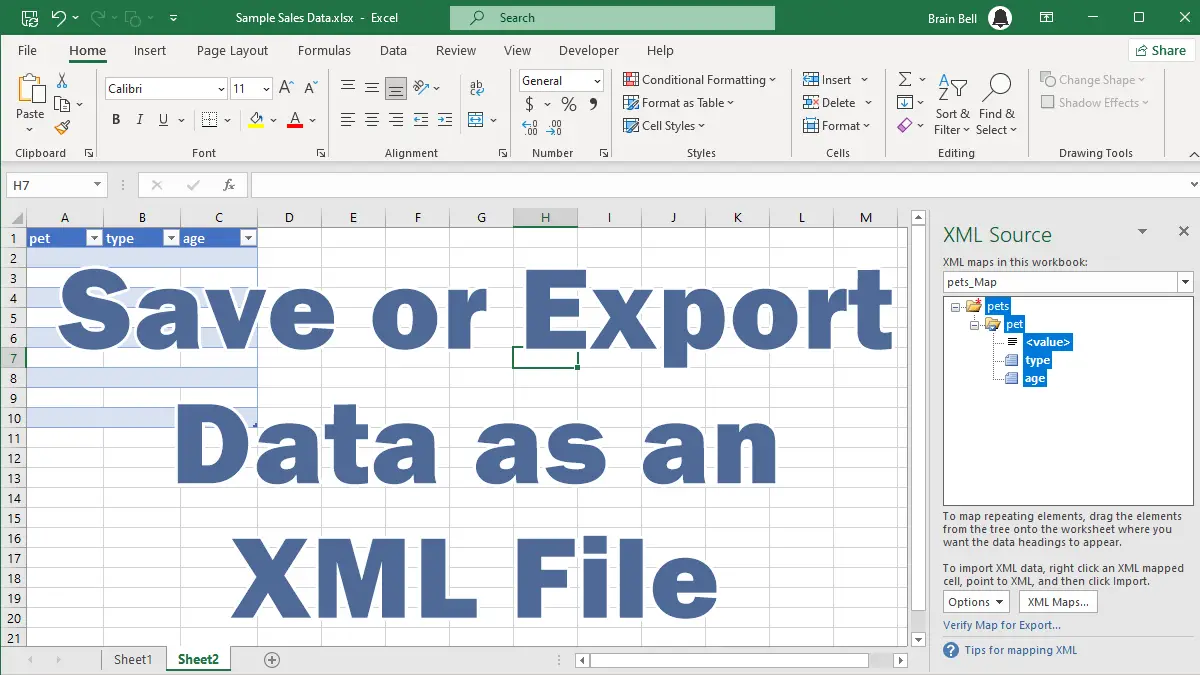
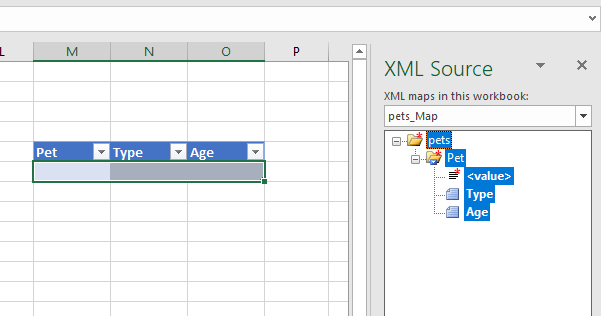
The XML Source task pane now displays the structure of the XML map. To create the XML table, place all of the XML elements on the worksheet by dragging the root element pets from the XML Source pane and dropping it on a cell on the sheet:
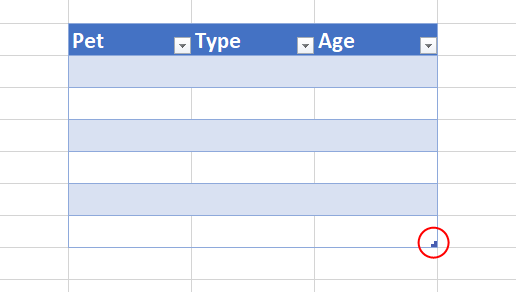
To add rows in the XML table, move the mouse pointer to the bottom-right corner of the table, click and hold the mouse button when double-headed arrows appear, drag the pointer to the downside, and drop the pointer at the desired cell:
The XML table is mapped to the Excel cells. Fill all rows and try to export the table or workbook as an XML document using one of the following methods:
- Click
File > Save As > Browseand select the location where you want to save the XML file. Write a file name for your XML file inFile namefield and select XML Data (*.xml) from the Save as type list.
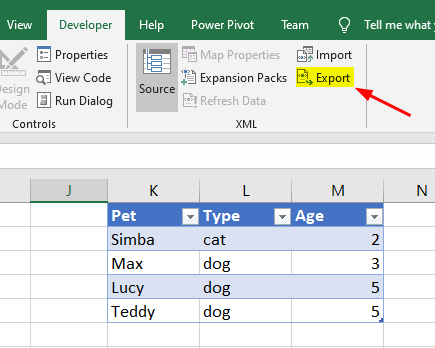
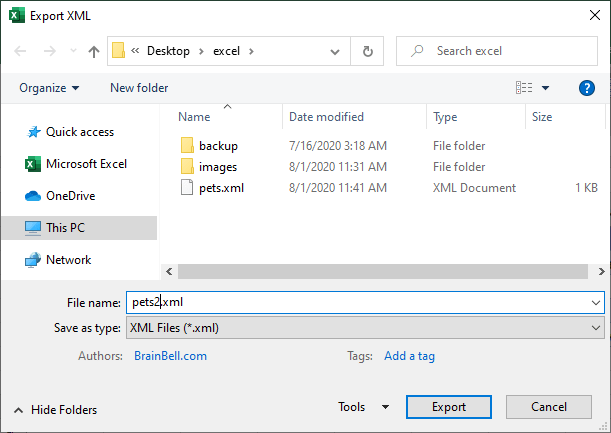
- To export XML data, click any cell in the XML table and then, on the
Developertab, click theExportbutton to display theExport XMLdialog box:
Navigate to the folder in which you want to export your data, enter a name for the file, and click Export:
Creating an XML Map (Schema)
An XML map is actually an XML schema (plain text document) that helps the other application to understand the elements in the XML document. Excel allows you to add multiple XML maps to a workbook. If you want to create the XML schema used in this tutorial, open a text editor, copy the following code, paste it into the text editor, and save it as map.xsd:
<?xml version="1.0" encoding="utf-8"?>
 <xs:schema xmlns:xs="http://www.w3.org/2001/XMLSchema">
  <xs:element name="pets">
   <xs:complexType>
    <xs:sequence>
     <xs:element maxOccurs="unbounded" name="Pet">
      <xs:complexType>
       <xs:simpleContent>
        <xs:extension base="xs:string">
         <xs:attribute name="Type" type="xs:string" />
         <xs:attribute name="Age" type="xs:integer" />
        </xs:extension>
       </xs:simpleContent>
      </xs:complexType>
     </xs:element>
    </xs:sequence>
   </xs:complexType>
  </xs:element>
 </xs:schema>
The map.xsd XML scheme (map) defines the elements of the pets XML. Read the full tutorial on XML schema: Creating XML Schema.
When you export data to an XML file, the two XML events
AfterXMLExportandBeforeXMLExporttriggered. You can writeWorkbook_AfterXMLExportandWorkbook_BeforeXMLExportevent listener procedures for these events to control what happens before and after import.