- Limit Scroll Area by Hiding Columns and Rows
- Limit Scroll Area using VBA
- Reset Scroll Area by Calling a Macro
All Excel worksheets created in Excel 2007 and above are 16384 columns wide (A to XFD) and 10,48,576 rows long. The older versions (Excel-97 to Excel-2003) are 256 columns wide (A to IV) and 65,536 rows long.
Limit scrolling can make it less daunting to scroll around in a worksheet, as it is not uncommon for users to find themselves at row 50,000 and then start screaming that they are unable to find any data in a worksheet.
Hide Unused Columns & Rows to Limit the Scroll
The easiest way to establish boundaries is simply to hide all the unused columns and rows.
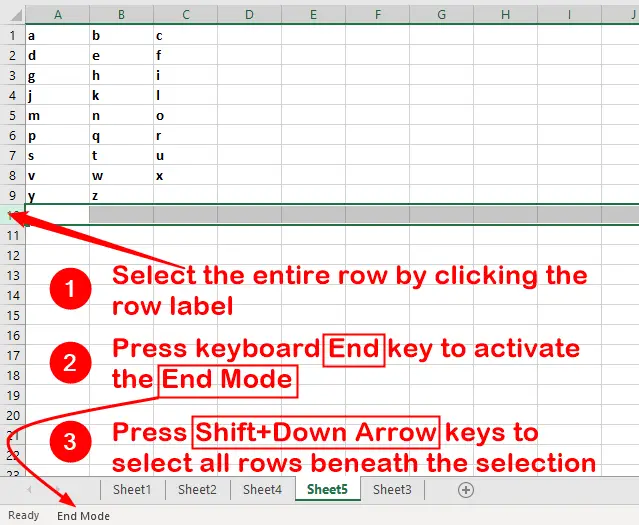
- On your sheet, locate the last row containing data and select the entire row below it by clicking the row label.
- Press
Endkey to activate theEnd Mode. - Press
Shift+Down Arrowkeys to select all rows beneath. - To hide all selected rows:
- Right-click on the selection and click
Hidefrom the context menu. - Or, click
Home » Cells Group » Format » Hide & Unhide » Hide Rows
(for older versions, clickFormat » Row » Hide)
- Right-click on the selection and click
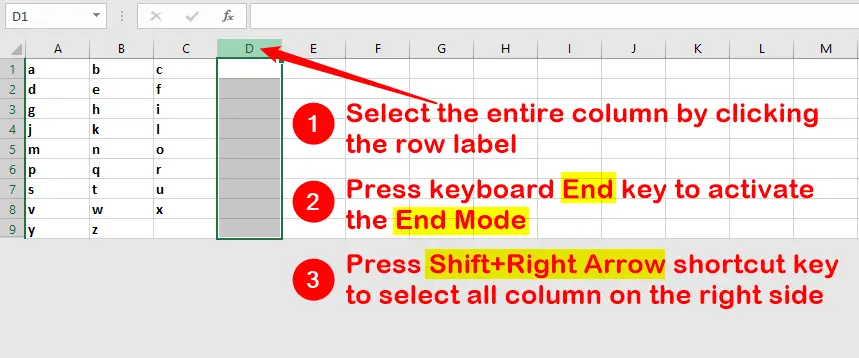
- Do the same thing for unused columns; find the last-used column, select the entire column to the right of it by clicking the column label
- Press
Endkey to activate theEnd Mode. - Press
Shift+Right Arrowshortcut key to select all unused columns - To hide all selected columns:
- Right-click on the selection and click
Hidefrom the context menu. - Or, click
Home » Cells Group » Format » Hide & Unhide » Hide Columns
(for older versions, clickFormat » Column » Hide).
- Right-click on the selection and click
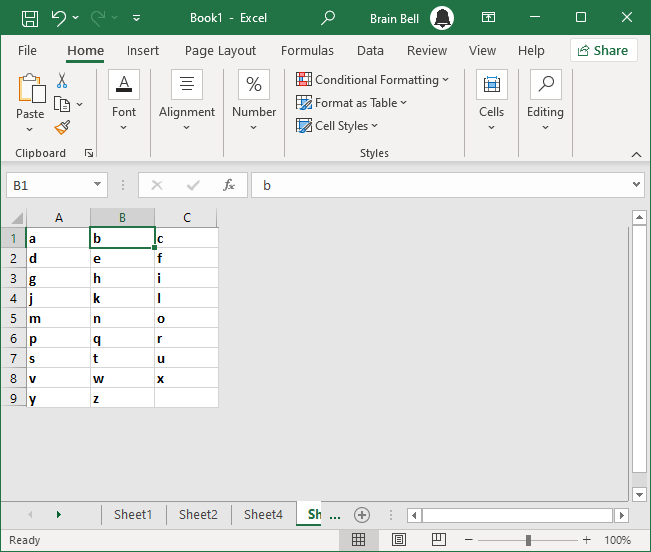
If all went according to plan, your useful cells should be surrounded by a gray moat past which you cannot scroll.
Limit the Scroll Area with VBA
The second way to establish boundaries is to specify a valid range in the worksheet’s Properties window.
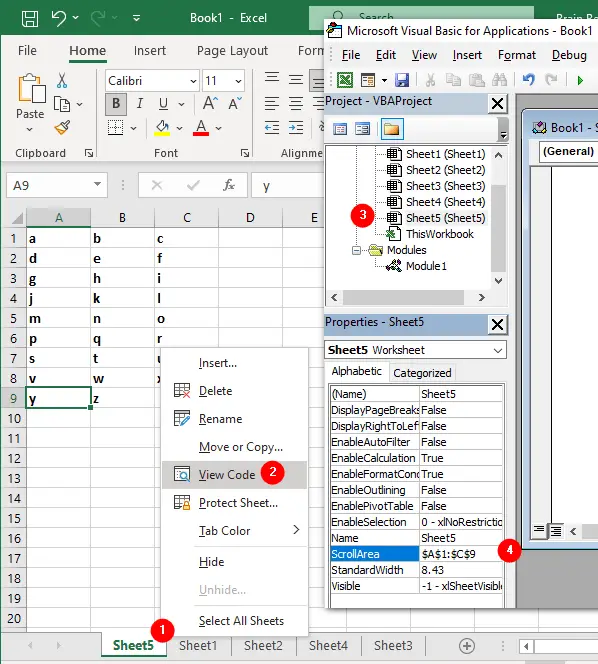
- Right-click the sheet’s tab at the bottom left of the window
- Select
View Codefrom the context menu. - Visit Project Explorer (press Ctrl+R or press ⌘+R if Project Explorer is not displayed).
- If the
Propertieswindow isn’t visible, pressF4to make it appear. - Select the appropriate worksheet and visit the
ScrollAreaproperty in thePropertieswindow.
Now, from within the Project Explorer, select the worksheet you want the scroll area limited to, and then, from the Properties window, go down to the ScrollArea property. In the associated value field to the right, enter the preferred boundaries of your worksheet-$A$1:$C$9, for instance.
Press Alt+Q to return to the sheet, you will be unable to scroll outside the area you have specified.
Unfortunately, Excel will not save this setting after closing it. This means you need a very simple macro to automatically set the scroll area to the desired range by placing some code in the worksheet_Activate event.
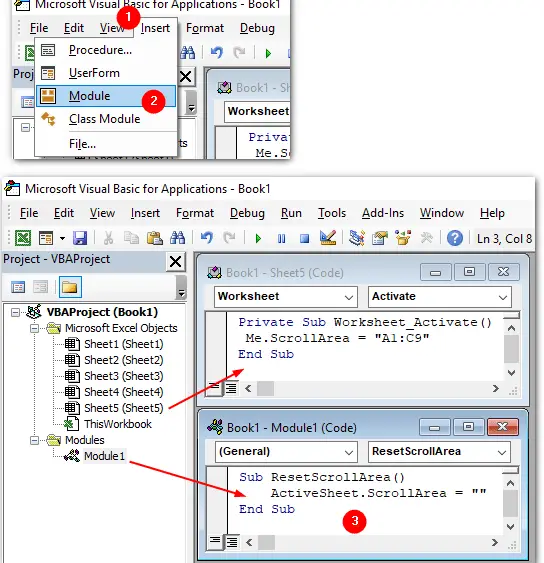
Right-click the Sheet Name tab on which the scroll area should be limited and select View Code, then enter the following:
Private Sub Worksheet_Activate ( )
 Me.ScrollArea = "A1:C9"
End Sub
The Me keyword refers to the object whose module the code is in. In this case, it’s the Sheet5 module, so Me refers to Sheet5.
As usual, press Alt+Q or ⌘+Q to return to Excel and save your workbook.
Although you will not see a visible clue, such as the gray moat of the first method, you won’t be able to scroll or select anything outside the specified area.
Reset Scroll Area with Macro
The preceding code will run automatically each time you activate the worksheet in which you placed it. If for some reason you need to clear the scroll area limits, you can remove the restriction with this statement:
Me.ScrollArea = ""
For example, you might encounter a problem when you need to actually enter data outside the existing used range. To avoid this problem, simply use a standard macro that will reset your scroll area back to the full sheet.
- Press
Alt+F11to open the VBA window (if not already opened) - Select
Insert » Module - Enter the following code:
Sub ResetScrollArea( )
    ActiveSheet.ScrollArea = ""
End Sub
Assigning Shortcut Key to Macro
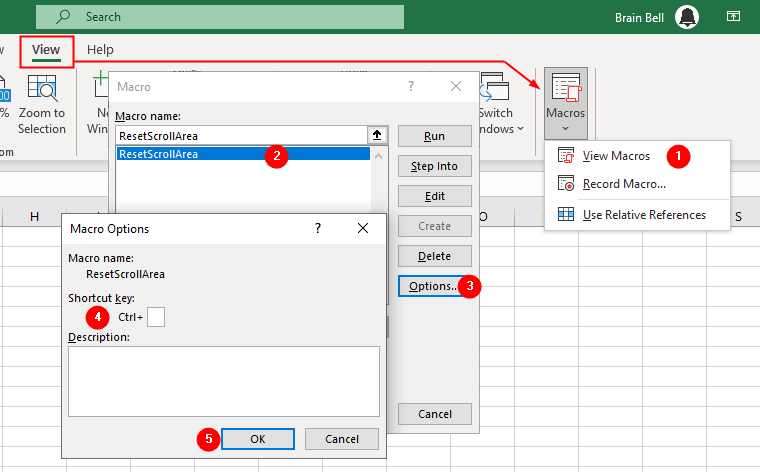
- Press
Alt+F8(orOpt+F8) to open theMacrodialog box, or
SelectView » Macros » View Macros
(for older versions, selectTools » Macro » Macros). - Select
ResetScrollArea(the name of your macro) - Click
Options. - Assign a shortcut key.
- Click OK
Each time you need to add data outside the established bounds of your worksheet, run the ResetScrollArea macro to readjust the borders. After you run the macro, make any changes you were unable to make while the scroll area was limited.
When you’re finished, activate any other worksheet and then activate the worksheet you just modified. Activation of the worksheet will cause the code to run and limit the scroll area to the desired range.