Android Studio is the official IDE for Android application development, based on IntelliJ IDEA. On top of the capabilities you expect from IntelliJ, Android Studio offers the following among many others:
- Flexible Gradle-based build system
- Build different versions of your app from a single project and generate multiple .apk files
- Code templates to help you build common app features
- Layout editor with support for dragging widgets into a visual design editor instead of writing the code by hand
- Lint, a code scanning tool, to identify and correct problems with the structural quality of your code without execute the app or write test cases.
- ProGuard to detects and removes unused classes, fields, methods, and attributes
- App-signing; creating and storing certificate, signing different build configurations using different certificates, and configuring the build process to sign your APKs automatically.
- Build and host your app backends on the Google Cloud Platform, making it easy to integrate Google Cloud messaging and App Engine
We'll discuss the steps and process involved in setting-up a development environment using the Android Studio. Android Studio comes bundled with all the necessary tools and libraries needed for Android application development.
Requirements
Android Studio requires a fairly powerful development machine to work well: fast CPU, lots of RAM, and an SSD are all strongly recommended. To use Android Studio, your development system must meet the minimum system requirements. This section lists the minimum requirements for Windows, Mac OS X, and Linux.
Supported Operating Systems
- Windows 7/8/10
- Mac OS X 10.10 (Yosemite) or higher, up to 10.12 (macOS Sierra)
- Linux with GNOME or KDE desktop with GNU C Library (glibc) 2.19 or later (64-bit distribution capable of running 32-bit applications)
Hardware requirements
- 4GB RAM minimum (3GB for the Android Studio and 1GB for the Android Emulator), 8GB recommended
- 2GB disk space minimum, 4GB Recommended
- 1280 x 800 minimum screen resolution
Accelerated emulator requirements
Emulator pretends to be an Android device. It helps you to get started on Android without a device and test device configurations that you do not own. The best way to test your app is by using a real device. The Android emulator is pretty slow and does not provide you with all the features that come with a real device, such as a camera and all kinds of sensors
There are two types of emulator: x86 and ARM. The x86 emulator is much faster than ARM emulator. So, you really want to be able to use the x86 emulator, as the ARM emulator is extremely slow.
Emulators are virtual devices, so having a CPU with virtualization support is crucial for developers to get the best experience with Android emulators. The x86 emulator only works for the following CPU technologies (CPUs that support virtualization in hardware):
- Intel processor with support for Intel VT-x, Intel EM64T (Intel Extended Memory 64), and Execute Disable (XD) Bit functionality.
AMD processor with support for (AMD-V) AMD Virtualization (Linux OS only). This technology improve the performance of virtualized applications.
What is Intel VT-x
Intel VT-x technology provides acceleration for memory intensive virtualized applications.
What is Intel EM64T
Intel EM64T (Intel Extended Memory 64) It means that your processor supports 64-bit extensions and that it CAN run a 64-bit OS.
What is Execute Disable (XD) Bit
Execute Disable (XD) Bit is a hardware-based security feature.
Does my CPU support Accelerated Emulator
After reading following instructions you'll be able to check if your Windows 10 machine has an Intel processor with support for VT-x, EM64T and XD functionalities.
In Windows 10, open System Information App by typing the system information in Cortana Search Box:

Make note of your processor number.
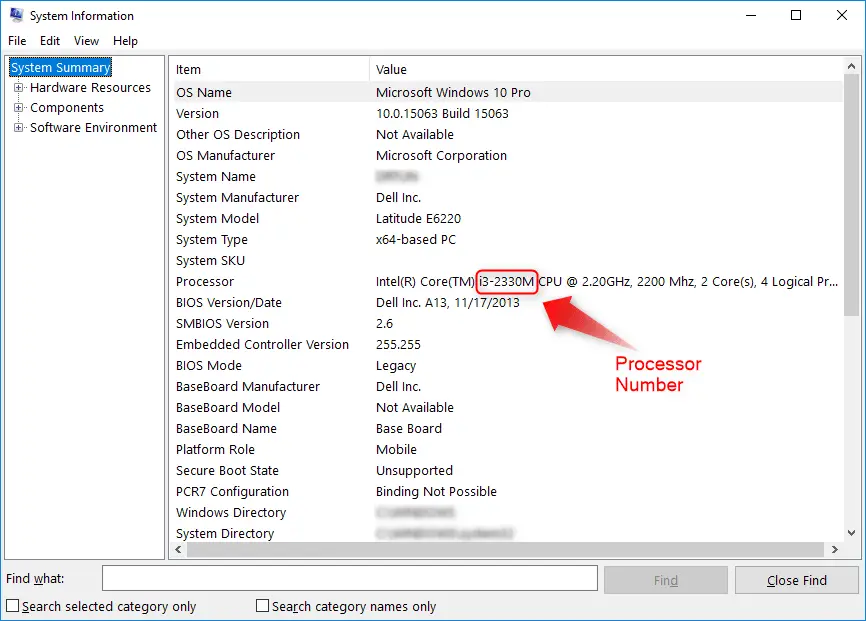
- Visit the https://ark.intel.com/
- Enter the processor number in the search box e.g.
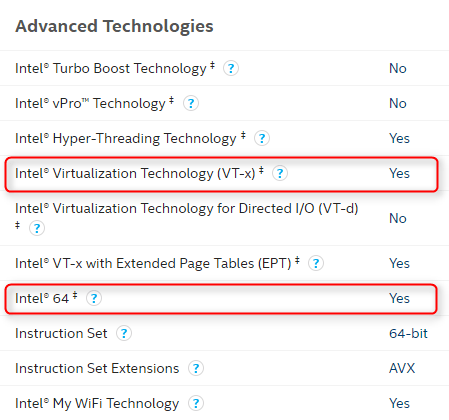
i3-2330M. Look for Intel® Virtualization Technology (VT-x) and Intel® 64, which shows Yes or No.
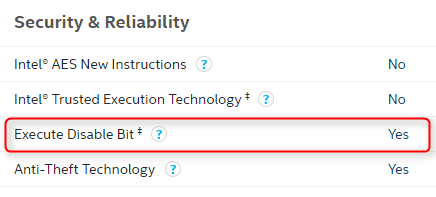
Look for Execute Disable Bit, which shows Yes or No.
You also check if your BIOS includes a setting to enable or disable support for
Intel VT, make sure you enable it.
Installations
Installing Java
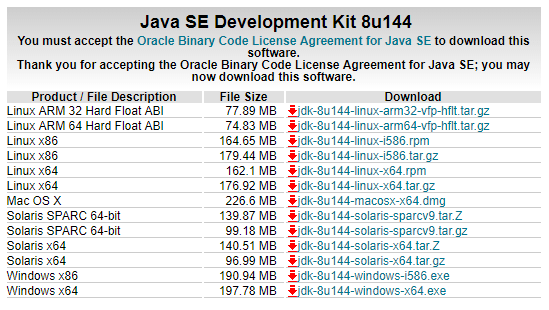
Java is essential for all operating systems. You must install Java SE (Standard Edition) Development Kit (JDK) for your operating system. The JDK 8 download page can be accessed directly at http://www.oracle.com/.../jdk8-downloads-2133151.html. When you navigate there, the page shown in following figure appears.
The following section provide installation instructions for JDK 8 on Windows 10
Installing Java for Windows 10
Java installation on Windows is straightforward, installing JDK provides JRE (Java Runtime Environment) as well. Depending on the version of your Windows installation, you need to download and install either the 64 bit or 32 bit version of the JDK. Since most modern computers are equipped with 64 bit CPUs, we will continue with installation of the 64 bit version. If you have a 32 bit Windows installation, use the 32 bit JDK, which is listed as the Windows x86 version.
Setting Paths for Java on Windows 10
After the installation finishes, you need to set the Windows 10 environment paths for Java to configure the system environment. You need to set a path for the JAVA_HOME system variable.
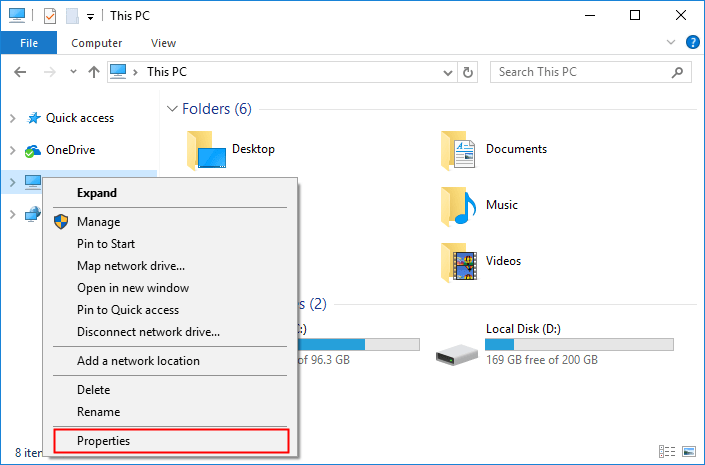
Open File Explorer and right-click
This PCand then clickPropertiesto open the System window.
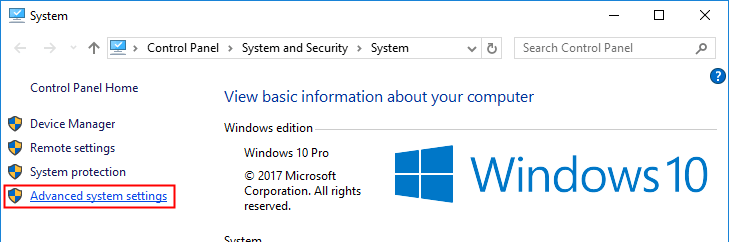
Select
Advancedsystem settings.
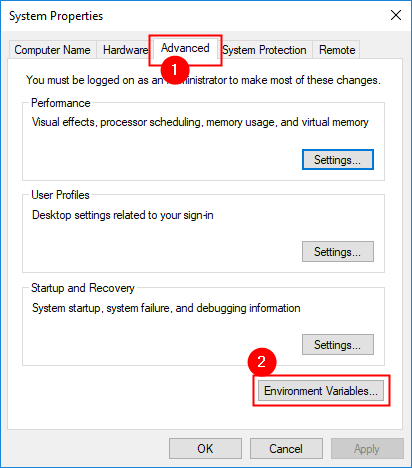
Click the
Environment Variablesin Advanced tab.
Click the
Newbutton (either in User variables or System variables)
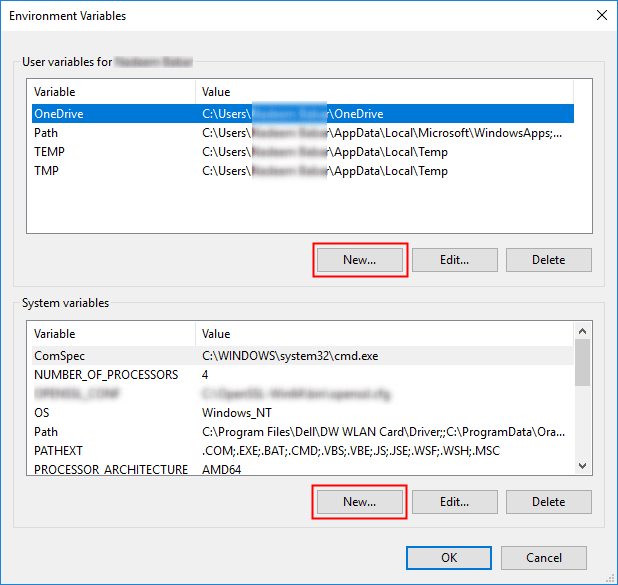
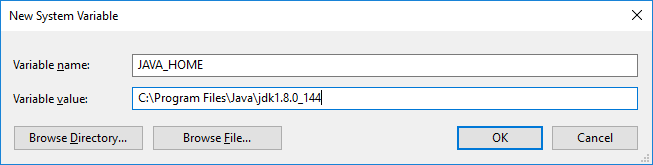
Set Variable name:
JAVA_HOMEand set the Variable value to Java path with your installation directory by clicking the Browse Directory...
Installing Android Studio
Android Studio installation, like Java installation, differs by operating system. The following section provide installation instructions for Windows 10.
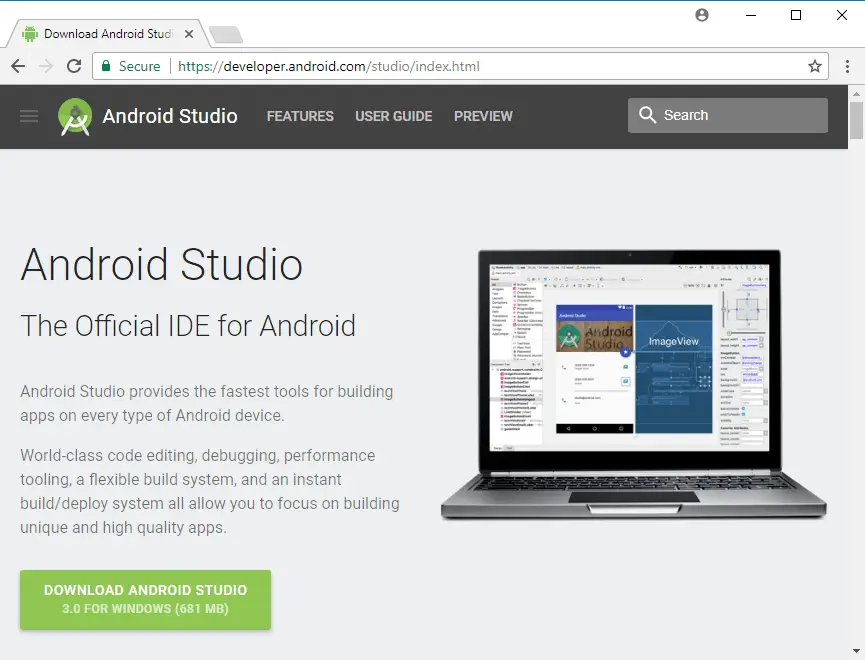
You can download the Android Studio from this link: https://developer.android.com/studio/index.html. The download link that's available when you go to this site will be correct for the operating system you are running, as shown in following figrue.
Installing Android Studio for Microsoft Windows 10
This section covers the installation instructions for Android Studio on Microsoft Windows 10. Before you are installing the Android Studio make sure you are connected to Internet because installation process includes downloading required Android SDK installation files from the web.
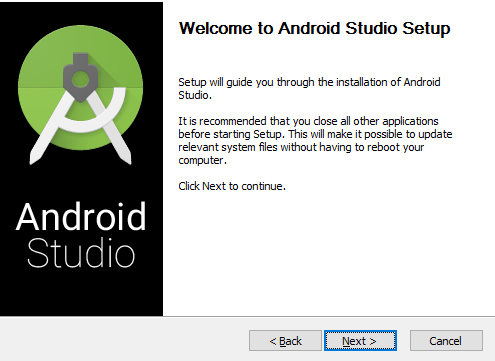
Download Android Studio and run the exe file after the download completes.
Click the Next button to select installation components. The Android Studio option can't be changed, but you can deselect the Android SDK, Emulator, and Android Virtual Device (AVD).

The next window displays the License Agreement, click "I Agree" to continue
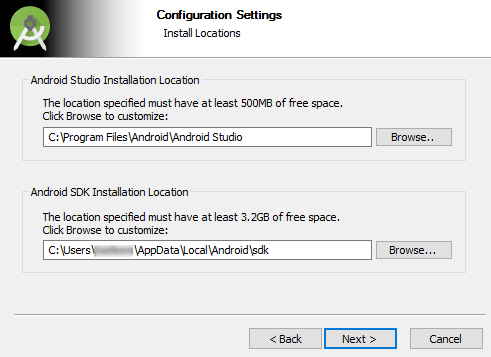
The next window prompts you for installation paths for Android Studio and Android SDK separately.
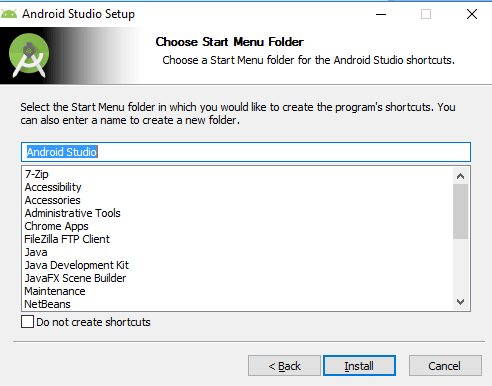
Choose a Start Menu folder for the Android Studio shortcuts and click install to start Android Studio Installation.
Start Android Studio after completing the Android Studio installation. Make sure you are connected to Internet because installation process includes downloading required Android SDK installation files from the web.
In next window you can import settings from a previous version of Android Studio, we'll select I do not have a previous version and press ok

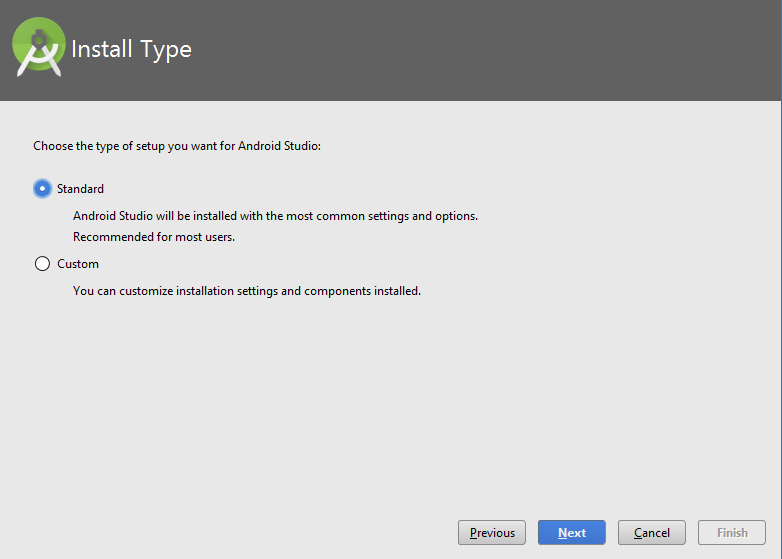
The Welcome window will appear, click next and choose Standard or Custom in Installat Type window
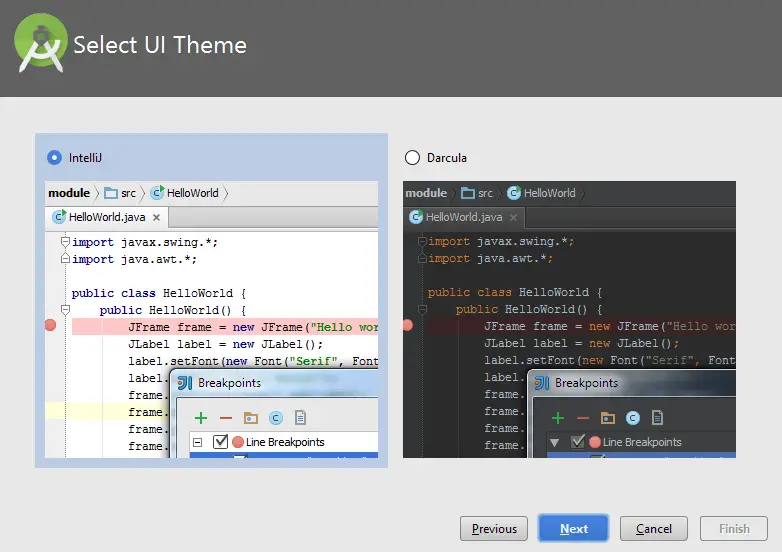
The next window asks you to select the theme for the IDE (if you choose Custom installation type in previous window).
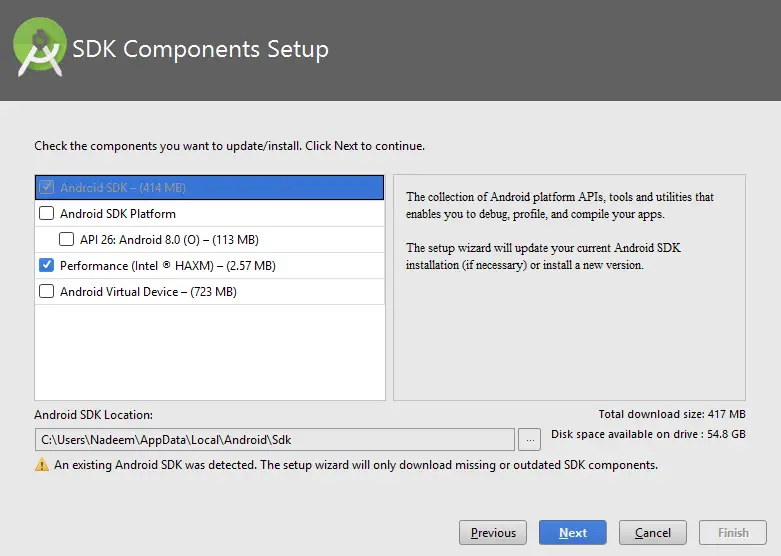
In next window, select
Android SDK Platform,Performance (Intel HAXM)andAndroid Virtual Devices. HAXM is a hardware-assisted virtualization engine that lets you use your computer's processor to generate x86 Android images. Without HAXM, the emulator's performance will greatly suffer. Android Virtual Devices (AVD) are preconfigured and optimized for "app testing" on the emulator.
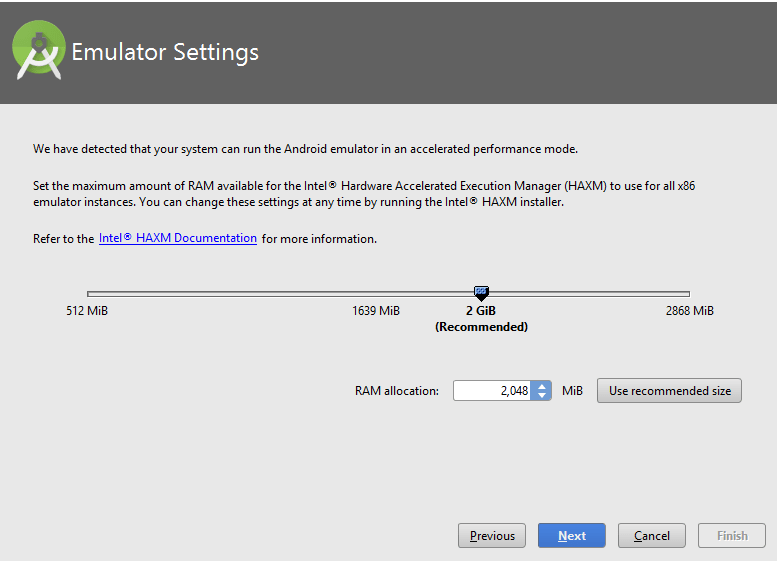
The installation asks about Intel HAXM memory configuration, and lets you choose a custom memory configuration. Recommended memory for HAXM is 2GB, but you can change that based on your hardware. We recommend that you install HAXM if you plan to use the emulator.
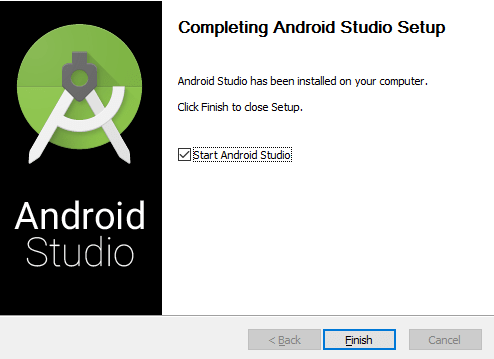
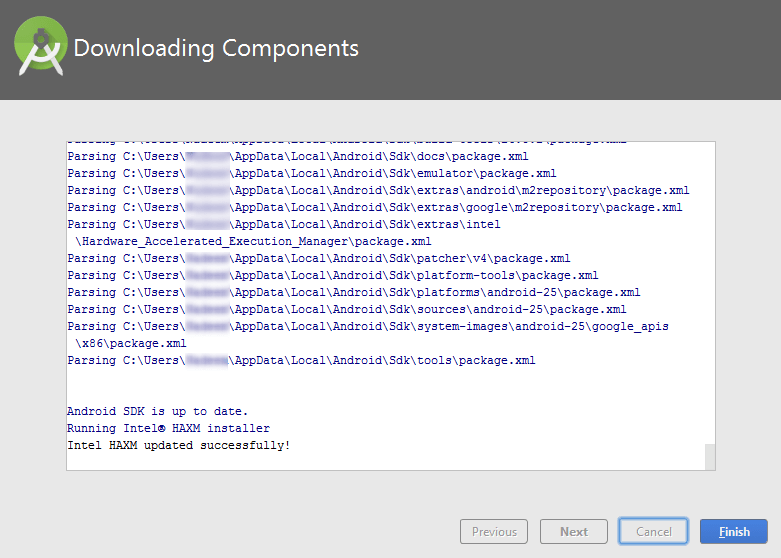
Verify settings window appears, click finish, the Android Studio will start downloading components, completing the download again click finish to complete the installation process.
Finally, the installation completes and Android Studio is ready to work on Android application projects.