In terms of framework classes, Web Parts are nested within zones, which are managed by a singular WebPartManager that talks to the application data store. Figure 7-1 illustrates how the parts are related.
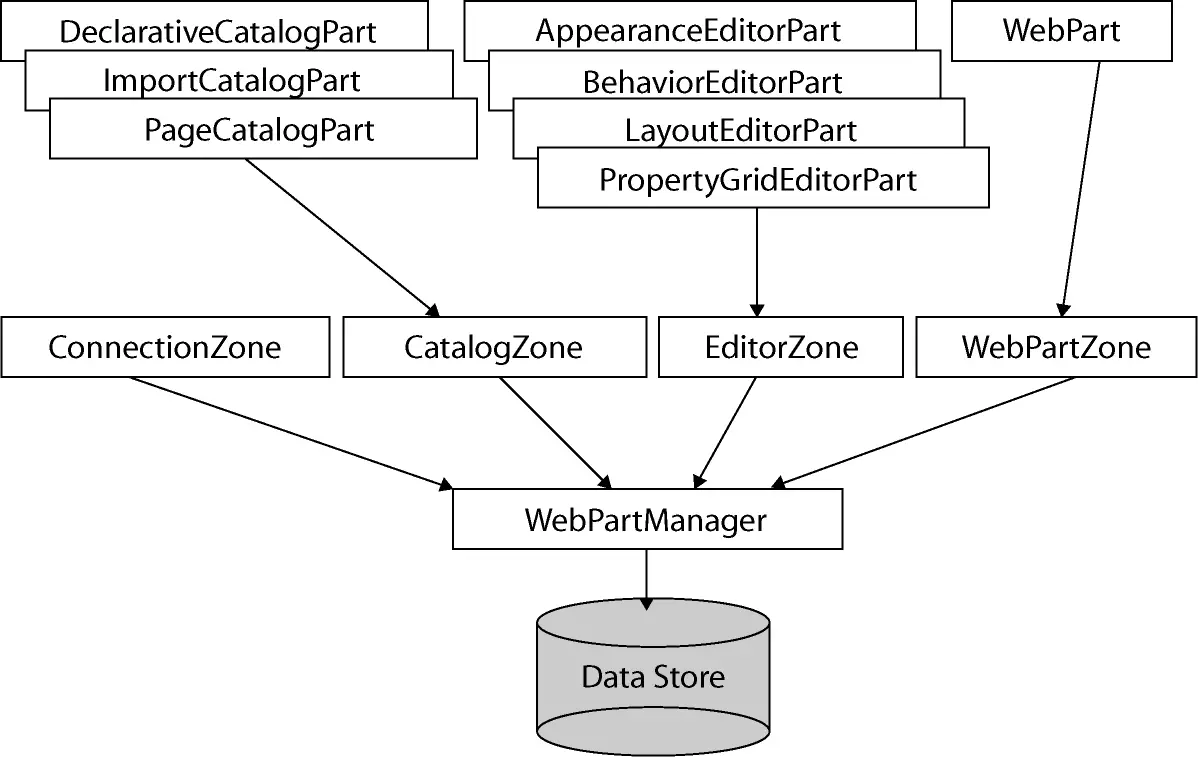
Figure 7-1 How Web Parts are managed within zones, which in turn are managed by an instance of WebPartManager.
WebPartManager and WebZones
As Figure 7-1 illustrates, WebPartManager manages each WebZone, which in turn manages each individual WebPart. Any page using at least one WebPart needs an instance of WebPartManager. The WebPartManager is responsible for managing and coordinating the zone(s) and the controls lying within them. The WebZone also manages any extra UI elements that go with the group of controls.
Within the zone, the ZoneTemplate contains all Web Parts. If a regular ASP.NET control is in a ZoneTemplate, ASP.NET will wrap it as a Web Part.
Built-in Zones
Web Parts zones manage the layout for a group of controls. Out of the box, ASP.NET includes four built-in zones. These are:
-
WebPartZone
This class represents basic functionality for managing server-side controls within zones on a page. WebPartZone controls are responsible for hosting both normal server-side controls as well as WebPart controls. Normal controls become wrapped by the GenericWebPart control at run time to add WebPart qualities to them.
-
CatalogZone
This zone hosts CatalogPart controls. Catalogs generally manage the visibility of parts on a page. The CatalogZone control shows and hides its contents based upon the catalog display mode. Web Part Catalogs are named such because they act as catalogs of controls from which the end user may select.
-
EditorZone
The EditorZone control represents the means through which end users may modify and personalize Web pages according to their preferences. Personalizing a Web site includes such things as setting up personal information (such as birthdays, gender-specific addressing, number of visits to the site, etc.). Other kinds of personalization involve setting up color schemes and layouts. The EditorZone helps manage this functionality as well as saves and loads those settings so they're available the next time the user logs on.
-
ConnectionZone
Web Parts are often more useful when they're connected together and communicate dynamically. The ConnectionZone manages this functionality.
Built-in Web Parts
In addition to including several zones straight out of the box, ASP.NET provides some ready-to-use WebPart controls as well. The WebPart controls fit into various functional categories. Some are for managing catalogs, while others are for managing editing. Each specific kind of WebPart fits within a particular zone. Here's a rundown of the currently available WebPart toolbox.
-
DeclarativeCatalogPart
When building a WebPart page, you may add parts dynamically or declaratively. Adding parts to a page dynamically means executing code that adds parts to the page at runtime. For example, imagine you had a Web Part represented as a class named "MyWebPart" (ultimately derived from System.Web.UI.Controls.WebParts). You may add the part to the page by creating an instance of the part and adding it to the WebPartManager using WebPartManager.AddWebPart. Adding parts to a page declaratively means including tag declarations within the ASPX file representing the WebPart page. The DeclarativeCatalogPart control manages server-side controls added declaratively to a catalog on a Web page.
-
PageCatalogPart
One way end users will probably want to customize a site is by opening and closing controls. The PageCatalogPart represents a page catalog for holding controls that were previously added to a page that is now closed. By managing the controls in a PageCatalogPart, the end user may add the controls back to the page.
-
ImportCatalogPart
The ImportCatalogPart enables users to import a Web Part description from XML data.
-
AppearanceEditorPart
The AppearanceEditorPart is used to edit the appearance properties of an associated WebPart or GenericWebPart.
-
BehaviorEditorPart
To support editing the behavior of a WebPart or GenericWebPart, ASP.NET provides the BehaviorEditorPart.
-
LayoutEditorPart
The LayoutEditorPart is for editing the layout properties and associated WebPart (or GenericWebPart control).
-
PropertyGridEditorPart
To support users in editing custom properties of WebPart controls, ASP.NET provides the PropertyGridEditorPart (the other EditorPart controls only support editing existing properties from the WebPart class).
To get a feel as to how to use WebPart controls let's run an example. The following exercise shows how to build a Web page from WebPart controls.
Using Web Parts
-
Create a new site. Name it UseWebParts.
-
In the default page, add a WebPartManager.
-
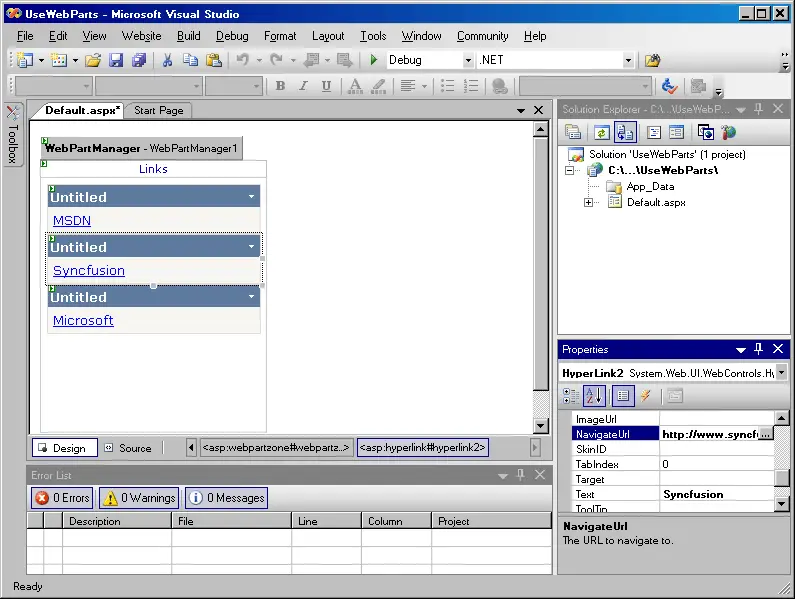
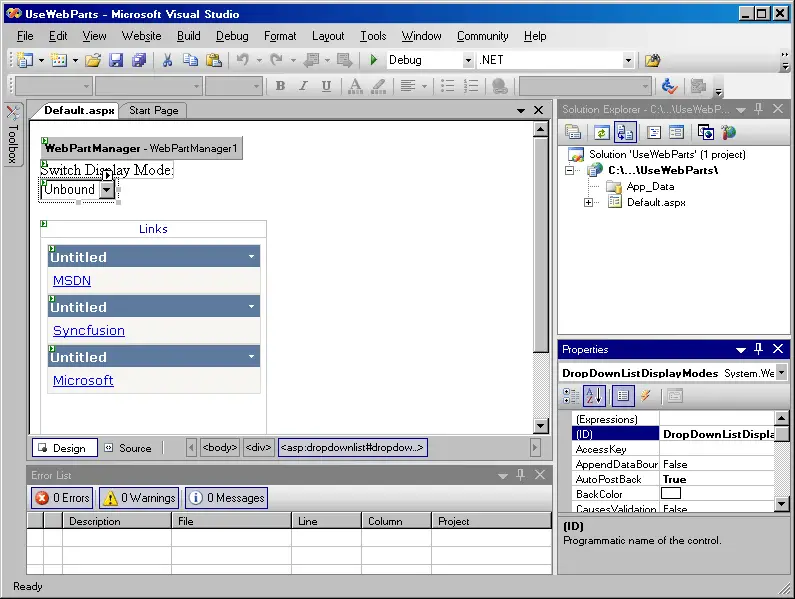
Drag a WebPartZone onto the page. Set the ID to WebPartZoneLinks. Set the HeaderText to Links. Set the HeaderStyle font Fore color to a blue (so you can see it better later during editing mode). Set the AutoFormat to a nice style such as Professional.
-
Add some HyperLinks to the WebPartZone, as shown here:
-
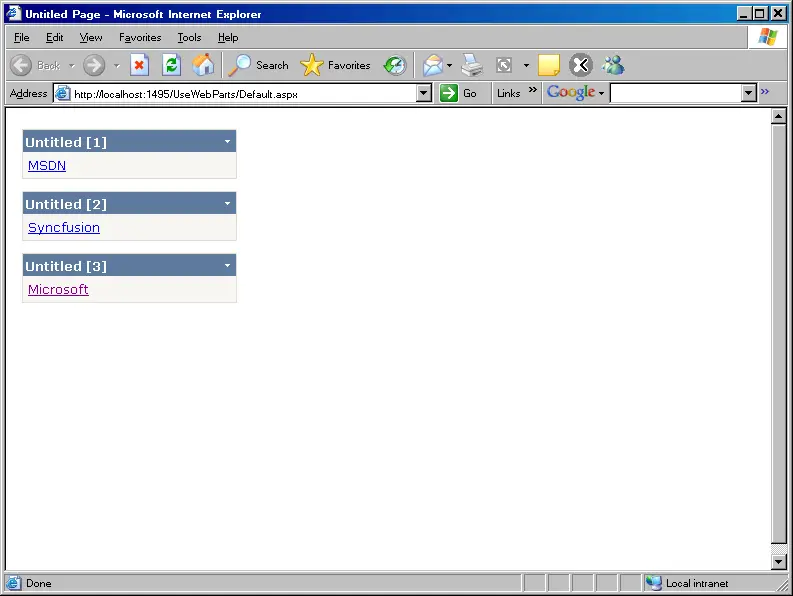
Run the page. You should see the links appear on the left side of the page.
-
Add a DropDownList to the page. Name it DropDownListDisplayModes. This will be used to switch the display mode back and forth.
ASP.NET 2.0 Web Parts support five separate display modes. They are:
-
BrowseDisplayMode
This is normal mode. No personalization or editing is available here.
-
DesignDisplayMode
This mode turns on drag-and-drop layout personalization.
-
EditDisplayMode
This option turns on personalization or customization of WebPart properties and permits a user to delete Web Parts that have been added to the page dynamically.
-
ConnectDisplayMode
This mode allows a user to connect Web Parts at runtime.
-
CatalogDisplayMode
This mode allows a user to add Web Parts into a WebPartZone at runtime.
-
BrowseDisplayMode
-
Update the _Default class to support switching modes. Add a WebPartManager member named _wpManager to the class to hold an instance of the current WebPartManager. Update the Page_Init method to attach an event handler to the page's InitComplete event. In the InitializationComplete handler, get the current WebPartManager and stash the reference in the _wpManager member, as shown in this listing:
public partial class _Default : System.Web.UI.Page
{
    WebPartManager _wpManager;
    protected void Page_Load(object sender, EventArgs e)
    {
    }

    void Page_Init(object sender, EventArgs e)
    {
        Page.InitComplete += new EventHandler(InitializationComplete);
    }

    public void InitializationComplete(object sender, System.EventArgs e)
    {
        _wpManager = WebPartMan ager.GetCurrentWebPartManager( Page);
        String browseModeName = WebPartMa nager.BrowseDisplayMode.Name;
        foreach  (WebPartDisplayMode mode in
          _wpManager.SupportedDisplayModes)
        {
            String modeName = mode.Name;
            // Make sure a mode is enabled before add ing it.
            if (mode.IsEnabled(_wpManager))
            {
                ListItem item = new ListItem(modeName, modeName);
                DisplayModeDro pdown.Items.Add( item);
            }
        }
    }
}
The code listed in the above handler interrogates the current WebPartManager for the supported display modes and puts them in the DropDownList.
-
Add a handler for the DropDownListDisplayModes drop-down list box when the SelectedIndexChanged event occurs. Have the handler switch the WebPart page into the selected mode. The following code shows how.
protected void DropDownListDisplayModes_SelectedIndexChanged( object sender, EventArgs e) { String selectedMode = DropDownListDispla yModes.SelectedValue; WebPartDisplayMode mode = _wpManager.SupportedDisplayModes[ selectedMode]; if (mode != null) _wpManager.DisplayMode = mode; } -
Finally, override the Page_PreRender method to display the selected display mode in the drop-down list box.
void Page_PreRender(object sender, EventArgs e) { ListItemCollection items = this.DropDownListDisplayModes.Items; int selectedIndex = items.IndexOf( items.FindByText(_wpManager.DisplayMode.Name)); DropDownListDisplayModes.SelectedIndex = selectedIndex; } -
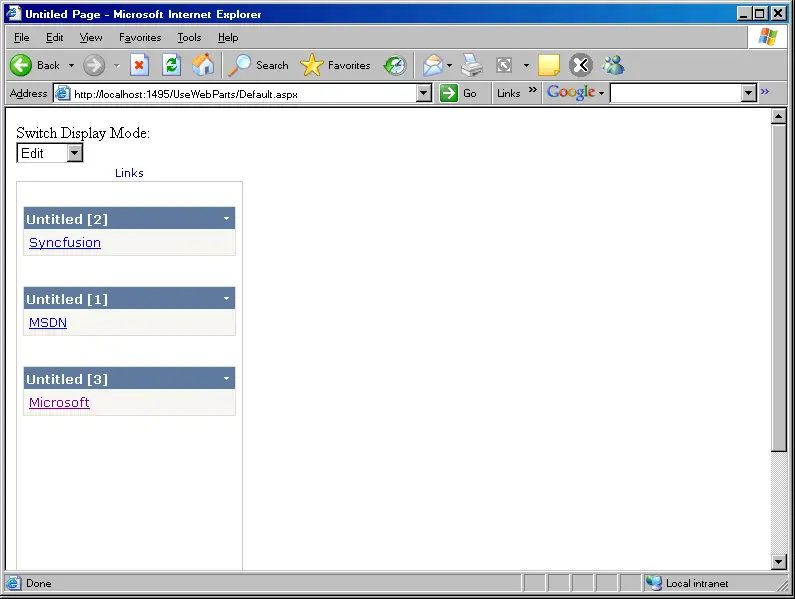
Run the site. Immediately (without doing anything else), you may enter Design mode, as shown in the following graphic:
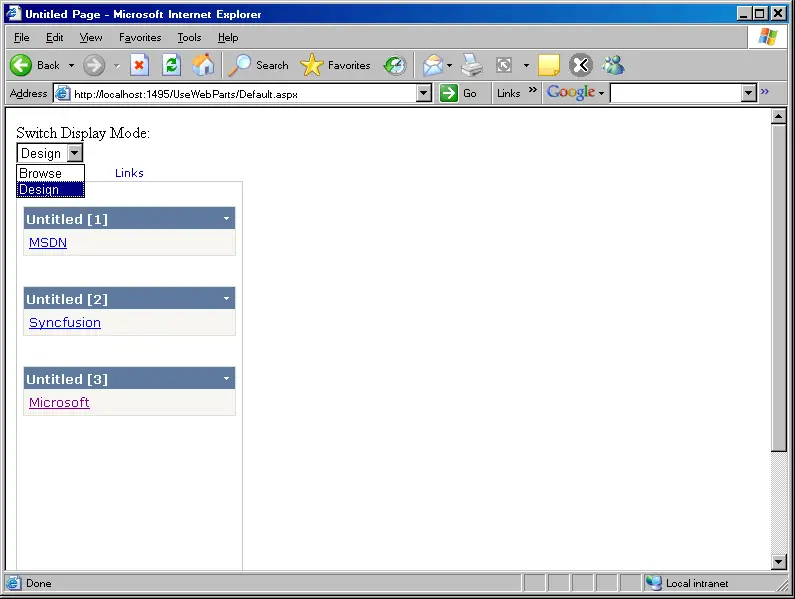
You'll see more modes later as you add more zones. Notice how the title now shows up. You may pick up items on the page and move them around now. For example, you may pick up one of the links and move it into the Links WebPartZone.
-
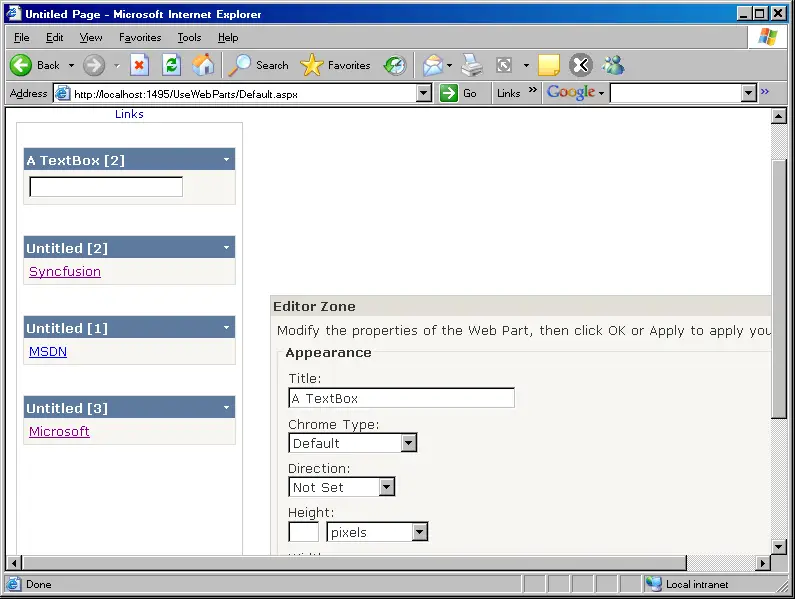
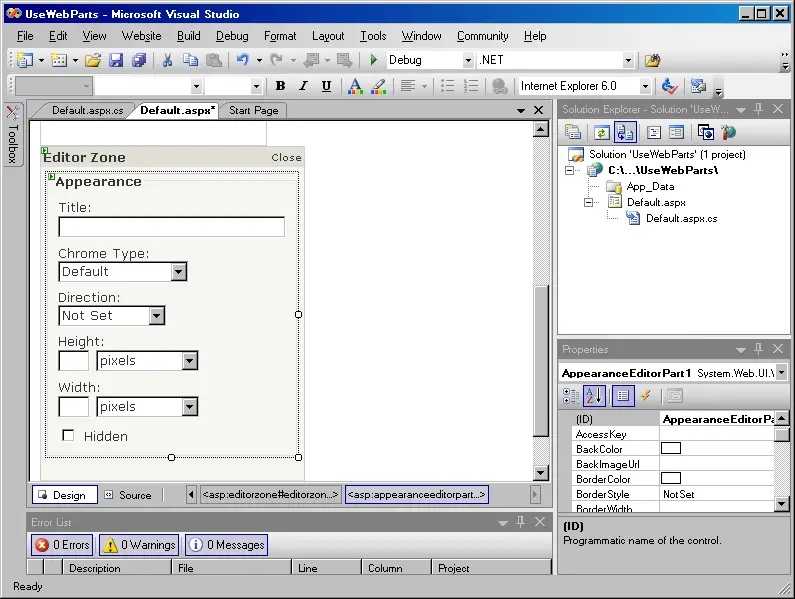
Now add some more functionality. Add an EditorZone to the page. Then in the EditorZone, add an AppearanceEditorPart, as shown in the following graphic:
-
Now run the site. You'll see a new option in the Display Mode drop-down list box: the Edit mode.
-
Now go back and add a CatalogZone. Drop a DeclarativeCatalogPart into the new WebPartZone and select Edit Template.
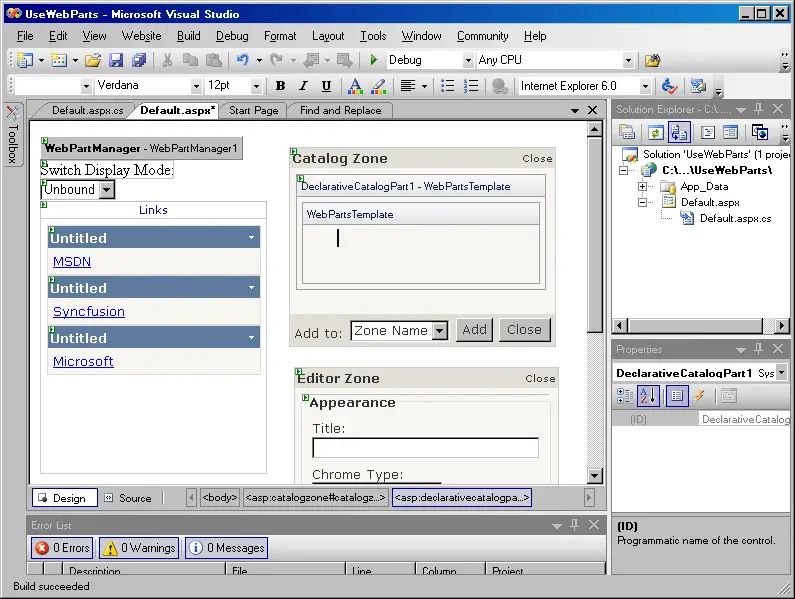
-
While in Template Editing mode, pick up a TextBox control from the toolbox and drop it into the DeclarativeCatalogPart. Then update the actual source code to add a Title attribute, as shown:
<ZoneTemplate>
   <asp:DeclarativeCatalogPart
      ID="DeclarativeCatalogPart1" runat="server">
      <WebPartsTemplate>
        <asp:TextBox ID="TextBox1"
          Title="A TextBox"
          runat="server">
        </asp:TextBox>
      </WebPartsTemplate>
   </asp:DeclarativeCatalogPart>
</ZoneTemplate>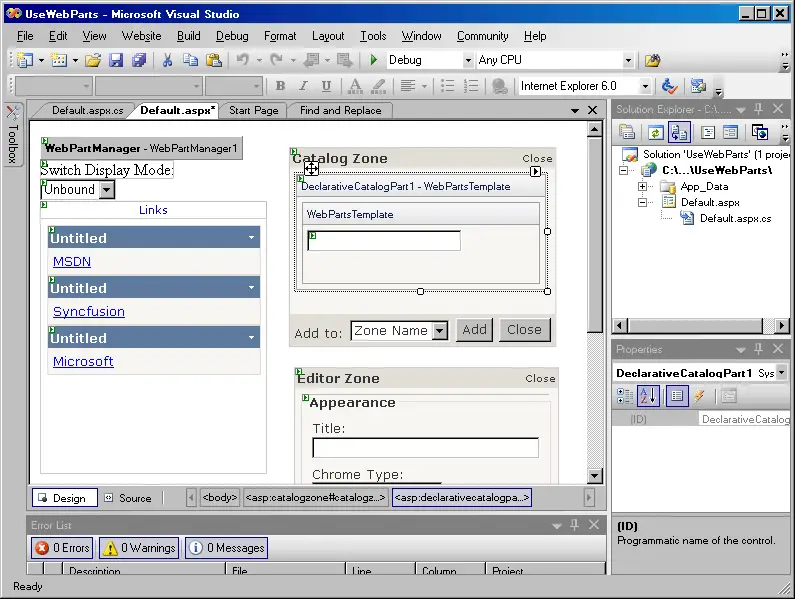
-
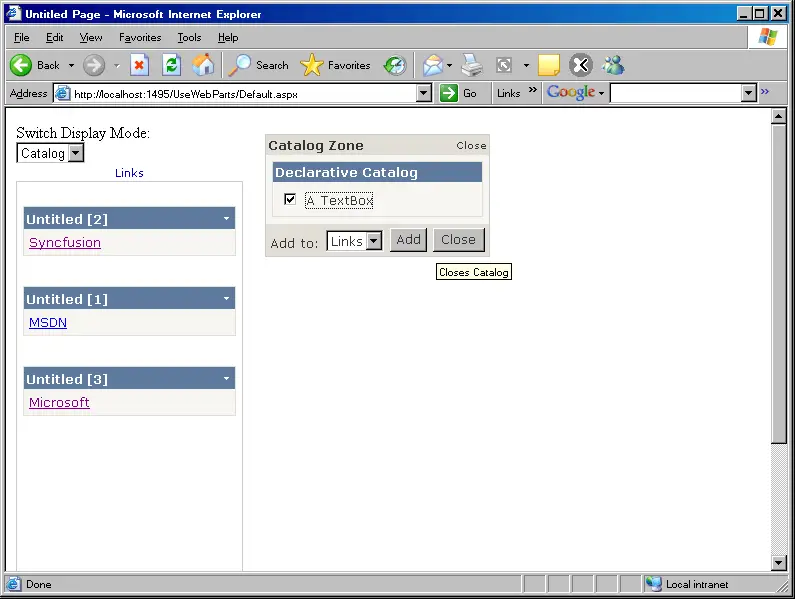
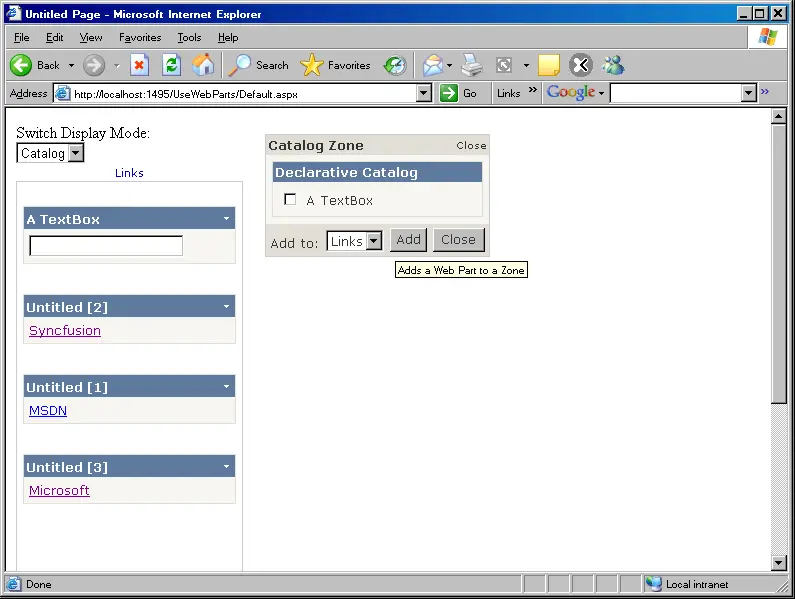
Now run the page again. Switch to Catalog Mode. Mark the A TextBox check box and add a TextBox to the Links zone. (This may not seem too interesting yet. However, in the next exercise, you'll write a hyperlink Web Part that you may add to the links page from the catalog-and then update it with your own links and display names).
-
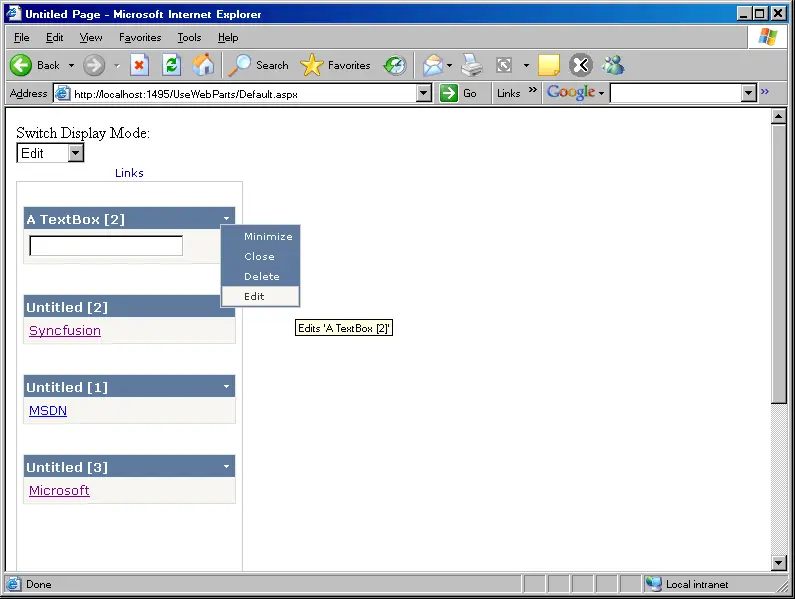
Run the page and get into Edit mode. Select a local menu from one of the Web Parts. Select Edit. You should see a collection of controls for editing the Web Part appearing in the Editor Zone, like so: