- Choose View > Toolbars > Customize to open the Customize dialog box and then
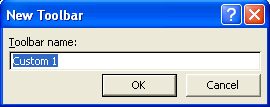
click the Toolbars tab and then click the New button to open the New Toolbar dialog box,
shown in below.
- Enter your name for the custom toolbar in the Toolbar Name text box and then click OK.
Excel adds the custom toolbar's name to the Toolbars list box in the Customize dialog box and displays a blank floating toolbar that shows only the first few letters of its name. - To add a tool to the new toolbar, select the Commands tab in the Customize dialog box,
click the desired command category in the Categories list box, scroll to the command's
icon in the Commands list box, and then drag the command's icon from the Customize dialog
box to the new toolbar.
Excel automatically expands the toolbar to accommodate the buttons you add. - Repeat Step 3 until you have added all the tools you want to appear on your new toolbar.
- If you want to group the buttons on the new toolbar, locate the buttons in front of which
you want the separators to appear and then drag the buttons slightly to the right.
You can also reposition the buttons you add to a new toolbar simply by dragging them to their places. - When you have the new toolbar exactly the way you want it, click the Close button to close the Customize dialog box.
After creating a custom toolbar, be sure to test out its buttons by clicking them at the appropriate moments in building or editing your spreadsheet (not all Excel commands can be executed on a blank worksheet).
The process for creating a custom menu is the same as for a toolbar except that to start the custom menu, you select the New Menu item at the bottom of the Commands tab of the Customize dialog box. Then you drag this New Menu item from the Customize dialog box to the place where you want it to appear on the Excel menu bar. To rename the menu to something besides New Menu, right-click New Menu on the Excel menu bar and choose Name from the shortcut menu. Then replace New Menu with the new name you have chosen.
If you want to assign a hot key to the name you give your new custom menu, type an ampersand (&) immediately in front of the letter in the menu name. (Just make sure that it is not already assigned to one of the other items on the same menu.)
To add an item to your new menu, drag the command from the Customize dialog box to the tab under the menu. (Don't release the mouse button until the bold, I-beam-type indicator appears on the tab and the box with the plus sign (+) appears next to the mouse pointer.) Removing and repositioning items on your custom menu is no different from making these types of modifications to a standard pulldown menu.