Flash documents can play over a length of time, like movies or sound, which is measured using frames. Layers are like transparencies that stack on top of one another, and each layer can contain images, text, or animations that display on the Stage. You'll learn more about frames and the Timeline in Part 2 of this tutorial, "Basic Tasks: Creating a banner, Part 2".
The FLA file you're working on has one layer (Layer 1) with contents on a single frame (Frame 1). This is the default way that a Flash document opens.
In this exercise, you lock and rename Layer 1. Often you'll want to place objects in a particular position on the Stage. To help you keep those objects in place, Flash enables you to lock layers, so you cannot select the items on a layer and accidentally move them.
In this section, you will complete the following tasks:
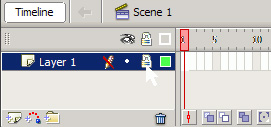
Select Layer 1 in the Timeline and click the dot below the lock icon, as shown in the following figure.
Lock a layer so its contents aren't accidentily moved or deleted from the Stage. You can also prevent inadvertently adding other assets to that layer.
With your only layer locked, you need to add new layers before you can add any other objects to the Stage. You cannot add new objects to a locked layer.
Select the Selection tool in the Tools panel, and double-click the name Layer 1.
When you double-click a layer name, you can modify the name of the layer.
Type background into the layer name to rename the layer. Then save your file.
When you start building projects with many layers, layer names like Layer 1 and Layer 14 don't help you determine what's on that layer. Giving layers a descriptive name is a good practice to adopt.
Select File > Save before you proceed to the next exercise ("Creating a new layer").
You can also organize layers into layer folders. For more information, see "Organize layers in a folder".
Creating a new layer
In just about any Flash project where you use imported graphics and animation, you'll need to create at least a few layers. You need to separate certain elements onto their own layers, particularly when you start to animate objects. You can also stack graphics on top of each other, and even create a sense of depth or overlapping by using multiple layers.
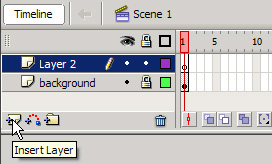
Select the background layer on the Timeline, and click Insert Layer to create a new, empty layer.
The new layer is created above the background layer (see the following figure).
Click Insert Layer to insert a new layer above the currently selected layer.
Double-click the name of the new layer so the layer's name becomes editable.
Type animation to rename the new layer.
Graphics on the Stage stack according to the layers on the Timeline. For example, anything that you put on the animation layer will appear above the image on the background layer. You will add animation to this second layer in Part 2 of this tutorial.
Select File > Save before you proceed to the next exercise ("Importing to a layer").
If you need to reorganize your layers you can use the Selection tool to select and then drag a layer above or below other layers on the Timeline.
Importing to a layer
In an earlier exercise, "Importing graphics", you imported the gnome.png image directly into the document's library. Then you dragged the image onto a selected layer on the Stage. You can also import assets directly to the Stage instead of into the library. First you need to select the frame into which you want to import the image on the Timeline. Then you can import the image onto that frame, which displays on the Stage. You use this technique to import an image in the following exercise.
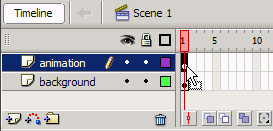
Select frame 1 of the animation layer.
You need to import star.png image to the animation layer.
Select File > Import > Import to Stage.
The Open dialog box appears where you can select an image from your hard disk. Find the folder of this tutorial's source files on your hard disk.
Select star.png in the tutorial's source files, and click Open (Windows) or Import (Macintosh).
The image imports to the animation layer (see the following figure), and then it appears on the Stage.
The image imports to the frame on the layer that you select on the Timeline. You will learn more about the Timeline and layers in Part 2 of this tutorial, "Basic Tasks: Creating a banner, Part 2".
Open the Library panel (Window > Library).
The image you just imported to the Stage also appears as an asset in the library. Even if you import an asset directly to the Stage, Flash always stores the assets you import in the library as well.
Click the Selection tool in the Tools panel.
Move the star.png file on the Stage to just above the gnome's head in the image, as shown in the following figure.
Move the star.png image just above the gnome's head.

Select File > Save to save your document before moving on to "Test the application".