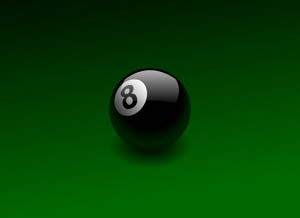
In the Animation Easing folder, open the file called tween_start.fla. This file contains some graphics that you will use to create the animation.
Create a motion tween
To animate the eight-ball graphic over time, you need to insert enough frames in the Timeline to lengthen the time from the beginning of the FLA file to its end. In this section, you will add frames to the Timeline and then create a motion tween within those frames.
Add the necessary frames to the Timeline
To add the necessary frames to the Timeline:
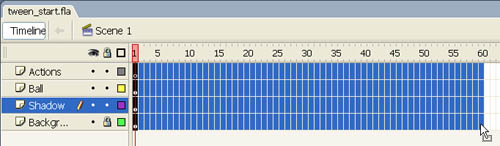
- In the Timeline, drag the pointer to select all the frames from 1 to 60 in all four layers.
Selecting multiple frames in the Timeline
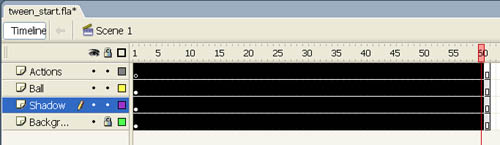
- Select Insert > Timeline > Frame. You should see the frames added to all four layers in the Timeline.
The frames added to the Timeline
Create a motion tween in the new frames
To create a motion tween in the new frames:
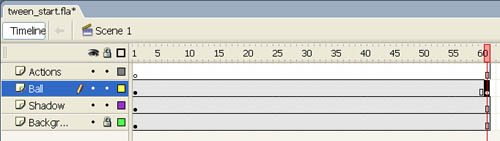
- Select Frame 61 of the layer named Ball.
- Select Insert > Timeline > Keyframe.
The keyframe added in Frame 61 of the Timeline
- On the Stage, press Shift and drag the eight ball downward until the bottom of the eight ball is in the middle of the shadow graphic.
The eight ball correctly placed on the shadow
 You have now defined a new position for the eight ball on the Stage in Frame 61. The ball now has one position for the first 60 frames, and a different position for the keyframe in Frame 61. When you define the motion tween, Flash calculates the positions in each frame for the eight ball, that is, between its original position above the Stage and its final position in the middle of the shadow.
 - In the Timeline, click the Ball layer name. This selects all the frames in that layer.
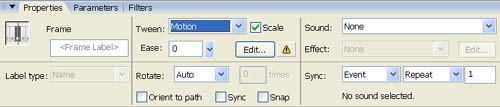
- In the Property inspector, select Motion from the Tween menu. This applies the motion tween to the selected frames.
The Motion selected in the Tween menu of the Property inspector
- In the Timeline, drag the playhead from Frame 1 to Frame 61. You will see the eight ball animate downward towards the shadow graphic.
The speed of the ball's motion is constant throughout the animation. In the next section you will learn to control the speed with which your animations begin and end their motion.
- Select File > Save As.
- Name the file my_tween_start.fla and click OK.
Use easing controls
You can control the speed at which your animations start and stop with the easing controls in Flash. The term easing is used because when you make an animation, such as dropping the eight ball slowly and then speeding it up, it is considered to be "easing in" to its motion. When slowing an animation at the end, it is said to be "easing out". Flash also allows you to perform easing in the middle of a tween with its custom easing controls.
Ease in the eight-ball animation
- In the Timeline, select the entire Ball layer by clicking the layer name.
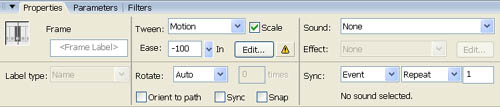
- In the Property inspector, drag the Ease slider down until the value is -100.
This will provide the maximum amount of easing in, thereby causing the eight-ball motion to start slowly and accelerate.
The Ease slider set to -100
- Drag the playhead across the Timeline and observe the animation speed.
Ease out the eight-ball animation
- In the Timeline, select the entire Ball layer by clicking the layer name.
- In the Property inspector, drag the Ease slider up until the value is 100.
This will provide the maximum amount of easing out, thereby causing the eight-ball motion to start abruptly and then decelerate.
- Drag the playhead across the Timeline and observe the animation speed.
- In the Timeline, select the entire Ball layer.
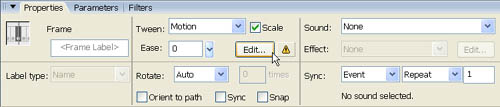
- In the Property inspector, drag the Ease slider down until the value is 0.
This will remove the easing from the animation.
Flash also provides more precise control of how easing occurs and allows you to add easing in the middle of a tween. In the next section, you will apply custom easing settings to the animation instead of using the Ease slider.
Add custom easing settings to the eight-ball tween
- In the Timeline, select the entire Ball layer.
- In the Property inspector, click Edit next to the Ease slider.
The Edit button in the Property inspector
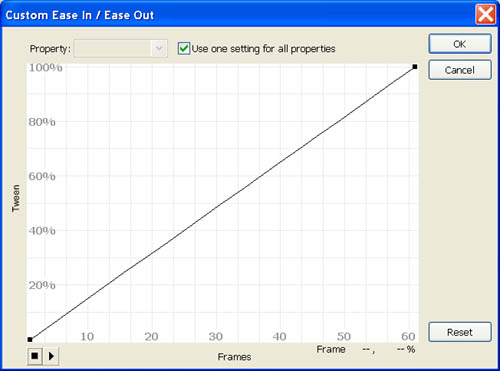
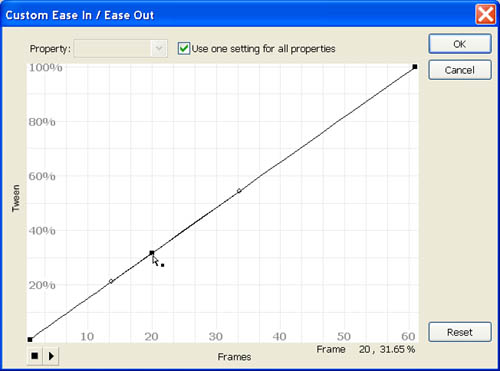
 The Custom Ease In / Ease Out dialog box displays a graph representing the degree of motion over time. Frames are represented by the horizontal axis, and the percentage of change is represented by the vertical axis.
The Custom Ease In / Ease Out dialog box
- In the Custom Ease In / Ease Out dialog box, Control-click (Windows) or Command-click (Macintosh) on the diagonal line where it crosses Frame 20 in the horizontal axis and on about 32% in the vertical axis. Click just once. This adds a new control point to the line.
Clicking the Ease In / Ease Out diagonal line
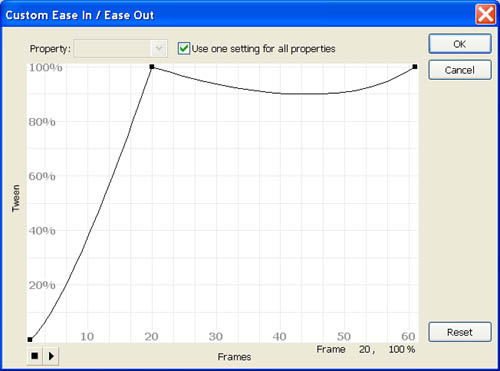
- Drag the line to the top of the graph (the 100% line) while keeping it at Frame 20 on the horizontal axis. The line is now a complex curve.
Dragging the control point to the top of the graph

- Drag the left vertex handle of the new control point to the right until it touches the control point. Drag the right vertex handle to the left until it touches the control point. This makes the curve pass through the control point with a simple sharp angle.
The control point with the vertex handles dragged onto the point
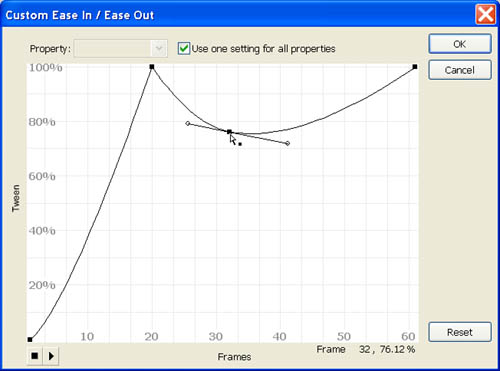
-
Control-click (Windows) or Command-click (Macintosh) the flat part of the curve at the top of the graph near Frame 32 and drag the new point downward to approximately 76% along the vertical axis.
Dragging the point at Frame 32
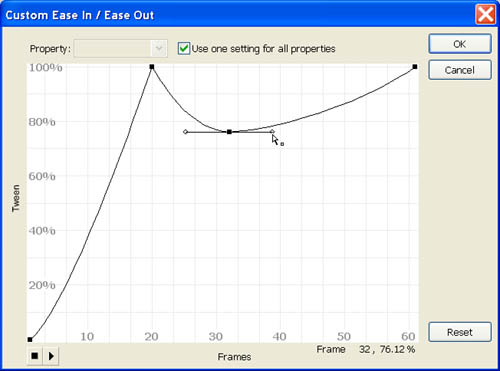
- Drag the vertex handles so that the line connecting them to the control point is horizontal and each handle is the same distance from the control point.
Dragging the vertex handles
-
Control-click (Windows) or Command-click (Macintosh) the curve at about Frame 44 and drag it up to the 100% line.
- Drag the vertex handles for the new control point onto the control point.
- Control-click (Windows) or Command-click (Macintosh) the curve at about Frame 52 and drag it down to about 95% on the vertical axis.
- Drag the vertex handles so that the line connecting them to the control point is horizontal and each handle is the same distance from the control point.
The completed Ease In / Ease Out curve
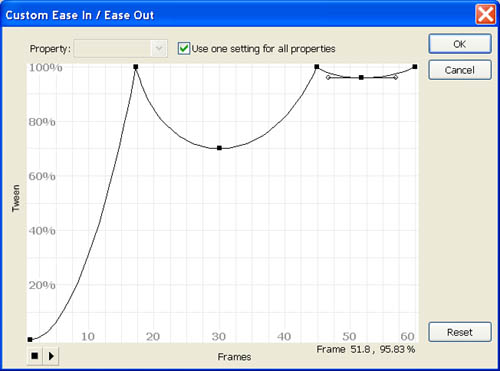 You have now created a complex easing curve that represents a bouncing eight ball instead of a simple one-way motion tween. You can use the Play button in the Custom Ease In / Ease Out dialog box to preview your animation on the Stage while you experiment with the tween curve.
-
In the lower-left corner of the Custom Ease In / Ease Out dialog box, click Play. Review the live preview of your animation on the Stage.
- Click OK to close the dialog box.
- Select File > Save to save your FLA file.
Create a motion tween with an alpha setting
In this section, you will create a tween of the alpha value of the shadow graphic that appears under the eight ball. Because the changes in the shadow should match the speed and timing of the bouncing eight ball, you will use the same easing curve you created in the previous section.
Create the tween of the alpha value for the shadow
- In the Timeline, select Frame 61 of the layer called Shadow.
- Select Insert > Timeline > Keyframe.
- Drag the playhead to Frame 1.
- Click outside the Stage to deselect all selections.
- Click the shadow movie clip on the Stage.
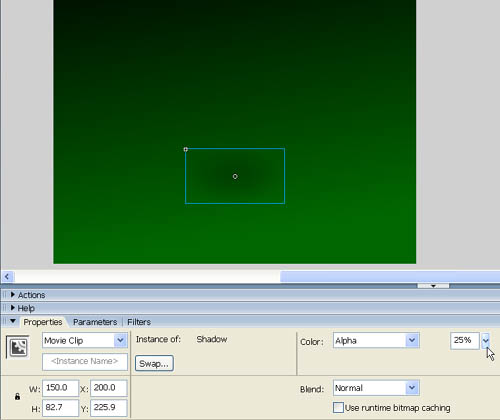
- In the Property inspector, select Alpha from the Color menu.
- Drag the Alpha slider down until the value is 25%. You have now set the alpha value to 25% in Frame 1 and 100% in Frame 61.
Setting the alpha value of the Shadow movie clip on the Stage to 25%
- In the Timeline, click the layer named Ball to select the frames in that layer.
- In the Property inspector, click Edit next to the Ease slider.
- In the Custom Ease In / Ease Out dialog box, press Control-C (Windows) or Command-C (Macintosh) to copy the easing curve you applied to the ball tween.
- Click Cancel to dismiss the dialog box.
- In the Timeline, click the layer named Shadow to select all the frames in that layer.
- In the Property inspector, select Motion from the Tween menu.
- Click Edit next to the Ease slider.
- In the Custom Ease In / Ease Out dialog box, press Control+V (Windows) or Command+V (Macintosh) to paste the easing curve from the ball tween.
- Click Play in the dialog box to preview the animation on the Stage.
By applying the same curve to the Shadow tween, you have made the transparency of the shadow animate according to the proximity of the ball. This way the shadow appears to become darker as the ball approaches the surface and lighter as the ball bounces away from the surface.
- Click OK to close the dialog box.
- Select File > Save to save your FLA file.