A value list displays a list of options that you specify.
Create a value list by selecting Lookup Wizard for the field's Data Type.
Select a source for the lookup field's values.
Enter the options you want to see in the value list.
For example, if you ship a product using three different courier services, you could create a value list that displays the three courier services, such as AirBorne, FedEx, and UPS.
Although it's possible to change the options displayed in a value list, doing so is a rather cumbersome process. For that reason, you should only use for values that will not change very often. If you want to display a lot of options, such as a list of state abbreviations or values that may change frequently, you should create a table to store those values and then display them with a lookup list instead. It's a lot easier to change values in a table than it is to change options in a value list.
This lesson will show you how to create a value list that contains several static options.
-
If necessary, open the Lesson 4 database and double-click the tblCustomerTours table.
The tblCustomerTours table appears.
-
Switch to Design view by clicking the View button on the toolbar.
Let's create a value list that will make it easier to enter data into the Ship Via field.
-
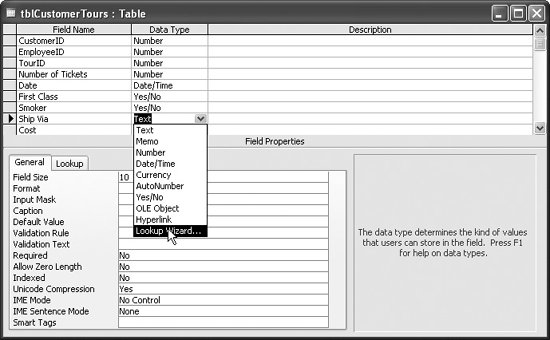
Click the Data Type box next to the Ship Via field, click the list arrow, and select Lookup Wizard, as shown in figure.
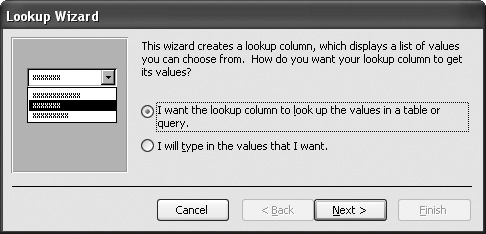
The appears, as shown in figure, and asks if you want your lookup field to get its values from another table or query or if you want to type a list of options yourself. Since you want to personally enter the options that appear in the value list, you will want to select the second option.
-
Click the I will type in the values that I want option and click Next.
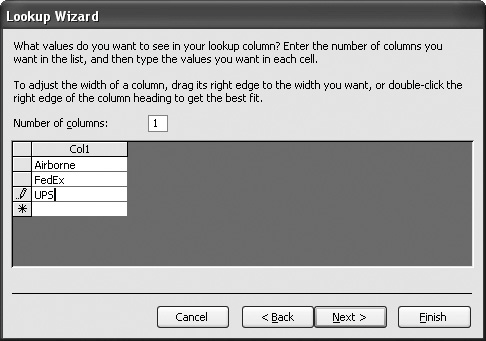
The next step of the Lookup Wizard appears, as shown in figure. This step is pretty easy simply enter the options you want to be displayed in the value list.
-
Click in the Col1 box, type
Airborne, press Tab, typeFedEx, press Tab, and typeUPS.The value list will display these three values.
If you want to add a lot of options (ten or more) to your value list or if the values in the list will change, consider creating a table to store the values and display them with a lookup list instead. Adding the initial options to a value list is easy, but adding, changing, or deleting these values can be a burden.
-
Click Next.
You've finished creating the value list!
-
Complete the Lookup Wizard by clicking Finish.
Let's see how our new value list works.
-
Click the Save button on the toolbar to save your changes and then click the View button to display the table in Datasheet view.
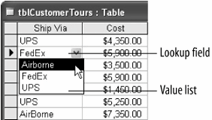
To display the value list for the Ship Via field, simply click the Ship Via field and click the list arrow.
-
Click the Ship Via field for any record. Click the list arrow that appears in the field.
Out pops the value list with the three couriers you entered in Step 5.
-
Select FedEx from the lookup list.
You can also select an option from a lookup field by typing the first few letters of the entry.
To create a value list:
-
display the table in design view.
-
click the data type box of the field you want to create the value list for, click the list arrow, and select lookup wizard.
-
click the i will type in the values that i want option and click next. specify the number of columns you want to appear in the value list.
-
enter the values in the list. resize the column widths if necessary. click next when you're finished.
-
enter a label for the lookup column and click finish.