Unlike number fields, text fields don’t have any ready-made settings built into them and must be formatted manually. Luckily, text fields don’t have nearly as many formatting options as number, currency, and date/time fields.
To manually format a text field:
- Make sure the table is displayed in the
Design Viewand click the text field you want to format. - Click the
Formatbox in the field properties section. - Enter the appropriate text formatting symbols.
Change Text Case
The most common of these characters are the greater than symbol >, which makes all text in the field appear in uppercase, and the less than symbol <, which makes all text in the field appear in lowercase, regardless of how it was entered. In both cases, Access actually stores the data exactly as it was typed.
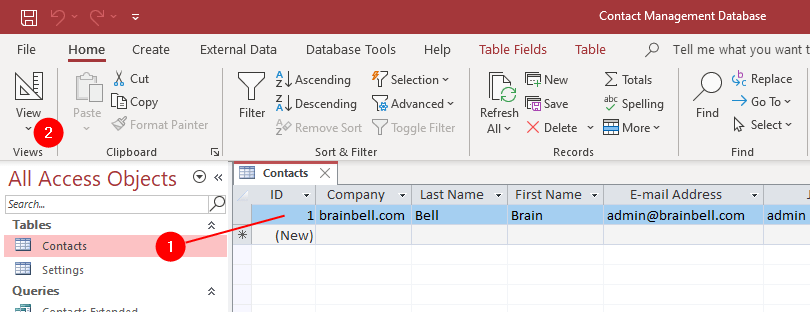
This example will give you some practice formatting text fields.
- Open a database, double-click the table, and enter a sample record in lowercase letters.
- Click the
Viewbutton on theHometab to display the table inDesign View.
- Click the name of the field you want to format.
- Click the
Formatbox in theField Propertiessection and type a greater than symbol>. - Click the
Savebutton (CTRL+S) on the Quick Access Toolbar to save your changes. - Switch to
Datasheet Viewby clicking theViewbutton on theHometab to see how the field looks with its new format.

- Notice that the lowercase text you entered back in Step 2 now appears in uppercase.
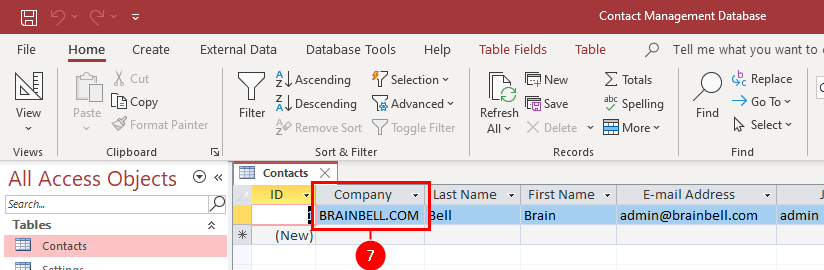
Your table should look like the above figure. Access will display the contents of the text field in uppercase, even if it was entered in lowercase.
Remember that the Format property only changes how data is displayed onscreen, not how the data is actually stored in the field.
Formatting Symbols for Text Fields
Table contains formatting symbols for text fields:
| Character | Description |
|---|---|
| > | All characters that follow are converted to uppercase. |
| < | All characters that follow are converted to lowercase. |
| @ | Required character. For example: @@@-@@@-@@@ will display 111222333 characters as 111-222-333. This format displays space if there isn’t a character, e.g. the 22 display as - - 22. |
| & | Optional character. For example: &&&-&&&-&&& will display 111222333 characters as 111-222-333. This format displays nothing if there isn’t a character, e.g. the 22 display as --22. |
| ! | Fill (or align) the text from the right. For example:@@@-@@@-@@@ displays the 22 display as - - 22.!@@@-@@@-@@@ displays the 22 display as 22 - - . |
| * | The character that follows * becomes a fill character. For example: &*! will display the Alert text in the field as Alert!!!!!!! |
| [color] | Applies a color to all characters in a section of the format. Can be black, blue, cyan, magenta, red, yellow, or white. For example: [Blue] will display text in blue color. |
| “Any Text” | Characters enclosed in double quotation marks are treated as literal characters. For example: @" Kg" or & " Kg" displays the 40 as 40 Kg in the field. |
| Spaces, +, -, (), $, ¥, and £ | Literal characters. can be inserted without double quotation marks. |
Conditional Formatting
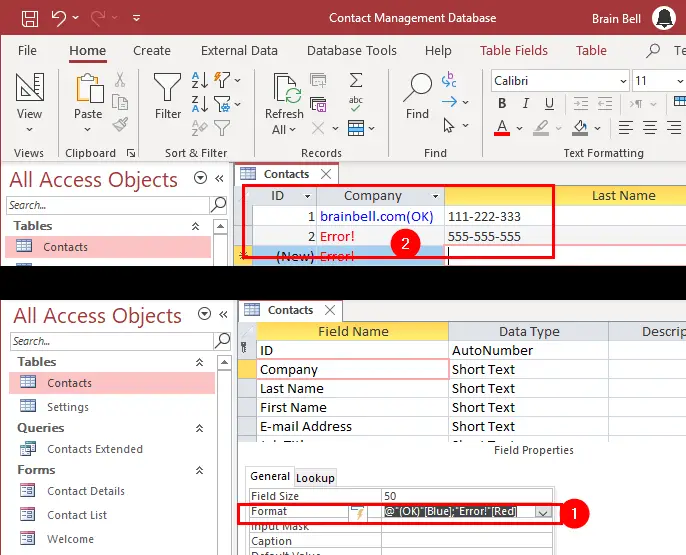
Consider the following format:
@"(OK)"[Blue];"Error!"[Red]
This format specifies two customizations separated by a semicolon. The first part append (OK) in blue if characters are entered in the field. The second part displays Error in red if the field is empty.