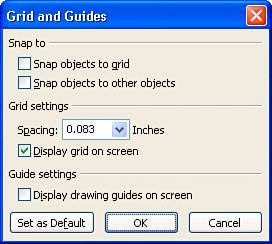
Grids and guidelines help you line up drawing items; you can be a little imprecise as you add items and then, when you're finished, allow PowerPoint to line things up precisely. When working with pictures and other drawing tools, it's helpful to show gridlines on the screen. To do so, choose View, Grid and Guides (Figure 5) and select the Display Grid On Screen check box.
Figure 5. PowerPoint lets you control the granularity of its grid, and whether drawings should be snapped to the grid.
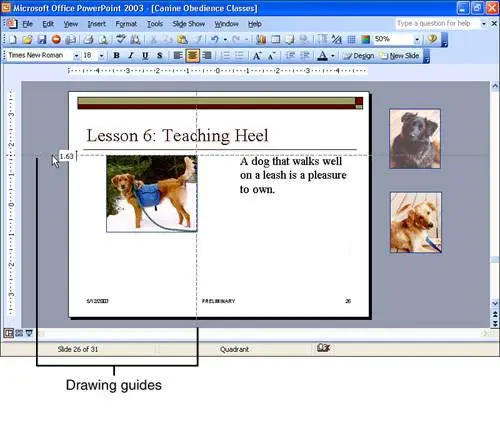
Sometimes you want to know how far a picture lies from dead center. That's where drawing guides come in handy. If you choose to Display drawing guides onscreen, you'll get horizontal and vertical lines that you can use to gauge how far any particular item on the slide sits, compared to dead center (Figure 6). Click the guide, and its distance from center appears as a ScreenTip. You can drag the guides into any position you like, making even fine layout tasks easier.
Figure 6. PowerPoint's drawing guidesone horizontal, one verticalare shown here. Note that we've "parked" pictures in the unused region around the slide.
In the Grid and Guides dialog box, you can take your pick of two Snap To check boxes. You can choose to line up shapes so they snap to the grid, or use the Snap Objects to Other Objects setting to make them automatically abut each other or share a common axis.
PowerPoint also allows you to park pictures in the gray area outside a slide, but still in the slide pane. This option can come in handy if you have a few different pictures you're considering for the slide, but can't make up your mind which one would be best: Parking them in the margin lets you swap them in and out quickly. To get a picture into the margin, click and drag on the picture, moving it to the edge of the pane. It takes a little practice to get a picture positioned this way, but the picture remains handy without appearing on the slide itself. (This option is most useful in Normal view when you close the Outline/Slides pane on the left.)