The Solution:
If you're using tabs to align columns of text, consider using a table instead. But if you're convinced that tabs are the way to go, here's what you must know to use them effectively.
To work easily with tabs, you need to be able to see where you've put themor (worse) where someone else has put them in the document you're trying to fix. You can toggle the display of all formatting marks by clicking the Show/Hide button on the Standard toolbar or pressing Ctrl+Shift+8 (or Ctrl+*, if you prefer to think of it that way). To see just tabs, choose Tools » Options, click the View tab, check the "Tab characters" box, and click the OK button. Each tab then appears as a small arrow pointing to the right.
Word starts you off with built-in tabs at half-inch intervals. These are fine for occasional use, but if you want to align columns of text precisely, you should set the tabs manually instead. If you use the built-in tabs to align text, the positioning will change if you change the margins or the font, or if you paste the aligned text into another document that has different settings. Your husband's computer may have substituted a font for one you used, or it may have applied his version of a template that has different tab settings from your version.
You can change the default tab interval by choosing Format » Tabs and setting the interval you want in the "Default tab stops" text box.
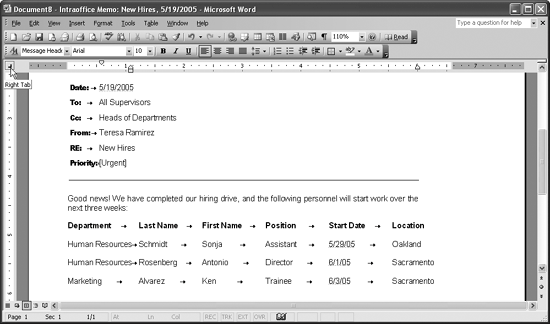
You can set tabs manually by using either the horizontal ruler or the Tabs dialog box (Format » Tabs). On the ruler, drag an existing tab mark to move it (hold down Alt as you drag to see exact measurements in the ruler), or drag it downward off the ruler to delete it. To set a new tab, click the Tab button at the left end of the ruler so that it shows the type of tab you want (hover the mouse pointer to display the ScreenTip for the tab type if you're not sure which type it's indicating, as shown in Figure 4-16), and click at the appropriate point in the ruler to place the tab there.
Figure 4-16. Click the Tab button at the left end of the horizontal ruler to change the type of tab. Hover the mouse pointer to identify the current type of tab.

All of Word's tabs are largely self-explanatory, except for the bar tab, which creates a thin vertical line at the specified position. It's not really a tab, because you don't have to press Tab to set it: the line simply appears in the paragraphs for which you've set the bar tab. Depending on what type of documents you create, you may find bar tabs occasionally useful or simply a puzzling waste of time.
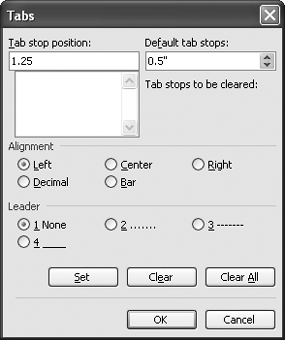
If you want to see exactly where you're putting your tabs, select the paragraphs you want to affect, and then choose Format » Tabs. The Tabs dialog box appears (see Figure 4-17). Type the position for the tab in the "Tab stop position" text box, select the appropriate option button in the Alignment area, choose the appropriate option button in the Leader area (the default is None), and click the Set button. You can also clear a tab you've selected in the "Tab stop position" listbox, or clear all tabs set so far.
To type a tab in a table, press Ctrl+Tab rather than plain Tab (which moves the selection to the next cell in the table).
Figure 4-17. The Tabs dialog box enables you to position tabs precisely as needed.
