Using HTML to design a user interface harkens back to the days when visual elements were created by writing code that had to be executed before the developer could see what they actually looked like on screen. However, plenty of applications allow you to design your Web pages in a visual way and then generate the underlying HTML for the Web page for you automatically. An understanding of the HTML behind the page is at least useful (if not essential) for effective Web application development, because it is the HTML in your user interface that furnishes your application with events that it can respond to.
You can include HTML in your application in two ways. The most flexible technique (and the most laborious) is to include raw HTML code in your procedures. You will already have seen this approach if you've examined the code supplied by the IIS Application template. Here is an example that uses the Write method of the ASP Response object to send text to the browser:
Response.Write "<HTML><BODY>Hello World!!</BODY></HTML>"
The other way of including HTML in your application is to add HTML files to your Web class through an HTML template. When an HTML template is added to a Web class, Visual Basic takes a copy of the underlying HTML file and stores the copy in the project directory. The HTML template is referenced in the Web class by the Web item name that you assign to it when it is added to the Web class.
When adding HTML templates to a Web class, the normal default naming convention of Visual Basic is followed, meaning that the item type name is suffixed with a number that makes the name unique. While this is fine in most cases, it would seem more sensible, when adding HTML templates, that the name of the original HTML file be used to refer to the template. The copies of the files held in the project directory maintain their original names (with the addition of a numeric suffix if a file of the same name already exists in the project directory), so why not default to these names in the IDE? So, when you add an HTML template to a Web class, change the default name to that of the HTML file it represents (remember to check the project directory to see if the name has been changed).
The HTML file is now in the Web class, but no one will get to see it unless the Web class is told when to display it. An HTML file is sent to the browser when the WriteTemplate method of the HTML template is called within code. This can be done from the Start event of the Web class but is better placed in the Respond event of the HTML template Web item. The Respond event is the default event of any template and is called whenever the template is referenced without a specific event procedure. To reference the HTML template in code, the NextItem property of the Web class is set. At the end of processing an event in a Web class, if the NextItem property points to a Web item, processing is transferred to that Web item. This is the statement to place in the Start event of the Web class in order to have the template displayed in the browser:
Private Sub WebClass1_Start()
      Set NextItem = Welcome
  End Sub
  Private Sub Welcome_Respond()
      Welcome.WriteTemplate
  End Sub
In the above code, when the Web class starts, the HTML template named Welcome is sent to the browser requesting the Web class's ASP.
An HTML template is able to trigger events within a Web class when the template is processed by a browser. When an HTML template is added to a Web class, its underlying HTML file is scanned for tags that have attributes that can take a URL as a value. If an attribute can have a URL for a value, it can send HTTP requests to the Web server, which can be intercepted by the Web class. The Web class can intercept these requests only if the tag attributes are connected to events in the Web items of the Web class. The connection of attributes to events is performed in the right-hand pane of the Web class designer. Attributes can be connected either to a custom event or to a Web item by right-clicking a tag in the designer and choosing one of the options presented. If the attribute is connected to a custom event, the designer automatically creates a new event for the template containing the tag. Default event names come from the tag they are connected to (combined with the name of the attribute if the tag has multiple attributes that can be connected to events, as shown in Figure 3-1).
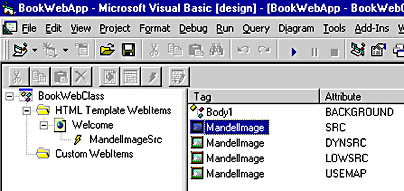
Figure 3-1 Web class designer showing custom events
If you change an event name (using the same techniques as in Windows Explorer), it is automatically updated both in the Target column of the Web class designer and the HTML Context column, but only for that tag-attribute combination. The update is not shown in other HTML Context entries belonging to the same tag until the template is refreshed in the designer. Also, if any code has been written for a custom event and the event's name is changed, the code becomes disassociated from the event and exists as a general procedure in the Web class (as happens when renaming a control in a form-based Visual Basic application). The names used for tags in the designer come from the tags themselves unless an ID or Name attribute has been set for the tag (with the ID attribute taking precedence).