Machine.Config
The default .NET configuration for your machine is declared within a file named Machine.Config. You can find Machine.Config within the directory c:\Windows\ Microsoft.NET\Framework\ver<whatevertheversionis>\config. Machine.Config sets the default .NET application behaviors for the entire machine.
.NET version 2.0 has made a number of improvements to the Machine.Config arrangement. ASP.NET 1.x lumped all of Machine.Config into a single file-even comments and configuration information for all separate browsers. The current version of Machine.Config is trimmed down substantially from version 1.x. The comments have been moved to a separate file named Machine.Config.Comments, and separate browser definition capability files have been moved to separate configuration files. This is important to know because the Machine.Config comments are often more useful as documentation for configuring .NET than the regular online documentation. As you configure your various ASP.NET applications, the Machine.Config comments should be the first place you look for information.
Configuration Section Handlers
At the top of Machine.Config you'll see a number of Configuration Section Handlers. Each of these handlers understands a specific vocabulary for configuring .NET (and ultimately ASP.NET). While Machine.Config controls the settings for the entire machine, ASP.NET applications rely on files named "Web.Config" to manage configuration. We'll see much more about Web.Config shortly. However, for now here is a small snippet that you might find in a Web.Config file for a specific application.
<?xml version="1.0" encoding="utf-8"?>
<configuration
xmlns="http://schemas.microsoft.com/.NetConfiguration/v2.0">
    <system.web>
        <authentication mode="Forms" />
        <sessionState mode="SQLServer" cookieless="UseUri" timeout="25" />
    </system.web>
</configuration>
This small segment tells the ASP.NET runtime to use Forms Authentication (one of ASP.NET's authentication options) to authenticate users of this site. The configuration information also tells ASP.NET to use SQL Server to manage session state, to allow session state information to expire after 25 minutes, and to track session information using a session ID embedded within the request URI.
You can see from this example that configuring ASP.NET relies on the ability of the runtime to understand some keywords. In this case, the keywords authentication, mode, and Forms tell ASP.NET how to manage authentication. ASP.NET must correctly interpret sessionState, mode, SQLServer, cookieless, UseURI, and timeout to know how to manage an application's session state.
The .NET components that understand these vocabularies are listed near the top of Machine.Config.
<configuration>
  <configSections>
    <section name="appSettings"
     type="entire strong assembly name here… "
        restartOnExternalChanges="false" />
    <section name="connectionStrings"
      type="entire strong assembly name here… " />
…
    <sectionGroup name="system.web"
      type="entire strong assembly name here.. ">
      <section name="authentication"
        type=" entire strong assembly name here.. "
           allowDefinition="MachineToApplication" />
      <section name="sessionState"
        type=" entire strong assembly name here.. "
           allowDefinition="MachineToApplication" />
…
    </sectionGroup>
  </configSections>
</configuration>
The listing above is necessarily abbreviated. Go ahead and take a look at Machine.Config and you'll see the section handlers in their full glory. The sessionState configuration settings are interpreted by an assembly with the strong name System.Web.Configuration.SessionStateSection, System.Web, Version=2.0.0.0, Culture=neutral, PublicKeyToken=b03f5f7f11d50a3a. A strong name fully specifies the name of an assembly including a version (to ensure version compatibility) and a public token (to ensure the assembly has not been tampered with).
Web.Config
While Machine.Config lays out the default setting for your applications, the default settings are generally targeted toward the most common use cases (rather than some special configuration you may need to apply to your application). For example, sessionState is configured to be handled in process by default. That's fine when you're developing, but almost certainly is not appropriate for a commercial-grade application that is servicing many diverse clients.
Because all your .NET applications depend upon Machine.Config to configure them, making changes to Machine.Config could potentially affect your other applications. It's a bad idea to update Machine.Config directly.
Stand-alone .NET applications depend upon configuration files modeled after the application name to configure themselves. For example, an application named MyApp.EXE would have a configuration file named Myapp.EXE.Config. Of course, ASP.NET applications aren't named in that way. Instead, the ASP.NET runtime expects configuration information to be declared in a file named Web.Config.
To override the default settings within Machine.Config, you simply need to include a file named Web.Config in your application's virtual directory. For example, the following code sets up the Web application to which it applies. The Config file turns on Forms Authentication and tracing.
<?xml version="1.0" encoding="utf-8"?>
<configuration
xmlns="http://schemas.microsoft.com/.NetConfiguration/v2.0">
    <system.web>
        <authentication mode="Forms" />
        <trace enable=true/>
    </system.web>
</configuration>
The configuration settings your application actually sees have been inherited from a (potentially) long line of other Web.Config files. Figure 9-1 illustrates how the configuration settings accumulate through the Web.Config file standing in the directory path taken by the request. After Machine.Config sets up the default configuration settings, different configuration files in the same path have the opportunity to tweak the settings for a single application. Figure 9-1 shows how configuration settings are modified via individual configuration files.
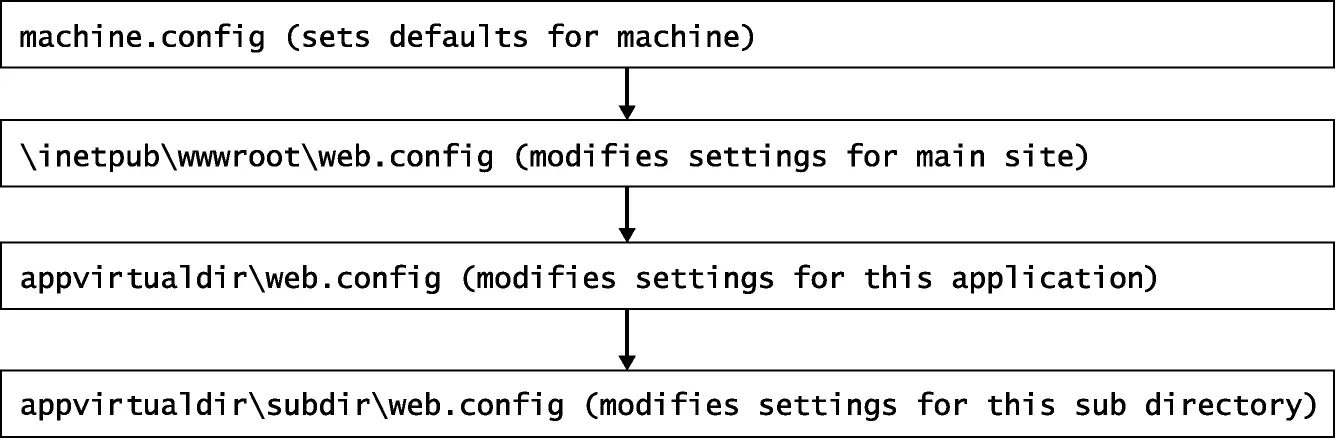
Figure 9-1 The .NET configuration hierarchy.
In Figure 9-1, you can see that Machine.Config sets the default configuration. The subsequent Web.Config files are merged into a new set of configuration parameters along the way. After Machine.Config sets up the configuration parameters, the Web.Config in Inetpub takes over, modifying the settings in Machine.Config. As soon as the Web.Config from the Inetpub directory touches the configuration, the Web.Config contained in the application's virtual directory gets a crack at changing the settings. Finally, the Web.Config within a subdirectory of the main virtual directory modifies the settings. Note that ASP.NET configuration happens after IIS configures itself through the Metabase.
This way of managing configuration information works well. Many of the normal defaults work well and you need to tweak only a few items, so you just drop a Web.Config in your virtual directory and/or subdirectory.
However, managing settings that way (by littering your hard disk with Web.Config files) can get a bit unwieldy if lots of different parts of your application need separate configurations. The ASP.NET configuration schema includes a Location element for specifying different settings for different directories-but they can all go in a master configuration file for your application.
For example, the following configuration section will remove the ability for the AppSubDir directory to process standard ASP.NET Web Services. The remove instruction causes ASP.NET to have amnesia about all files with the extension .asmx.
<configuration>
  <location path="appSubDir">
    <system.web>
      <httpHandlers>
        <remove verb="*" path="*.asmx" />
      </httpHandlers>
    </system.web>
  </location>
</configuration>
You could also apply other specific settings to the subdirectory. We'll look at security in depth in the next tutorial. Of course, ASP.NET configuration files include terms to manage authorization and authentication. This is a perfect use for the local element. The following configuration snippet allows all users into the main (virtual) directory while requiring users wanting access to the PagesRequiringAuth subdirectory to be authenticated.
<configuration>
  <system.web>
    <authorization>
      <allow users="*" />
    </authorization>
  </system.web>
  <location path="pagesRequiringAuth">
    <system.web>
      <authorization>
       <deny users="?" />
      </authorization>
  </system.web>
  </location>
</configuration>
Configuration in ASP.NET 1.x
Configuration within ASP.NET 1.x was done entirely by typing changes into a target Web.Config file manually For example, if you wanted your application to use SQLServer as a session state database, you'd need to insert the correct verbiage into the application's Web.Config file keystroke by keystroke. Unfortunately, there was no configuration compiler to help ensure the syntax was correct. If you typed something wrong, you usually wouldn't know about it until you ran the application, at which point ASP.NET would cough up a cryptic error message.
Configuration in ASP.NET 2.0
ASP.NET 2.0 introduces some major improvements to the process of managing ASP.NET applications. While you may still type configuration information into the Web.Config file manually, ASP.NET 2.0 provides some new configuration utilities. These tools include the Web site Administration tool available in Visual Studio, and the ASP.NET configuration tab available through IIS.
Configuring Your Application
In this exercise, you'll change some application settings within an application's configuration and see how they're reflected within Web.Config.
-
Begin by creating a new Web site named ConfigORama. Make it a regular ASP.NET site (not an empty one). It can be a File Web site.
-
After Visual Studio generates the application, select the Web site | ASP.NET Configuration menu item. This will bring up the ASP.NET Administration tool:
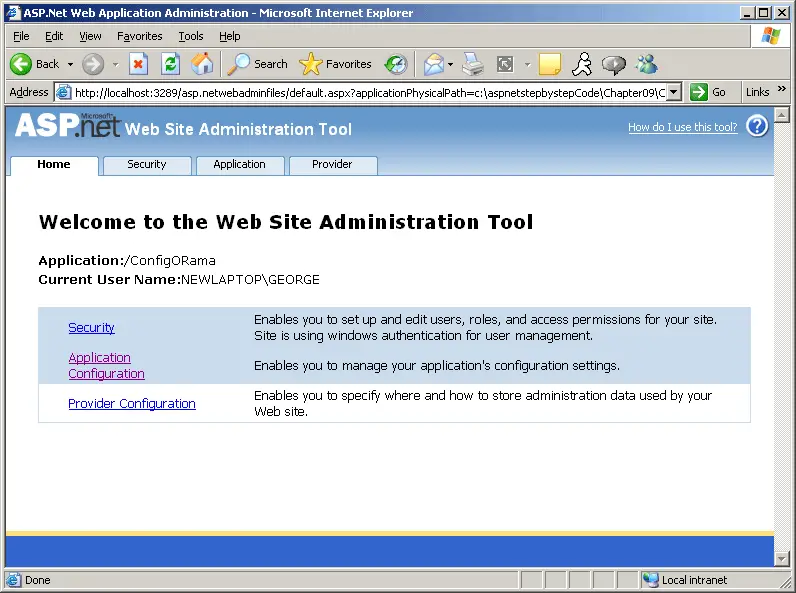
The ASP.NET Administration Tool
Notice the Administration tool includes three tabs: Security, Application, and Provider. The Security tab manages authentication and authorization settings. That is, you may use the Security tab to add users and assign roles to them. We'll explore that process in detail in the next tutorial.
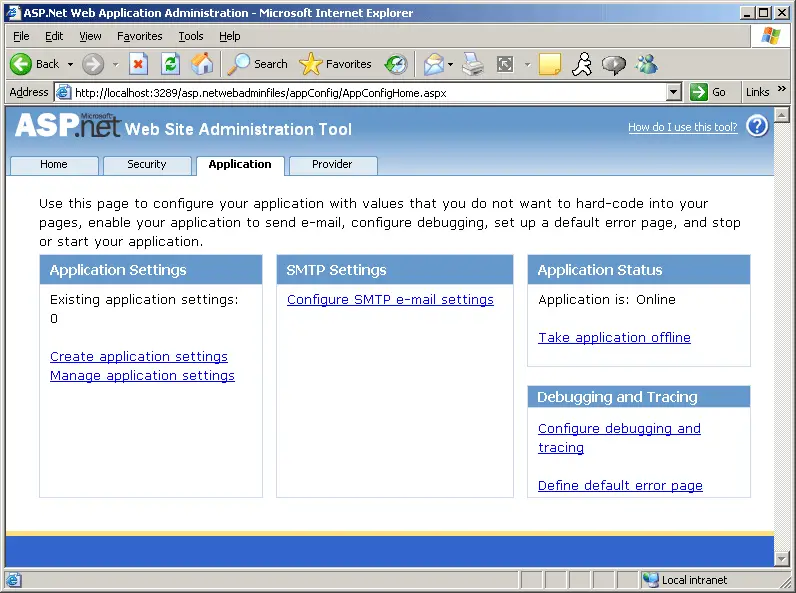
The Application tab is for maintaining various settings related to your application. Some basic configuration settings are controlled here, including maintaining key-value pairs specific to your application, SMTP settings for defining how the site manages e-mail, and turning debugging and tracing on and off. You can also use the Application tab to take your application offline in case you need to perform maintenance.
Finally, the Provider tab is used to manage database providers. While earlier versions of .NET (ADO.NET) supported a managed layer between your application and various data sources, managing the providers still took a bit of programming skill. ADO.NET includes multiple implementations of the same interfaces. If you're diligent and disciplined enough, you can minimize the amount of code that needs to be changed if your enterprise decides to go with another database vendor. ASP.NET 2.0 introduces the Data Provider architecture to further abstract the details of connecting and using a data source.
ASP.NET hooks you up with a database stored in the Web site's App_Data folder. The Provider tab is where you go when you decide to use another database in your application.
The Web Site Administration tool lets you manage parts of Web.Config without having to type things by hand. It's accessible from Visual Studio. Visual Studio doesn't provide a Web.Config by default. The Web Site Administration tool will create a Web.Config file for you. The tool will also create a database suitable for consumption by SQL Server Express in the Data folder of your Web site for storing application data.
The ASP.NET configuration facilities include a number of inherited settings. Those types of settings are likely to be found in many Web sites and are represented as inherited settings. For example, many sites use a database connection string. To avoid hard-coding the string into the site's code, connection strings are usually included as part of Web.Config. The ConnectionString application setting is an inherited setting.
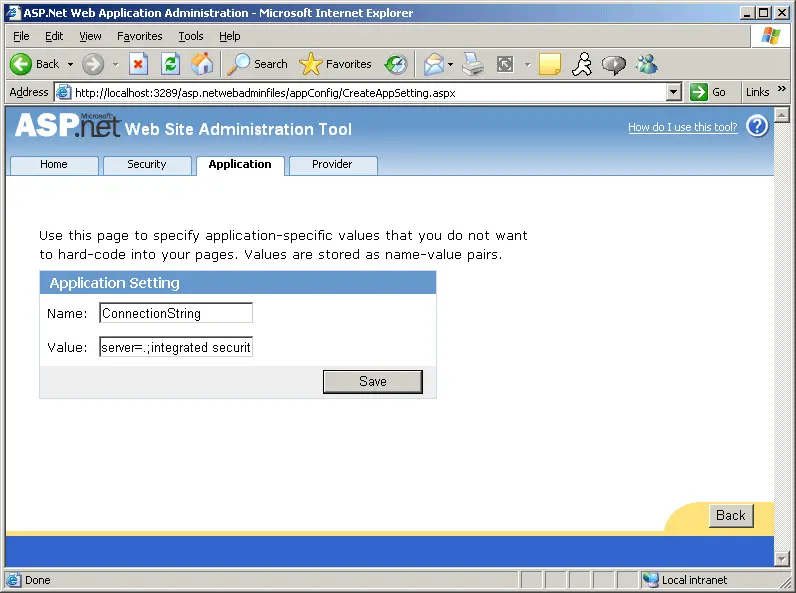
-
Continue working with configuration. Go to the Application tab and add a couple of application settings. Add a setting named ConnectionString and one named AnotherString. In this exercise, it doesn't matter what you type as the corresponding value (it will later).
-
Open the application's Web.Config file. You should see an entry for AnotherString. Then look for ConnectionString-it's not there. That's because ConnectionString is an inherited application setting.
Web.Config should look like this now:
<?xml version="1.0" encoding="utf-8"?> <configuration xmlns="http://schemas.microsoft.com/.NetConfiguration/v2.0"> <appSettings> <add key="AnotherString" value="AnotherValue" /> </appSettings> </configuration> -
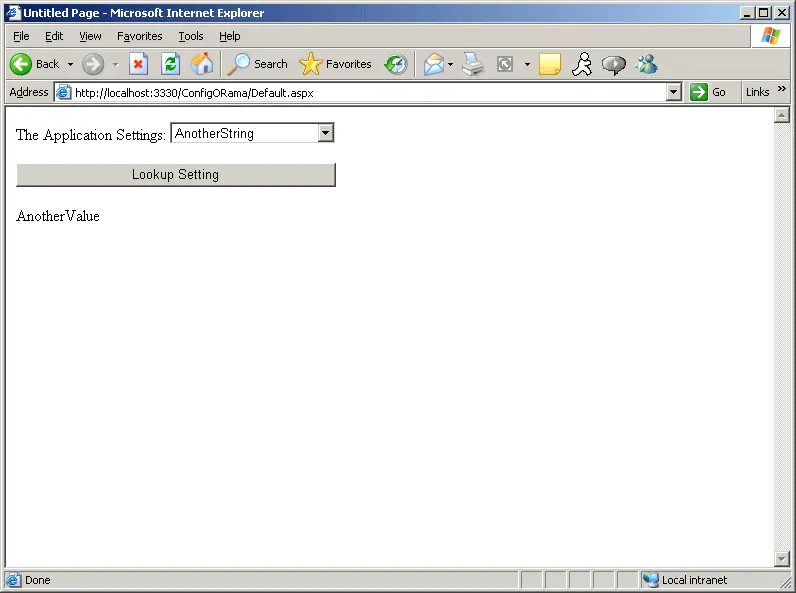
Now write some code to access the application settings you just added. They're available via a class named ConfigurationManager. Add a combo box to the Default.aspx form to hold the Application Settings keys and another label to display the values. Also add a button that will look up the value associated with the Application Settings key. In the Page_Load handler,interrogate the ConfigurationManager for all the application settings.
public partial class _Default : System.Web.UI.Page { protected void Page_Load(object sender, EventArgs e) { if (!this.IsPostBack) { foreach (String strKey in ConfigurationManager.AppSettings.AllKeys) { this. DropDownListApplicationSettings. Items.Add(strKey); } } } protected void ButtonLookupSetting_Click(object sender, EventArgs e) { String strSetting; strSetting = ConfigurationManager.AppSettings[this. DropDownListApplicationSettings. SelectedItem.Text]; this.LabelSetting.Text = strSetting; } } -
Compile the program and run the site. When you start the page, it will load the combo box with all the keys from the ConfigurationManager.AppSettings collection. When you select the Application Settings using the key from the combo box, the code looks up the value of the application setting and displays it in the label.
ASP.NET also supports another way to manage Application Settings. It's the MMC Snap-in for ASP.NET.