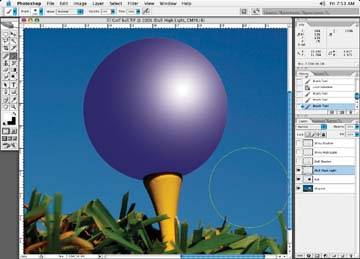
If we want the ball to look like it's been painted with a flat purple spray paint, we'd use soft highlights without any hard edges to them. Using the Paintbrush tool with a very soft hardness setting, like 0%, again set to a very low opacity of 20%, spray on highlights in an area you think would need them, as Figure 4-65. Where you brush in highlights will be based on where the light is coming from. Let's assume the light is coming from the right side of this page, then the highlights on the ball will land on the right side of the ball. Imagining that this is the only light source, the shadows will fall to the left of the ball. I've added a shadow on the left side, and the result Figure 4-66.
Figure 4-65. A selection of the ball is made and a white highlight is brushed in
Creating a Very Shiny Finish
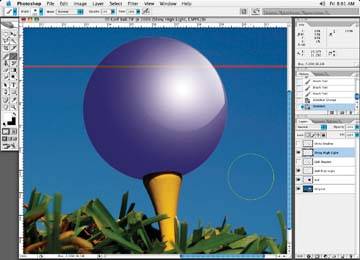
Now let's see if we can shine our object up a bit. Using the Pen tool, draw in a shape in an area that I think will need highlights based on where I think the light is coming from. I'll usually make the bottom portion of the highlight shape larger than I need to because I like to go wide on the bottoms of the highlights, as it is typical for a highlight to fall off softly without a hard edge. I can also go back in with the Erase brush, if I have to, and adjust the extra highlight. When I finish making my shapes with the Pen tool, I have shapes that look like Figure 4-67.
Figure 4-66. After adding a shadow for our dull ball, it is complete
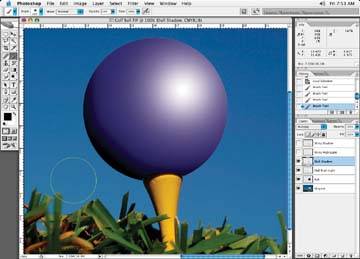
Figure 4-67. Leave the original highlight layer on, but add a shape with the Pen tool that you will use for the shine
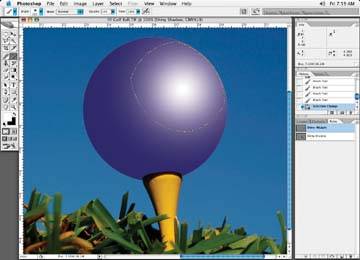
Next, I'll make a selection of the shape with a slight softness to it to match the look of any other hard edges on the ball. While on your highlight layer, use a low opacity, 20%, Airbrush. Now brush through the shape until you get the desired effect, as in Figure 4-68.
Figure 4-68. The look of the ball with the shiny highlight painted in
Highlights typically come from the top, so I usually make the tops of the highlights the brightest points and feather them off as they move down the ball. I usually do only one shape at a time if I have more than one shapewhat I brush in for one shape may not be suitable for the other shapes if they are too close together.
Then, let's do the same thing for the shadow. I'll create a shape for it as well that will give it a harder edge, as shown in Figure 4-69.
Figure 4-69. Give the shadow a hard edge as well
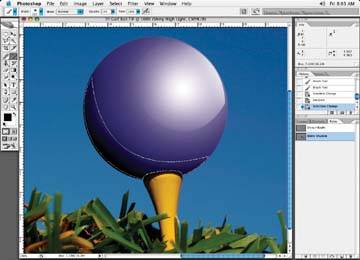
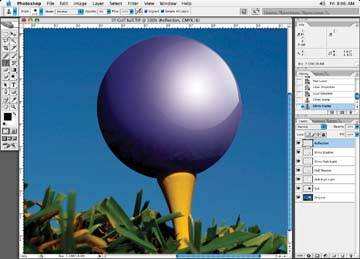
For a finishing touch, I added a reflection of the grass onto the bottom of the ball to appear as a very shiny ball. This was done with a low opacity Clone tool and a large brush size. I put the source of the Clone tool brush on the grass and cloned that information onto the ball. The final results are in Figure 4-70.
Figure 4-70. A touch of highlight on the grass shows just how shiny the ball has become!