One of the common issues that users encounter when working with MS Word is the numbering not continuing as expected. This can happen when the user inserts a new paragraph, changes the style, or applies a different list level. There are several ways to fix this problem and resume the numbering sequence.
Let's take a look at your options for correcting (or avoiding) the problem.
Reset (or Restart) Each Numbering List
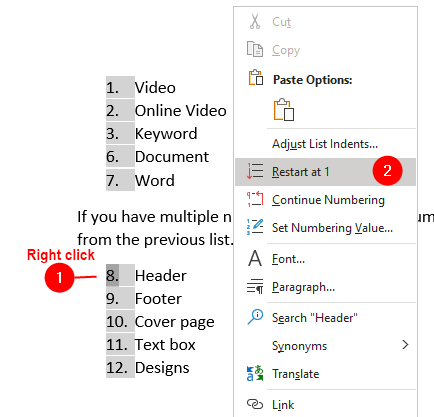
If you have the patience, you can restart each list manually by right-clicking on the item that is out of sequence and choosing Restart at 1 from the shortcut menu. This will create a new list with a separate numbering sequence.
Continue Numbering
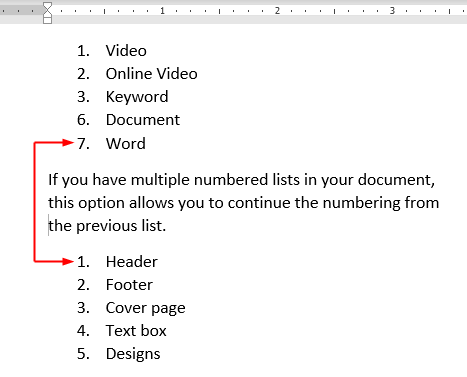
The Continue Numbering option is helpful when you want to resume the numbering from a previous list that was interrupted by a different paragraph style or level as shown in the following figure:
Follow these steps to continue numbering from the previous listing:
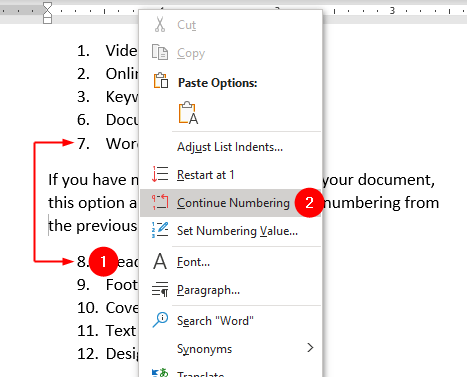
- Right-click on the number where the numbering should continue.
- Select
Continue Numberingfrom the context menu.
This will link the current list to the previous one and continue the numbering sequence as shown in the following figure:
Set Numbering Value
The Set Numbering Value option allows you to customize or reset the numbering of a list. This feature is particularly useful when you want to change the starting number of a numbered list, restart numbering, or skip numbering from a specific point. For example, you can start a numbered list with 4 instead of 1. Follow these steps to set numbering value:
Start a New List Out of an Existing List
- Right-click on the item that is out of sequence.
- Choose
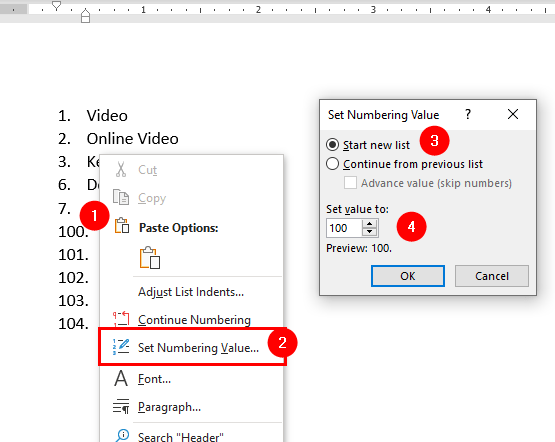
Set Numbering Valuefrom the shortcut menu. - In the Set Numbering Value dialog box, choose Start new list option to break the existing list and start a new list.
- Specify the starting number in the Set value to box for the new list. For example, you can change it to start at
100instead of1. - Click OK
Skip Some Numbers in a Numbered List
The Advance value (skip numbers) checkbox in the Set Numbering Value dialog box allows you to skip some numbers in a numbered list. For example, if you have a list that goes from 1 to 10, and you want to skip numbers 4 and 5, you can use this option to do so:
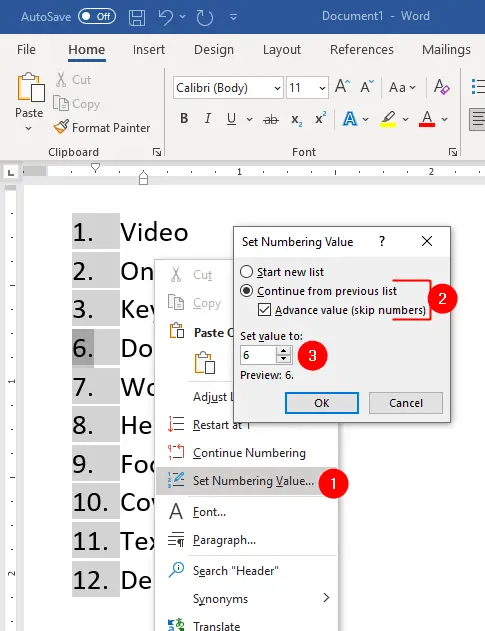
- Right-click on the number that you want to skip from (e.g.
4) and chooseSet Numbering Valuefrom the context menu. - In the Set Numbering Value dialog box, choose
Continue from previous listoption and check theAdvance value (skip numbers)box. - Enter the number of values that you want to skip in the
Set value tobox next to it. In this case, enter6. - Click
OK.
The list will now skip numbers 4 and 5 and continue from number 6. You can use this option to skip any number of values in a numbered list.