A project is a directory containing source code files, images, UI definitions and many other resources etc. Android Studio will take what is in the project and generate an APK (Android Package Kit) as output.
After completing installation the welcome screen of Android Studio appears, it is the first screen we'll see when we launch Android Studio. From here, we can start a new project.
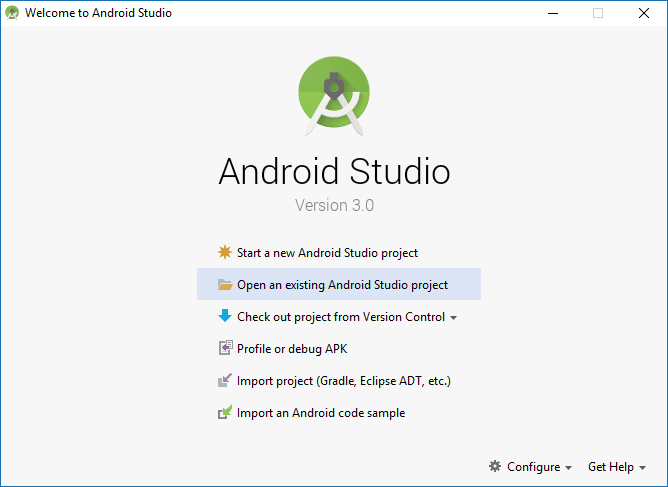
If you are inside the Android Studio IDE itself, choose
File > Create Projectfrom the main menu.
This brings up the new-project wizard:
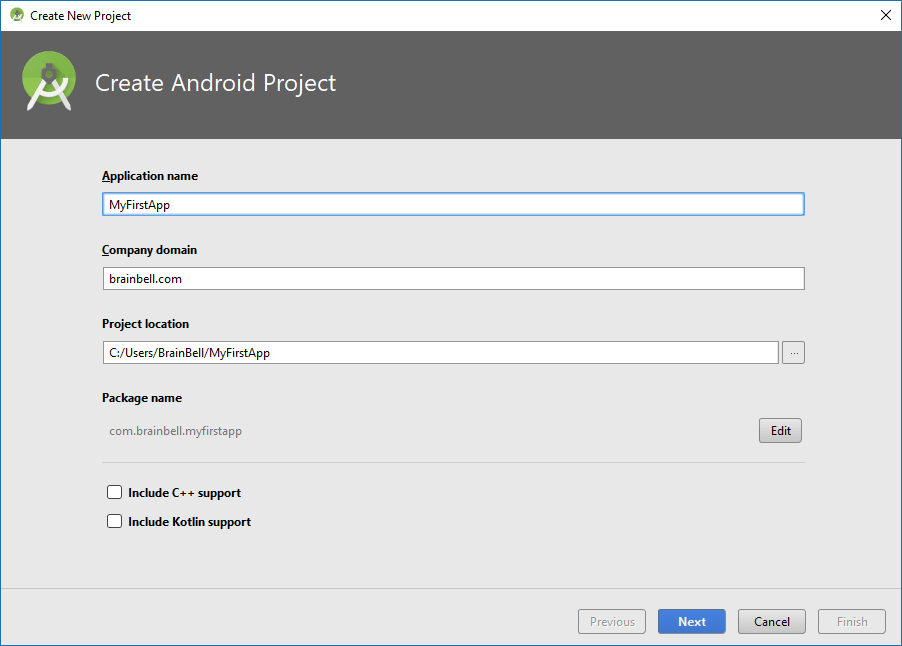
This is the first page of the wizard, you can accept the default My Application name for your app and example.com Company Domain. You will not need to select Include C++ support and Include Kotlin support options check box.
The follwing is a brief description of each field:
The application name
The Application name is the name of your project as seen by the users. As you type in an application name, the Package name and Project location will automatically be filled in to match the application name, converted into lowercase, with whitespace and other invalid characters removed.
The company domain
The Company domain is used to name the Java package to which your code will belong.
Project location
The location where you want to save your Android project files.
The package name
The Package name refers to a Java package name (com.brainbell.myfirstapp). This package name will be used for generating Java source code and it also is used as a unique identifier of this package. By default, the package name will be made up of two pieces: reverse domain (com.brainbell.) + application name (myfirstapp)
Include C++ support
Although Android applications are primarily written in Java, there are times when developers need or prefer to leverage native C or C++ libraries. The Android NDK (Native Development Kit) provides the tools necessary to include and use native libraries in your Android applications.
Include Kotlin support
Kotlin is a programming language, which is now officially supported for Android development with the release of Android Studi 3.0. Kotlin is an expressive and concise language that is interoperable with existing Android languages and runtimes, which means you can use as little or as much of the language in your app as you want.
Target Android Devices
Click the Next button to advance to the Target Android Devices page, where you will accept the default Phone and Tablet application type option. The default "Minimum SDK" value also usually is a good choice.
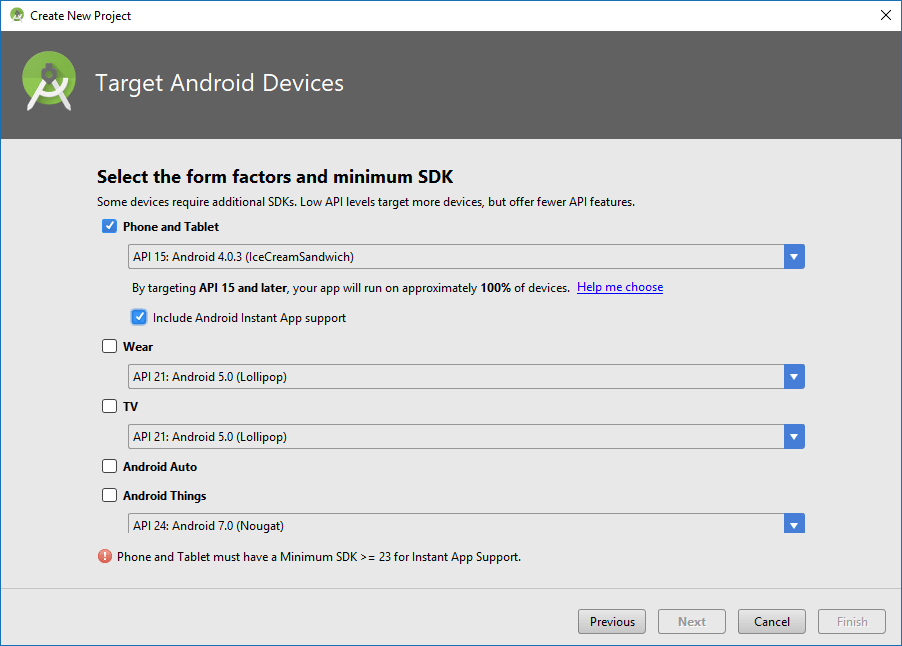
The Target Android Devices shows what sort of project you are creating, in terms of intended device type (phones/tablets, TVs, Wearable or Auto) and minimum required SDK level.
The "Minimum Required SDK" refers to how far back in Android's version history you are willing to support. The lower the value you specify here, the more Android devices can run your app, but the more work you will have to do to test whether your app really does support those devices.
If you target a newer platform, you will be targeting a smaller number of users because not as many devices have released that are running that version of the OS yet.
You can see the current statistics for number of users running each version at: http://developer.android.com/about/dashboards/index.html. The data represents all the devices that visited the Google Play Store in the prior 7 days.
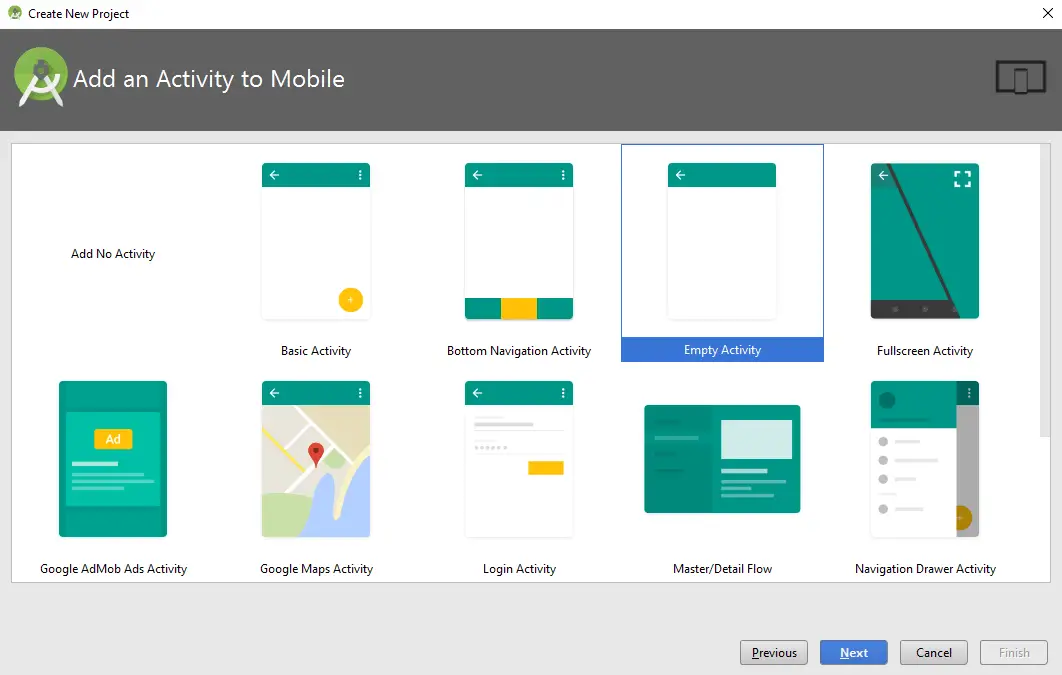
Add an Activity to Mobile
Clicking Next advances you to the Add an Activity to Mobile page. The default option is the creation of an Empty Activity. Empty Activity is the best of the available options for a novice developer, simply because it adds the least amount of this cruft.
Customize the Activity
If you choose any option other than Add No Activity, clicking Next will advance you to a page in the wizard where you can provide additional details about the activity to be created.
Now you will advance to the Customize the Activity page. Accept the default values for Activity Name and Layout Name fields. Select the Generate Layout File and uncheck the Backwards Compatibility (AppCompat) option.
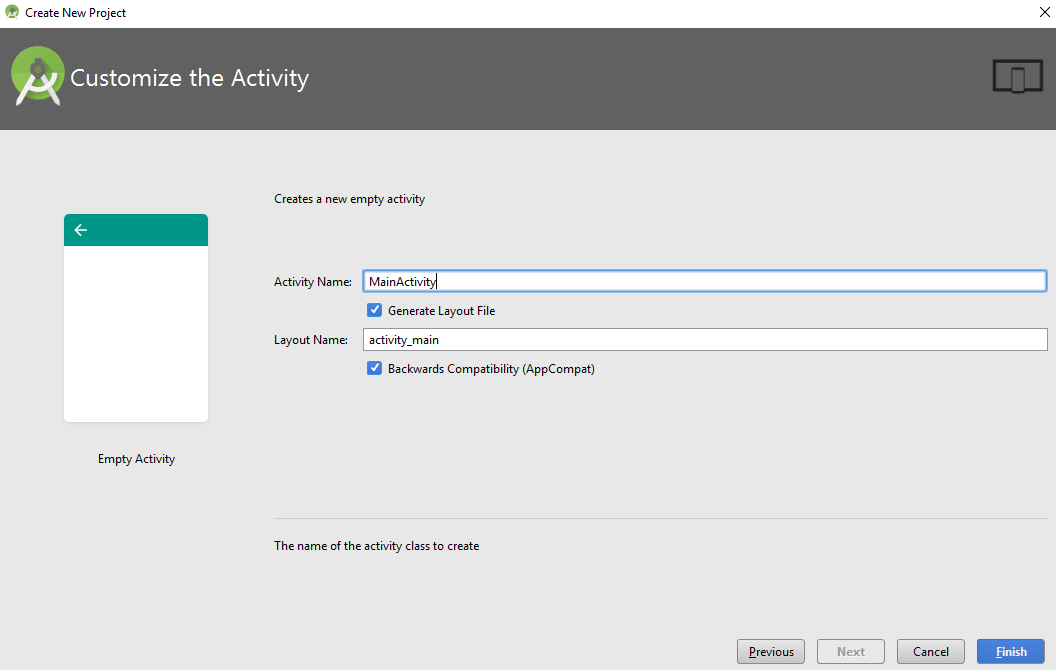
The follwing is a brief description of each field:
Activity Name
Android Studio wants you to name your Activity so you can refer to it in code. It is actually the name of Java class for your activity. Android Studio suggests the name of MainActivity since this will be the Activity the user sees when the application starts.
Generate Layout File
Android Studio writes XML markup for you.
Layout Name
The base name of an XML file that will contain a UI definition of your activity. The layout file represents all of the graphic elements that the user sees on the Activity (buttons, edit boxes, etc).
Backwards Compatibility (AppCompat)
Indicates if you want to use a library known as AppCompat.
Completing the wizard
Click the Finish button and Android Studio will create the project and you'll see a floating progress bar.

The build system known as Gradle is doing a lot of work preparing your app for development. Finally, you will see the main Android Studio Window. Even though the Android Studio main window is now visible, the Gradle build system will continue to build and index the project, as seen at the bottom right in following Figure.

Once your new project build has finished, the blank screen in Android Studio will be replaced with the project navigation and development panes. These various panes let you navigate your project structure as well as edit your Java code
and XML markup structure.
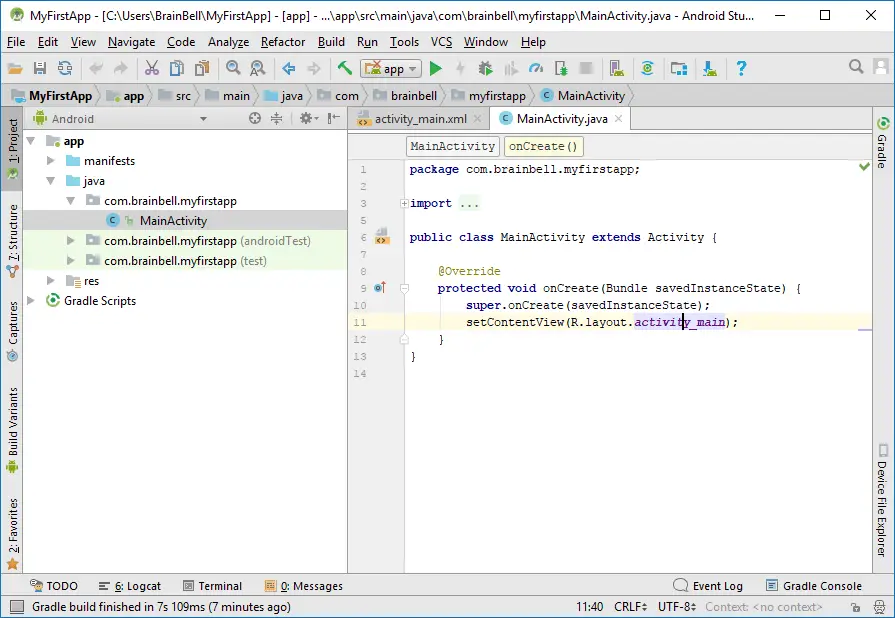
There are a lot of things going on in the Android Studio User Interface. It's quite overwhelming for a first look at a project. Let's take a look at a few key areas in Android Studio which will clear this up.