When you finish creating your project by going through the wizard, Android Studio automatically displays the project for you. Each time you start Android Studio, you will be presented with a Tip of the day message box.
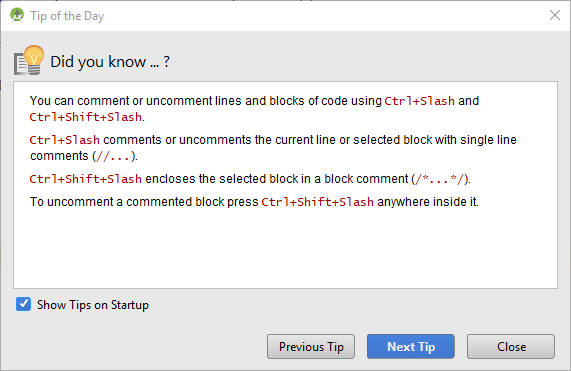
It is well worth reading these, as many of them contain really, valuable information that can either save time or enlighten us in some way.
Parts of the Project's UI
Here's what our project looks like:
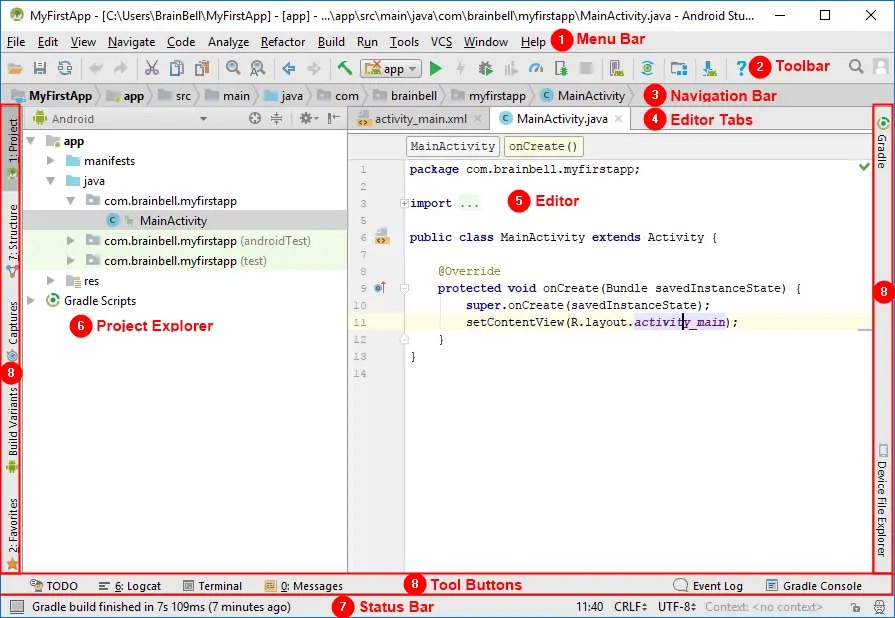
Let's take a quick look at the different areas that are labeled in the preceding screenshot:
1. Menu Bar

Main Menu Bar
As with most applications, we can get to almost any option from here.
2. Toolbar

Toolbar
To access one of the many quick-launch icons. From here, some of the most commonly used options can be accessed with a single click. The Run and Instant Run are the most popular buttons:
 Run: We click this icon to make the Android Studio build the project and then we can run it on an emulator or on a real device.
 Instant Run: This button attempts to patch your existing app based on whatever changes you made to the project since you last ran it.
3. Navigation Bar

Navigation Bar
It shows us the location of the file that is currently open in the editor window within our project and allows us to quickly navigate to a file or folder.
4. Editor Tabs

Editor Tabs
We can click on a tab to see its contents in the editor window. Note that there are more files in our project than are shown in the editor tabs. We can add a file to the editor tabs by double-clicking on them in the project explorer.
5. Editor
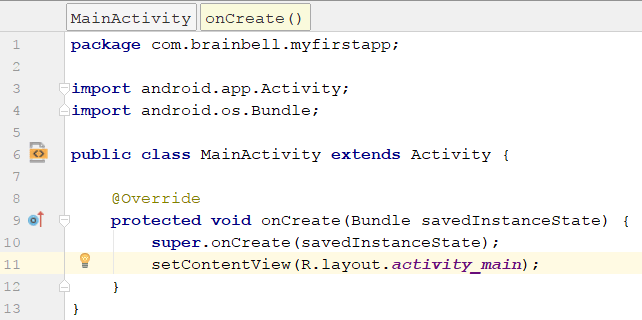
Editor
Here we will spend the majority of our time. Although the screenshot shows a code file in the editor, when we select a layout file to open, the editor window transforms itself into a design studio.
Take a look at the vertical bar, a bit further to the right and notice that there are two Tool Buttons on that bar. They are: Gradle and Device File Explorer, here is a quick run down of what the main ones do, starting from the top:
Tool window bar on right margin

Tool window bar
Gradle
The
Gradletool window provides a view onto the Gradle tasks that make up the project build configuration. The window lists the tasks that are involved in compiling the various elements of the project into an executable application. Right-click on a top level Gradle task and select the Open Gradle Config menu option to load the Gradle build file for the current project into the editor.Device File Explorer
The Device File Explorer allows you to view, copy, and delete files on an Android device. This is useful when examining files that are created by your app or if you want to transfer files to and from a device.
6. The project explorer
This is essentially a file browser. The newly created project and its files are listed here. You can navigate to a file in this window and double-click on it to open it and add a tab for it to the editor window.
There are a number of tabs (Tool Buttons) down the left-hand side of Android Studio that cause the project explorer window to be replaced. Here is a quick run down of what the main ones do, starting from the top:
Tool window bar on left margin

Tool window bar
Project
The project explorer as just discussed above.
Structure
The structure tool window provides the hierarchy of current project broken down into classes, methods, and other components. Then, we can simply click on a part of the hierarchy to be taken to the selected part of the code in the editor window.
Captures
The captures tool window provides access to performance data files that have been generated by the monitoring tools contained within the Android Monitor tool window.
Build variants
The build variants tool window provides a quick way to configure different build targets for the current application project (for example different builds for debugging and release versions of the application, or multiple builds to target different device categories).
Favorites
You can see all the places that you have visited the most, bookmark files, or the points in your code that you have been debugging.
7. Status Bar

The status bar displays some information about the currently active editing session. This information includes the current position of the cursor in terms of lines, line seprator (Unix and OSx: \n, Windows: \r\n etc.), characters and the encoding format of the file (UTF-8, ASCII etc.). Clicking on these values in the status bar allows the corresponding setting to be changed. Clicking on the line number, for example, displays the Go to Line dialog.
The status bar also display Tool Buttons located in the far left and right corner. Clicking on a button will display the corresponding tool window:
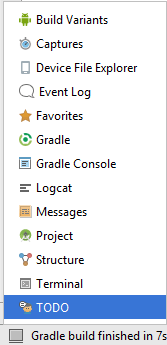
Tool window bar on bottom margin

Tool window bar
TODO
This tool provides a place to review items that have yet to be completed on the project. This is really useful tool, try this out: type
// TODO an example to memorize your workanywhere in your code. And no matter how many code files you have, you will see your note and be able to jump to the precise line in the code directly from your TODO window.Logcat
The
LogCatdisplays system messages, such as when a garbage collection occurs, as well as messages that you can add to your app using the Log class. This monitor also show all messages that appear at runtime including Java stack traces triggered by bugs.Messages
As the name suggests, you will get system and error messages in this window.
Terminal
You can use this to navigate your OS and do anything you can do from a console (DOS) window.
Event Log
Every time Android Studio completes a significant event, it is logged here. So if you can't remember the steps you have taken so far or whether a particular process has been completed successfully, you can check here.
Gradle Console
By default, docked in the lower-right corner of your Android Studio window is a
Gradle Consoleitem. Tapping on that will open up a pane showing the output of attempts to build your application.This may automatically appear from time to time, if specific build problems are detected, and you can always go examine it whenever you need.
8. Tool buttons on tool window bar
The tool buttons are located the corners of the margins. For example, the default position of the Project tool button is in the upper corner of the left margin, while the Android Model tool button is located by default in the lower corner of the right margin.
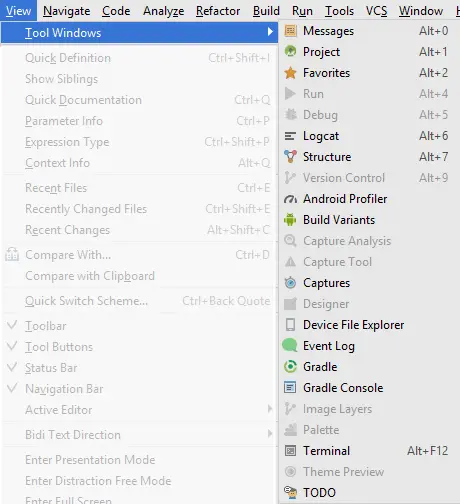
You've already seen the Project tool window, displayed in the left pane by default. To see complete list of tool windows, choose View > Tool Windows from the Menu Bar.
Notice that some of these tool buttons are labeled with Alt + 1, Alt + 2 and so forth, these keyboard combinations (shortcuts) are used to toggle that tool button's corresponding window open/closed.
You also can use the
tool window quick access menuwhich can be accessed by hovering the mouse pointer over the button located in the far left hand corner of the status bar without clicking the mouse button.
Switcheris another option to view the listing of tool windows. It also shows the currently open files. You can use useCtrl + Tabkeyboard shortcut to openSwitcherwindow.

For more information visit official user guide: https://developer.android.com/studio/intro/index.html
In next section you learn the types of files you can include in your project, including where XML files are located, where image are stored, and where the Gradle build files are stored.