When you add animation, you should always animate symbols in Flash, instead of animating raw graphics (graphics that you draw) or raw assets that you import (such as a PNG file). For example, if you draw a circle using the Oval tool in Flash, you should convert that circle graphic into a movie clip before you animate it. This helps you reduce the SWF file size, and makes it easier to create an animation in Flash.
You will create a movie clip symbol in the following exercise. You will animate this movie clip in later exercises.
|
1.
|
In banner2.fla, select the star.png image (imported in Part 1) and select Modify > Convert to Symbol from the main menu.
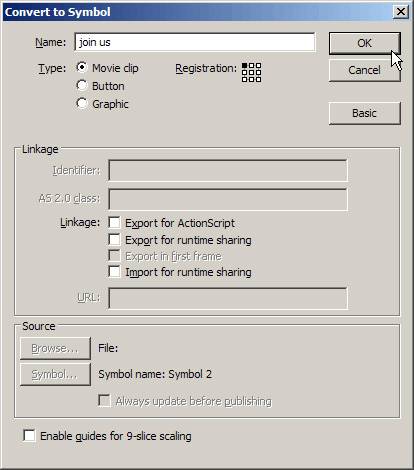
The Convert to Symbol dialog box opens (see the following figure), where you can name a symbol and select which type of symbol you want it to be. |
|
2.
|
Type join us in the Name text box (see the following figure).
You will see the name of the symbol, join us, in the Library panel after you create the symbol. You will also see an icon that represents movie clips next to the symbol's name. Remember that the symbol's name is different than its instance name, because you can have numerous instances of a single symbol on the Stage. For example, you can set an instance name for the join us symbol using the Property inspector after you drag it to the Stage from the Library panel. If you drag another instance of the join us symbol to the Stage, assign it a different instance name. You use the instance name in your ActionScript to reference and manipulate the instance with code. There are some naming guidelines you must follow when you assign an instance name. (This is discussed in "Writing simple actions"). Use the Convert to Symbol dialog box to convert selected content into a symbol, give it a name, and click OK (shown above) add it to the document's library. You might see a smaller dialog box without the advanced linkage and source information when you convert a symbol.
|
|
3.
|
Select the Movie clip option, and click OK.
This means that you will convert the graphic image into a movie clip symbol. Movie clip symbols have their own timelines. This means you can animate each movie clip instance on its own timeline, and on the main timeline of the document. This is unique to movie clip instances. |
|
4.
|
Select File > Save to save your progress before moving on.
After you finish saving the file, proceed to the following exercise, "Adding animation to a timeline". In this exercise you will animate the movie clip. |
by updated