The next step is to adjust the color before doing any other corrections. Newspaper stock is typically off-white to yellow in appearance. If you were to print the original, unprepared image in a newspaper, it would look dirty. You want to make the image as clean and bright as possible now, as it will become far less so when it appears in the newspaper. (If it is a moody or artsy shot, making the image bright and colorful may not be the objective However, you would still want to clean up the overall color in the image by removing unwanted colors within the image.) For instance, if the image has a blue cast to it, remove some yellow from the blue. If the image is red, remove some cyan from the red. If there is a yellow cast, remove cyan from the image. The best way to illustrate this is by example.
Let's go back to our penguins and clean the colors up for newsprint.
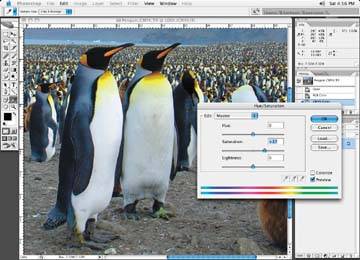
First, let's try the Hue and Saturation. You can see from figure that the colors in the yellow are breaking off quite hard, which is unacceptable. Oh well, sometimes it works very well. No harm in trying! Stick with the Selective Color tool for making the yellows as bright as possible.
The Hue and Saturation tool works on occasion, but is not what we want here
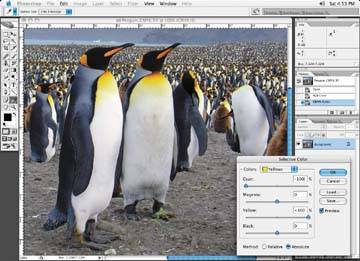
Take out any unwanted color in the yellows to make them as bright as possible
Be careful if you use the Hue and Saturation tool, as it can do quite a bit of damage to an image if overdone. If the hue and saturation have been pushed too far, the image may start to look posterized. Posterization occurs when where the color starts to look blotchy.
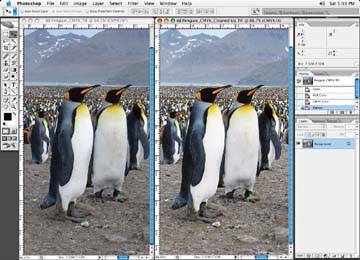
The idea is to make the color look almost cartoonish: bright and clean. If the color is too full of the unwanted colors or high in density, the colors will appear muddy and full when printed on newsprint. Figure 8-17 shows the difference before and after using the Selective Color tool. I have not changed my minimum or maximum dots in the image; I have just made the color cleaner and brighter looking.
The before and after result of using the Selective Color correction tool