If the image is a layered file, then at this point you should leave it a layered file, as this could save you time having to remake masks of the various image elements. If the image is a flattened file, you may have to create masks and layers of the various image elements to be worked on. In either case, you should be ready to continue.
The first thing to look at is the minimum dot called for. Typically this can be anything from 2 to 10%, depending on the type of press that will be used for printing this job. A minimum dot area would be the lightest area of your image. If you have an image with a pure white background or a solid tint background, and the background contains no vignettes or images that blend themselves into the white or tinted background, then you wouldn't need to worry about a minimum dot in this background, as it is carrying no dot in the white, or the tinted background contains values that are above the minimum dot value.
If an area or the background of an image has a vignette or images that blend into the background, you may need to add a minimum dot to the background so that when the image is printed, the images blend into one another or the background smoothly without any transitions or areas where the lack of a minimum dot breaks off because the printing press could not hold the dot or lack thereof.
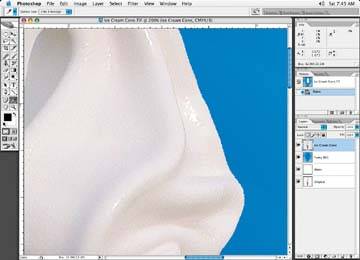
In Figure 9-5, the lightest area in our ice cream is cyan 1%, yellow 1%, magenta 1%, and black 0% (there is no black). These values are too low for our specified print specifications, and are unacceptable. We'll have to figure out how to get a 3% minimum in this white area. In our blue background, we have cyan at 47% and magenta at 13%, so as mentioned, we do not have any minimum dot issues with the background, and the values are well above the minimum.
Figure 9-5. We need a 3% minimum black to meet spec
If the minimum valuesin this case, 3%are not present in an area of the image, you will have two choices: put a minimum dot in the image area with a simple curve or selective color adjustment or take the color right out of the image area. If you print the image without regard for the minimum dot, you will get a hard break where the dot gets chopped off during the printing process. And don't forget that dot gain makes the break or drop off in a vignette even worse as the difference between the minimum dot and the gained dot is enhanced. If you decide to keep a color and it needs its minimum dot value increased to meet the specifications, remember that the color will gain and you will have to live with the results, although you'll have to do your best to make it work with the image.