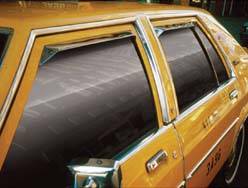
As a professional retoucher, you won't always be asked to create that which doesn't exist; sometimes you'll be asked to remove something undesirable. One of these types of requests I get often is to eliminate reflections from windows (of cars, or any window for that matter, or at least tone down the reflection so that it just contains basic light rather than a bunch of distracting objects. Figure 4-71 shows the before image with a very distinct reflection, whereas in Figure 4-72 the reflection is realistic but no longer distracts from the image of the car.
Figure 4-71. Before: reflections in the car window are distracting
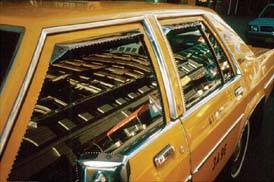
Figure 4-72. A sleek, subtle reflection
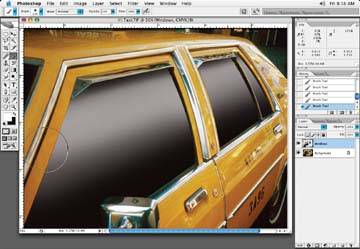
Let's start by selecting the area we wish to change with the Pen tool. Create a new layer for your selection. Use the Brush tool to paint in a darker color, as shown in Figure 4-73. Next, take readings of the existing color in the window (by clicking on it and noting the color information in the Info palette), and then paint with that color. If there are variations in the color of the window, take a few color readings and paint in with those colors. Choose tones for the darker and lighter colors based on what you see in the image. If there seems to be a large variation between the two colors, pick up some in-between colors to smooth the transition from dark to light. Paint in the highlight as shown in Figure 4-74.
Figure 4-73. The darker shade of the window is painted in first
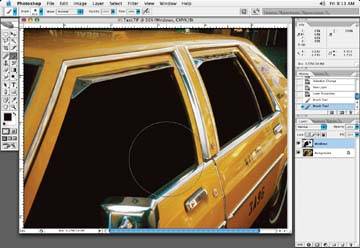
Figure 4-74. The highlight side of the window is now painted in
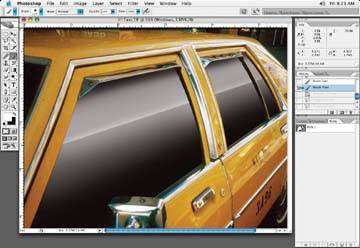
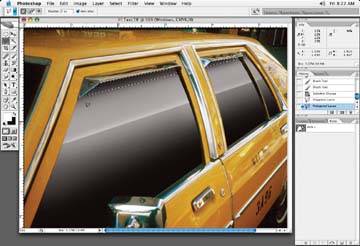
At this point, the window looks flat, so let's modify the window mask so we can add a hard highlight edge. Using the Polygonal Lasso tool, divide the window where you think a shine could existyou'll have to use your imagination! Next, use the Lasso tool to subtract some of the selection. Add a small feather to the mask (Select » Feather because the Lasso tool tends to make too hard an edge. A feather of .5 should do it. With a low opacity brush, paint in a white edge along the edge of the new selection, as in Figure 4-75.
Figure 4-75. Subtract some of the original window selection to create a shine line, and then brush highlight into the selection area to create a hard shiny edge
Next, modify the mask for the dark shadows under the top of the windows by the rain guards for the shadow area. Then, paint a hard shadow line in there, as you can see in Figure 4-76.
Figure 4-76. Paint in a hard shadow under the rain gutter
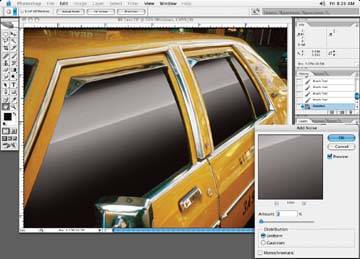
Next, add a tiny bit of noise to the window layer. I added a two-pixel amount to the example (Figure 4-77). This is done to help smooth out the transitions in the vignetted windows.
Figure 4-77. Add a little bit of noise to smooth out transitions
The window layer opacity can be changed to suit the client needs. It is typical for a client to play with the opacity of this layer. At least you have a lot to show them! In Figure 4-78, I've chosen 90% opacity to let a little of the building reflection shine through. This helps add a sense of realism. By all means, experiment with the layer opacity.